Overview
Shot changes in the OOONA Toolkit are represented with yellow vertical lines on the timeline.
When creating subtitles, you might have specific requirements for timing subtitles before or after a shot change.
The OOONA Toolkit allows you to automatically generate shot changes. If working with local files, from your own computer, when opening the media file within the project, you will see a pop-up message asking if you want to generate the video shot changes.
You can also generate them by uploading a .dat file, previously created by one of the OOONA tools
Shot changes settings
The OOONA Toolkit allows you to automatically snap in-cues or out-cues to a shot change while timing a project from scratch, as well as fix subtitles that were already created.
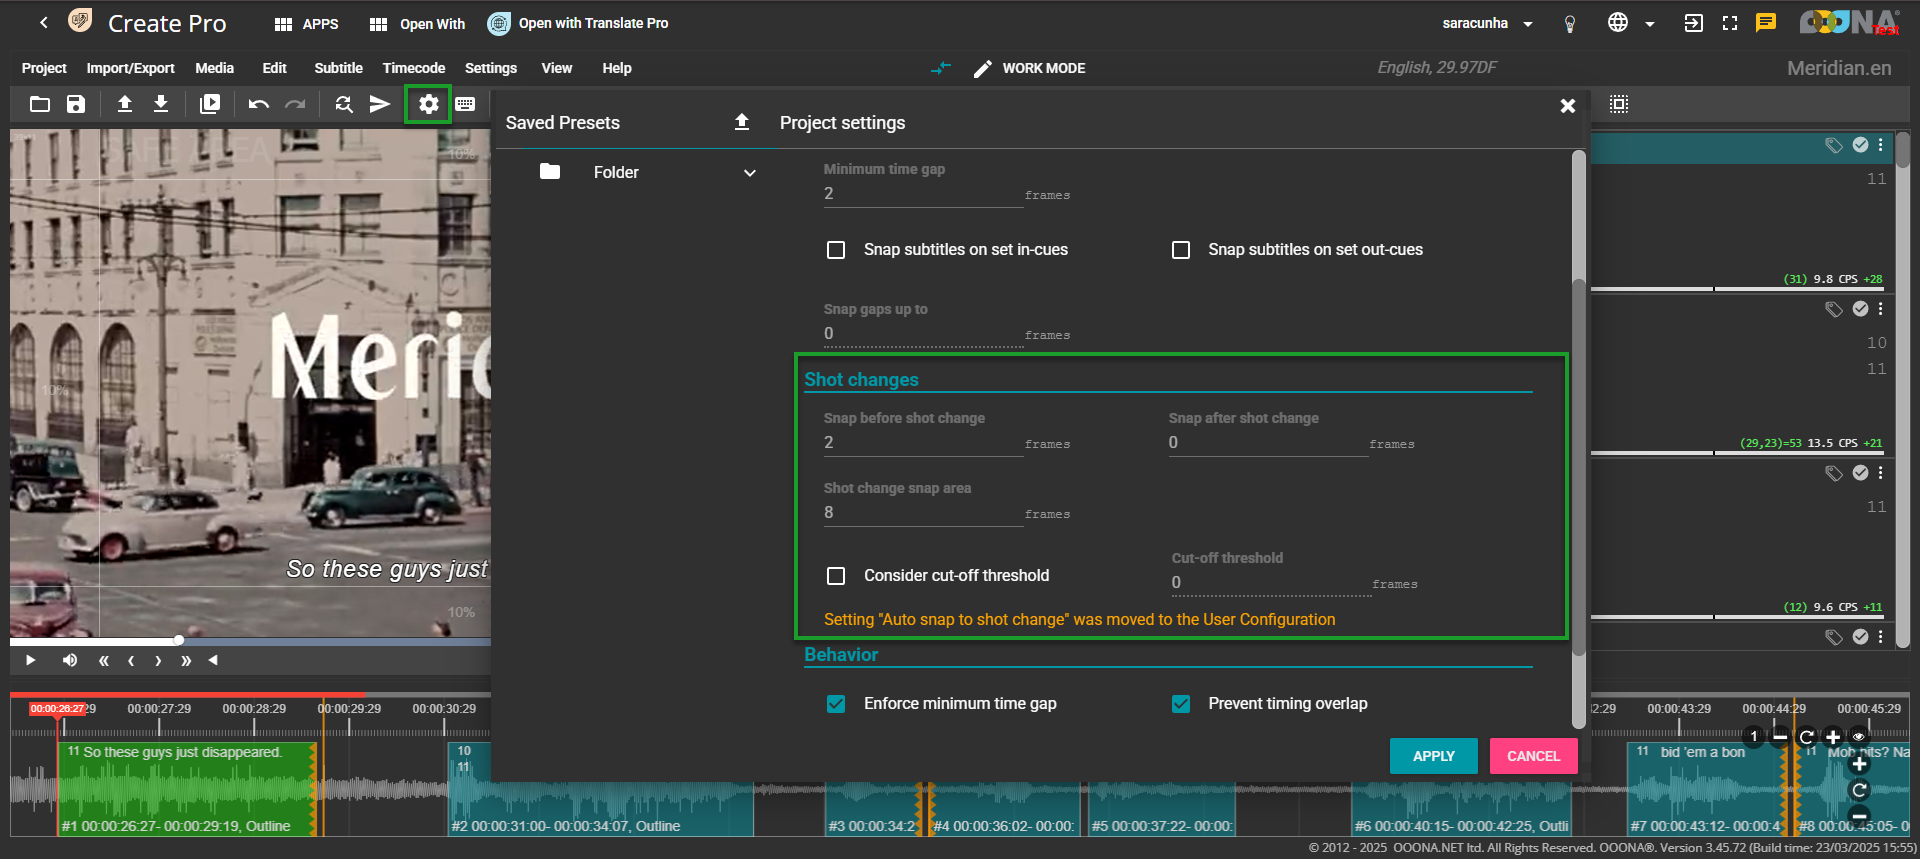
Under the Cues tab in Project settings, you will find a section dedicated to shot changes.

These settings will determine how shot changes will be flagged on the timeline or when they will be automatically snapped, if you have the “Auto snap to shot changes” enabled under the User configuration.
Set the Snap before shot change field to determine how many frames the out-cue should be from the shot change.
For example, if the Snap before shot change is set to 2, then all the out-cues within the Shot change snap area (see explanation below) will be snapped to 2 frames before the shot change. Remember that this can be done automatically, with the “Auto snap to shot changes” enabled under the User configuration or using the “Snap end to shotchange” option under Run checks, to fix one by one manually, or under Run fixes, to fix all corresponding out-cues automatically.
Set the Snap after shot change field to determine how many frames the in-cue should be from the shot change.
For example, if the Snap after shot change is set to 0, then all the in-cues within the Shot change snap area (see explanation below) will be snapped to the exact frame (0 frames away) of the shot change. Remember that this can be done automatically, with the “Auto snap to shot changes” enabled under the User configuration or using the “Snap to shot changes” option under Run checks, to fix one by one manually, or under Run fixes, to fix all corresponding out-cues automatically.
Set the Shot change snap area field to determine how many frames away from a shot change the in or out cue of a subtitle needs to be for the system to not flag it as an error.
For example, if the Shot change snap area is set to 12 and the Snap after shot change is set to 0, as the example above, all in-cues that start 11 frames before or after a shot change will be snapped to the shot change.
The same goes for the out-cues. If the Shot change snap area is set to 12 and the Snap before shot change is set to 2, as the example above, all out-cues that end 11 frames before or after a shot change will be snapped to 2 frames before the shot change.
Remember that this can be done automatically, with the “Auto snap to shot changes” enabled under the User configuration or using the “Snap to shot changes” option under Run checks, to fix one by one manually, or under Run fixes, to fix all corresponding out-cues automatically.
Set the Cut-off threshold field to determine the frames threshold in which the in-cues and out-cues will be snapped to either the shot change or away from it.
For example, if the Shot change snap area is set to 12 and the Cut-off threshold is set to 7, all in-cues that start 7 or more frames away from the shot change will be snapped to 12 frames away from the shot change. If, on the other hand, they start 6 or less frames away from the shot change, they will be snapped to the shot change, if we consider the Snap after shot change is set to 0, as in the example above.
The same goes for the out-cues. if the Shot change snap area is set to 12 and the Cut-off threshold is set to 7, all out-cues that end 7 or more frames away from the shot change will be snapped to 12 frames away from the shot change. If, on the other hand, they end 6 or less frames away from the shot change, they will be snapped to 2 frames before the shot change, if we consider the Snap before shot change is set to 2, as in the example above.
Remember that this can be done automatically, with the “Auto snap to shot changes” enabled under the User configuration or using the “Snap to shot changes” option under Run checks, to fix one by one manually, or under Run fixes, to fix all corresponding out-cues automatically.