Sections in this article:
Overview
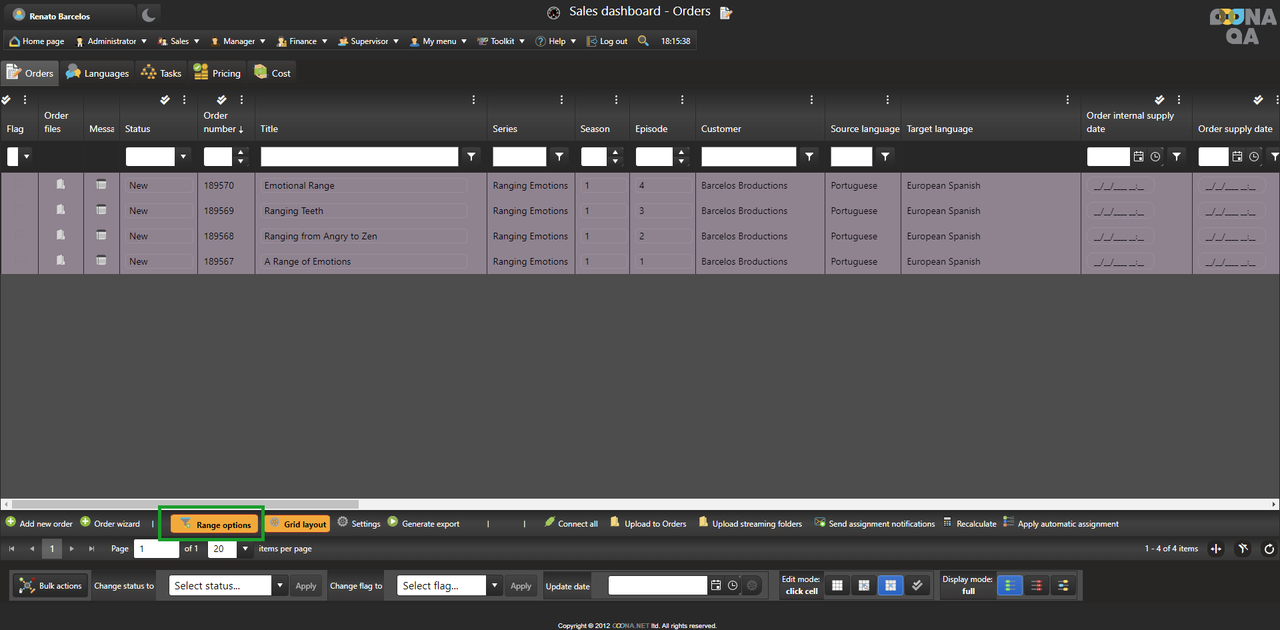
The range is a filtering tool that determines what is shown on a page.
Each page has its own range, which can be edited, changed to a new default or saved for future use.
In the case of the Sales dashboard, the range will also persist between tabs.
Multiple criteria can be filtered for at a time, increasing the capacity for detailed results.
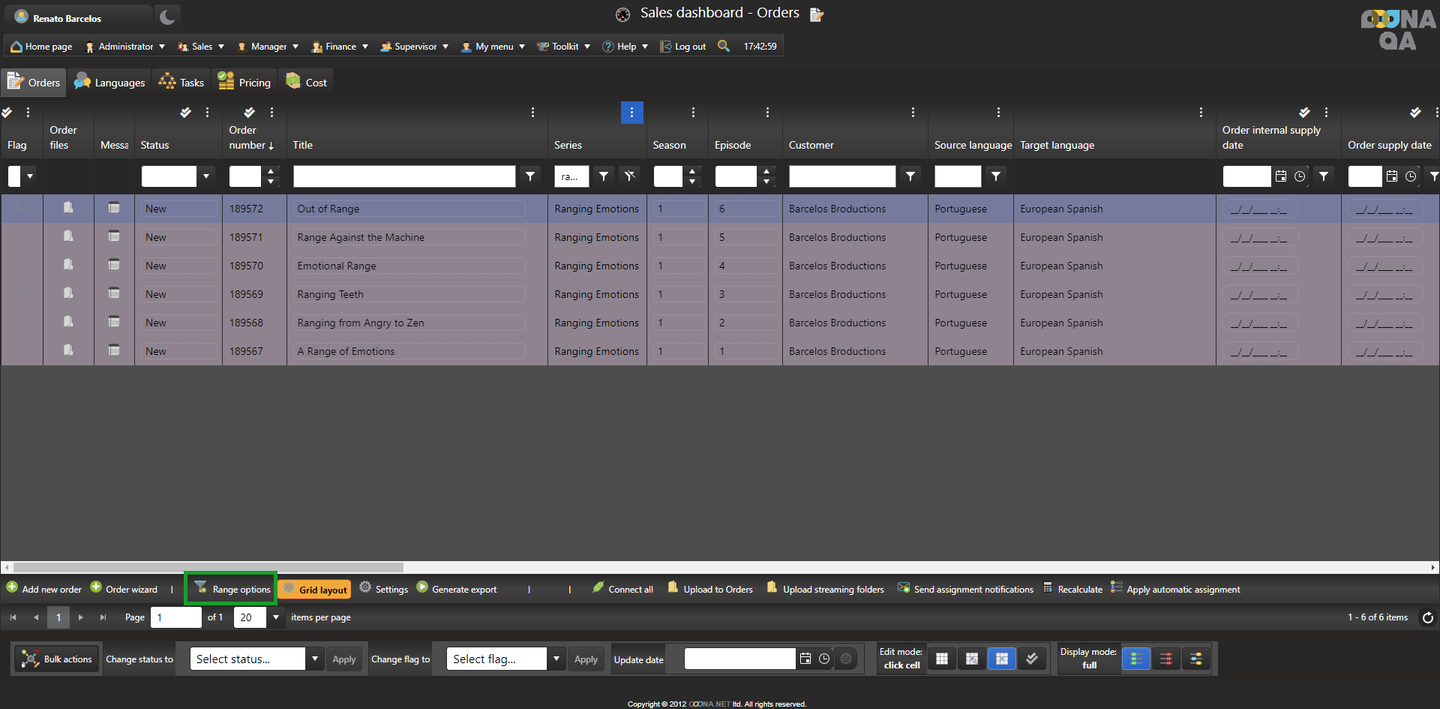
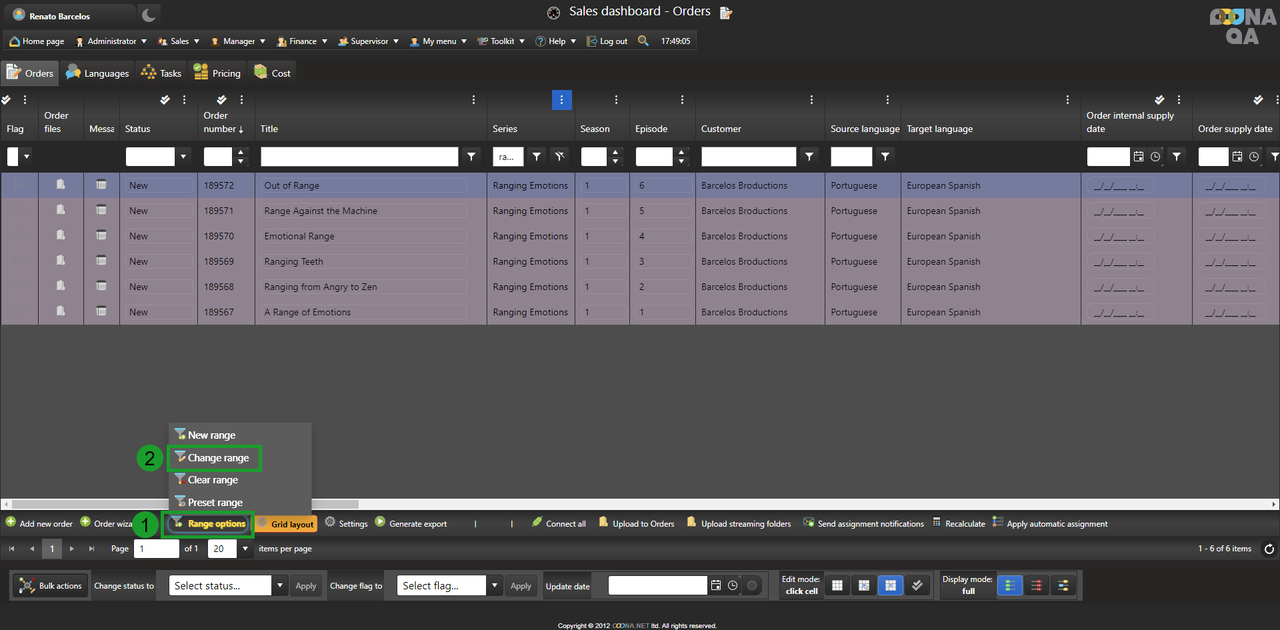
If a page enables changes to the range, the option to do so is available at the bottom: Range options.
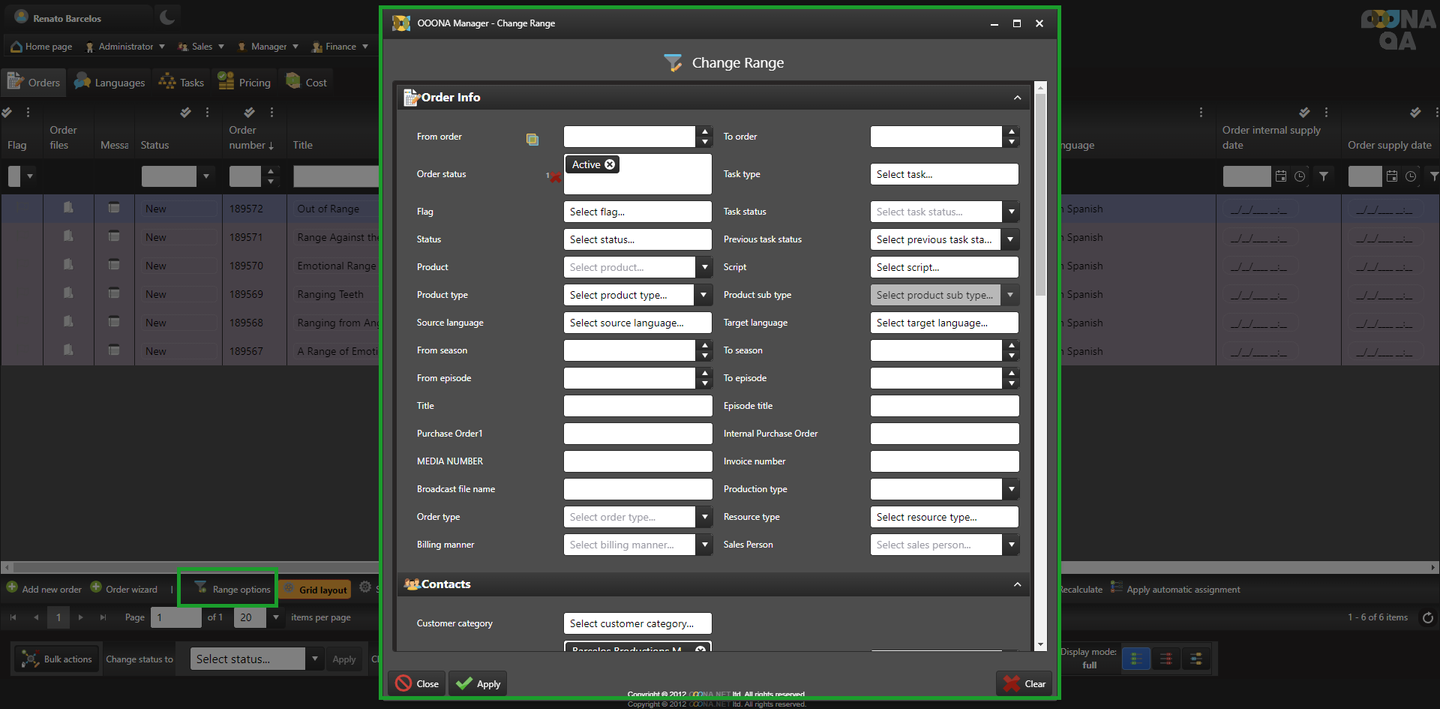
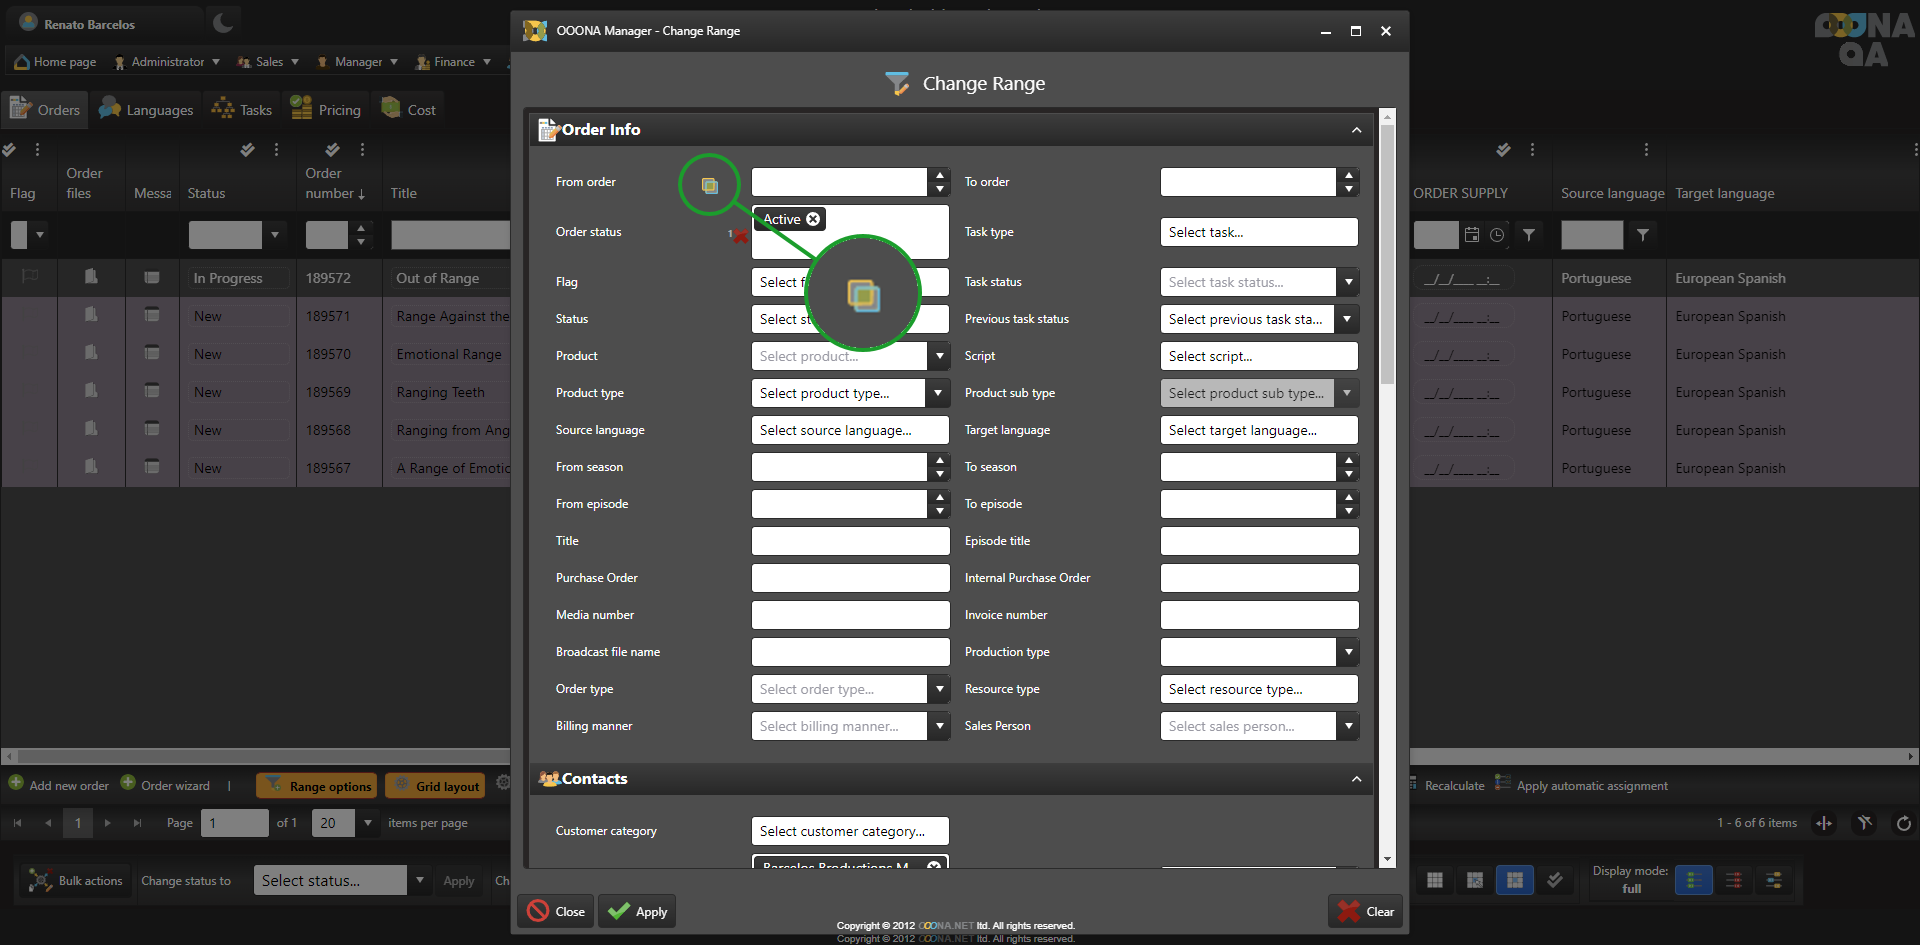
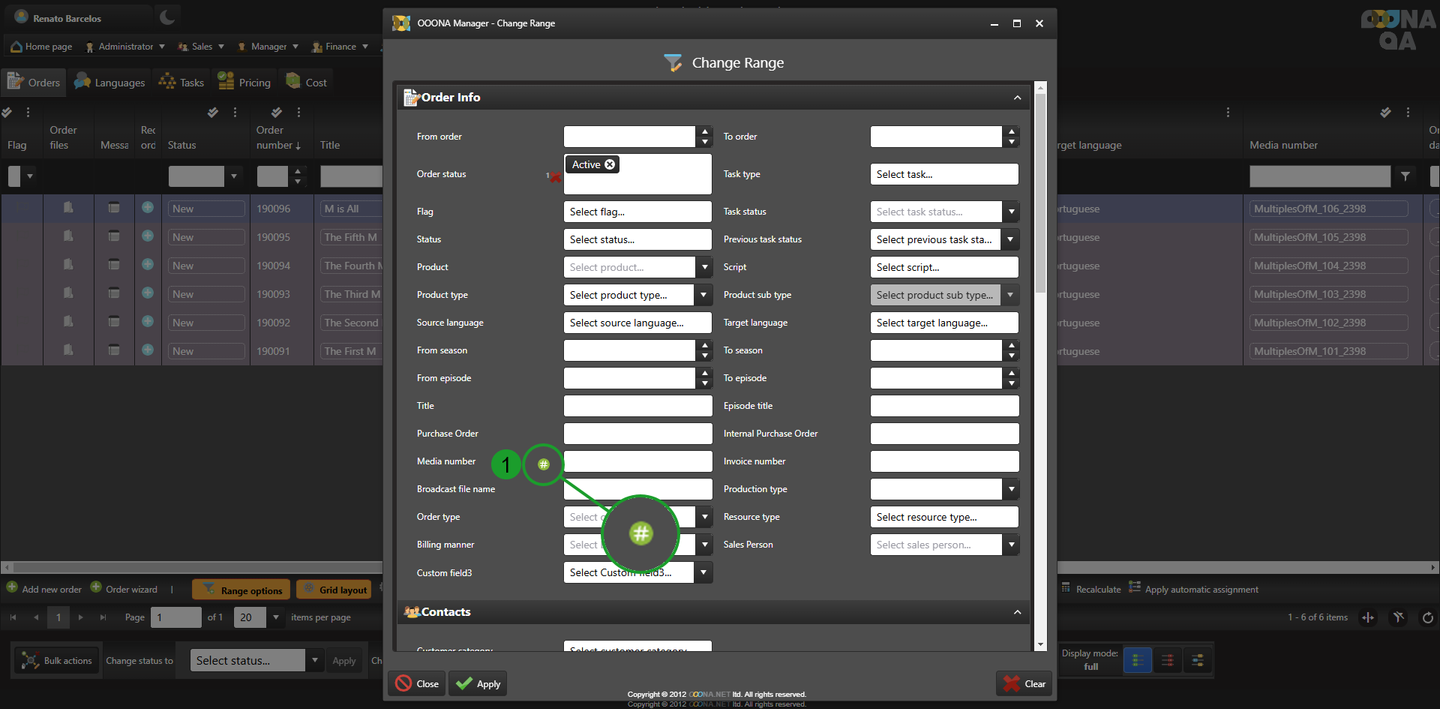
Change range
All pages have a default range.
If the option is available, the range can be edited to fit the current needs.
This can be found at the bottom of the page: Range options.
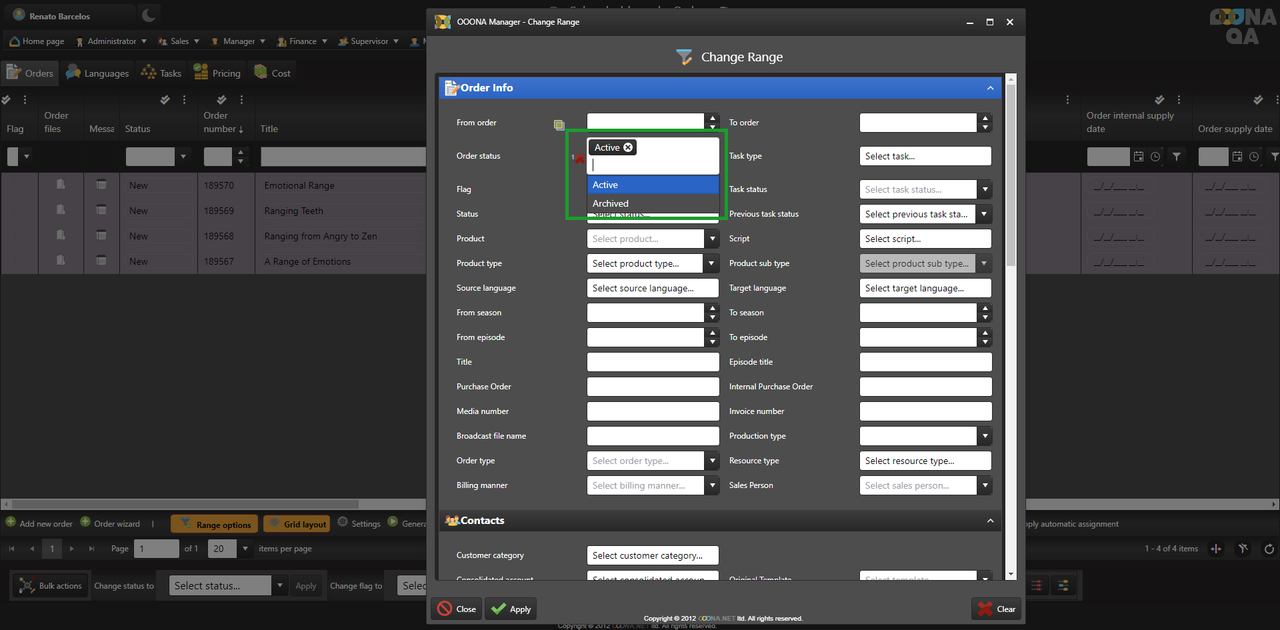
The range can be changed by clicking on either “Range options” (1) or “Change range” (2).
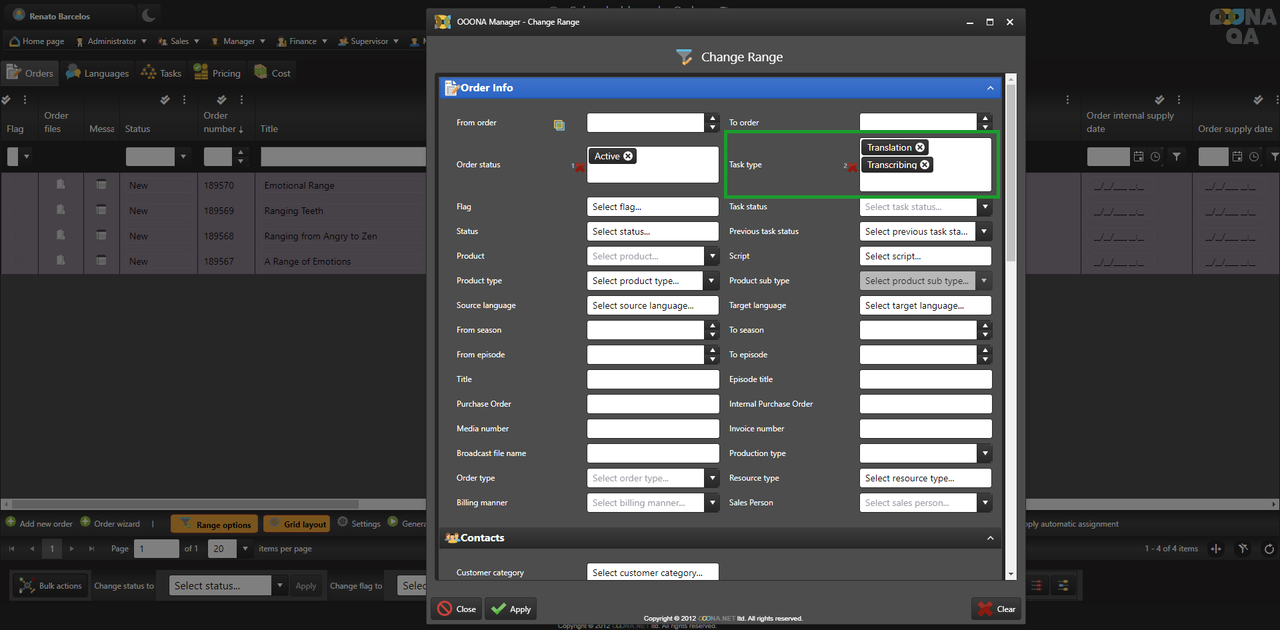
This will open a popup with all the available fields the view can be filtered for.
After the required fields have been populated, press “Apply” (3) to change the range in the page.
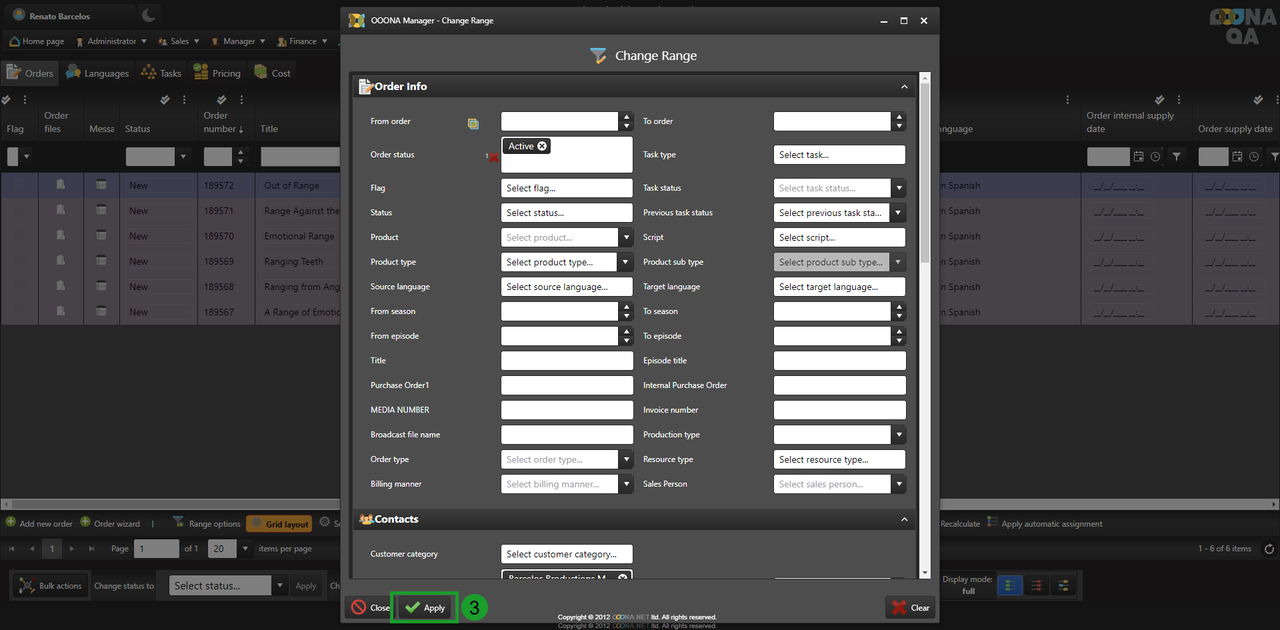
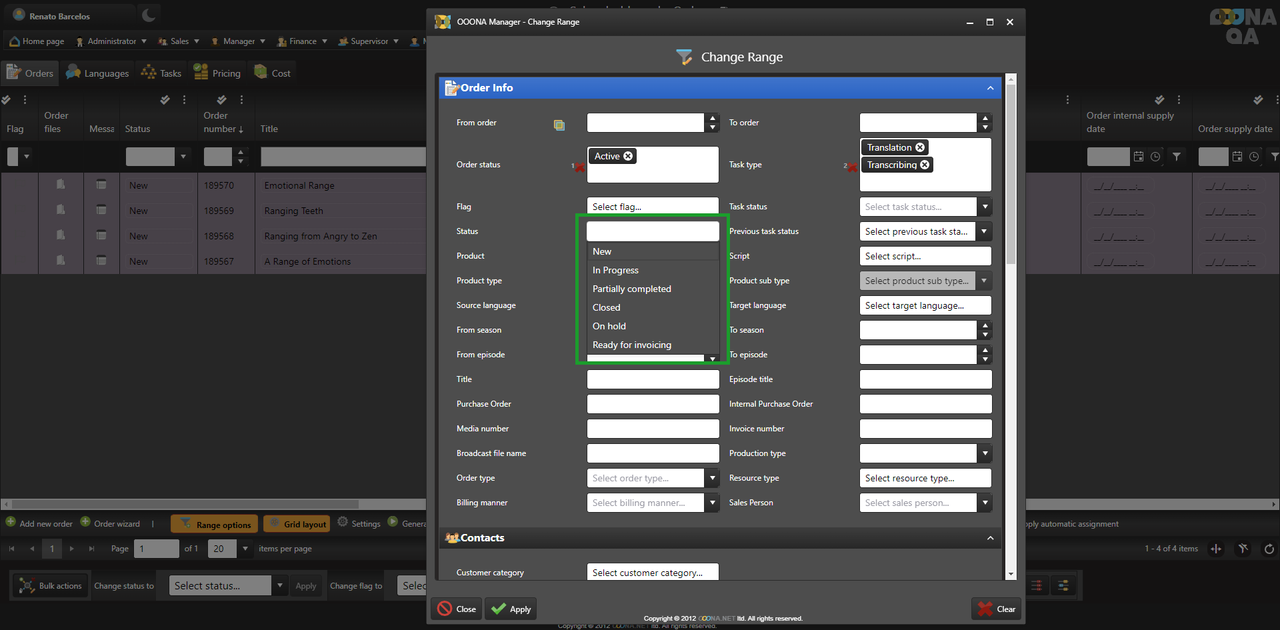
Fields that allow for the selection of specific values, such as Flag or Status, will show results containing those.
Free text fields will show results containing the specified text, such as Title or Media number.
If a field is empty, all results for said field will be shown.
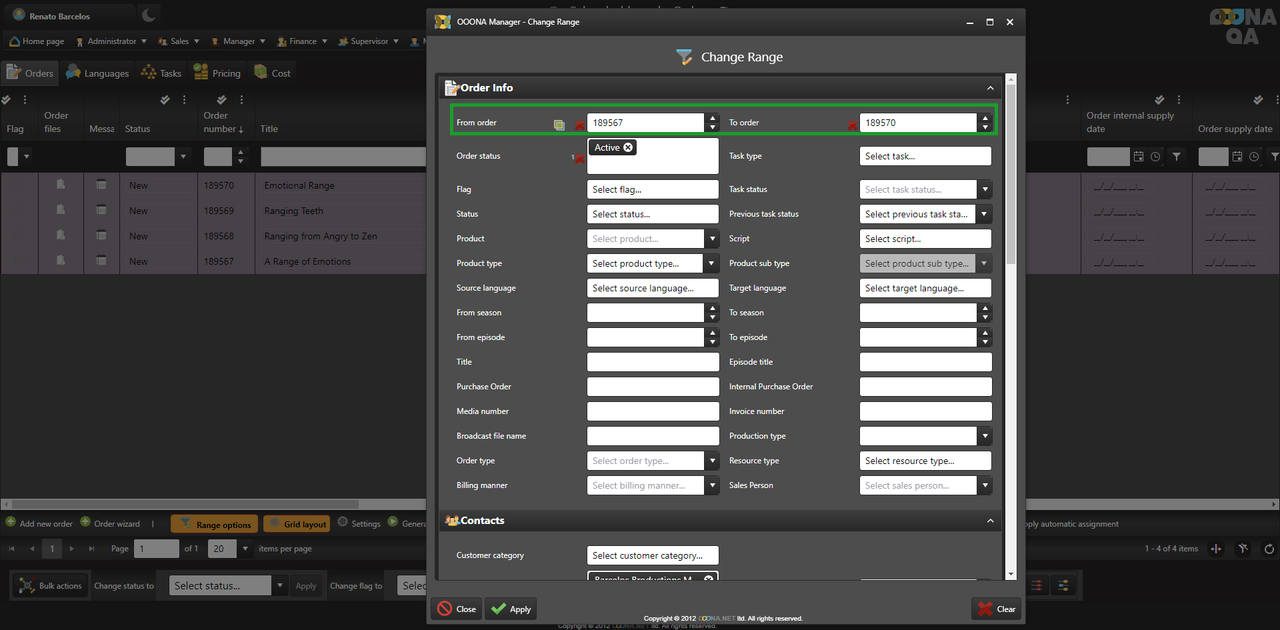
Noteworthy fields:
From order / To order - filters for a set of order numbers between two numbers.
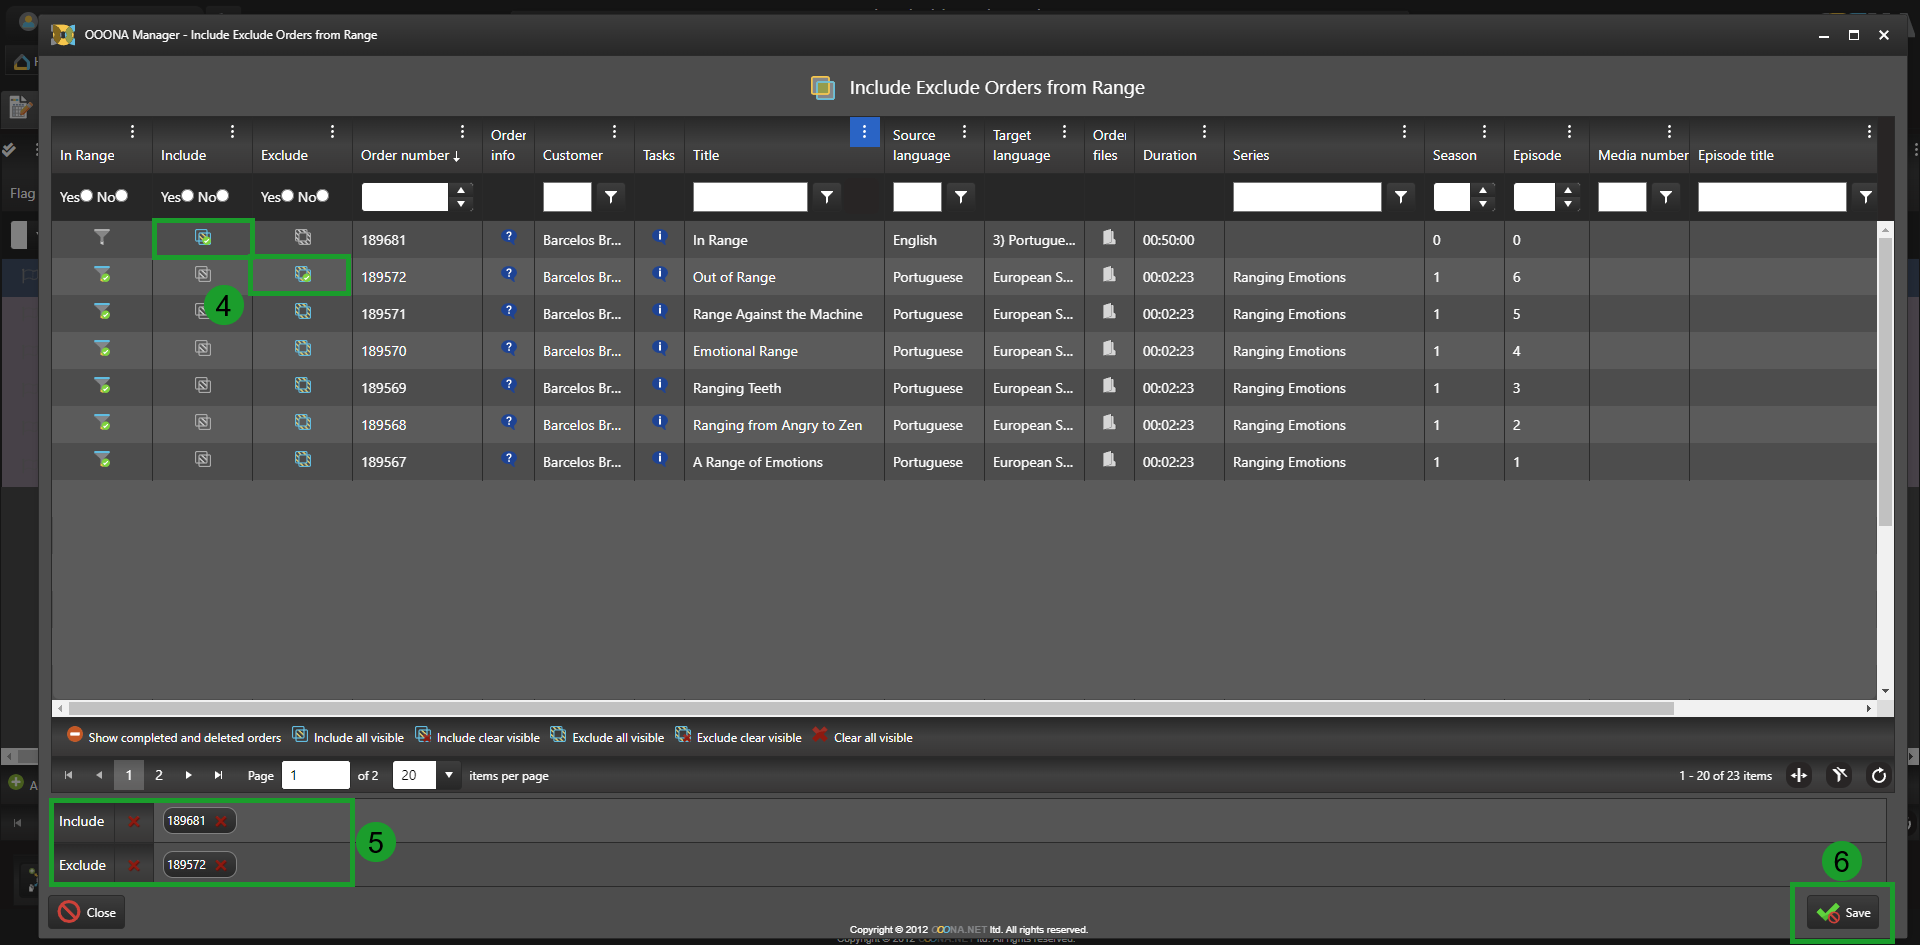
Include or Exclude orders from the range
Upcoming functionality
This functionality is only available in the upcoming version (368.1)
After changing the range, it’s possible to further fine-tune it by including or excluding orders from the results.
This can be done from the new button next to “From order”:
From the “In Range” column (1), it indicates if the order is part of the current range or not.
From “Include” (2), we can mark a currently excluded order to be included in the current range.
From “Exclude” (3), we can mark a currently included order to be excluded from the current range.
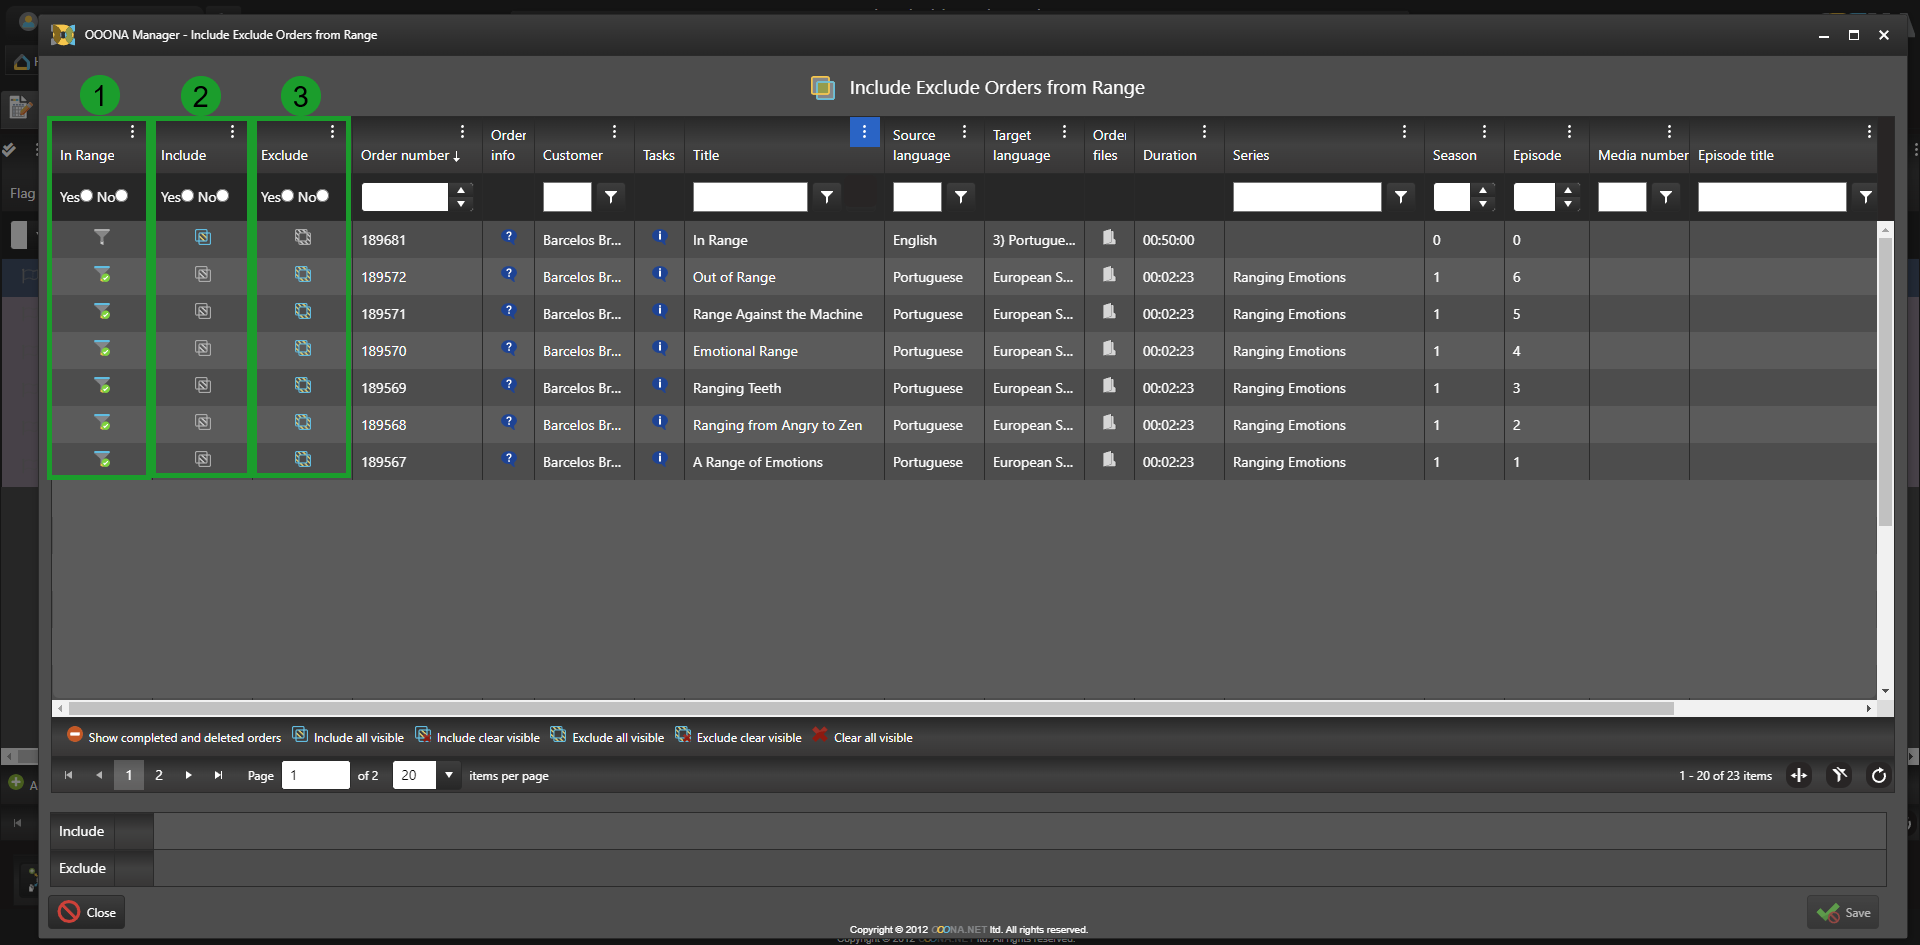
After excluding or including the required orders (4) (the icon will change to indicate it), the list of included/excluded orders will be shown at the bottom of the page (5).
Once done, click on “Save” (6) to return to the previous page.
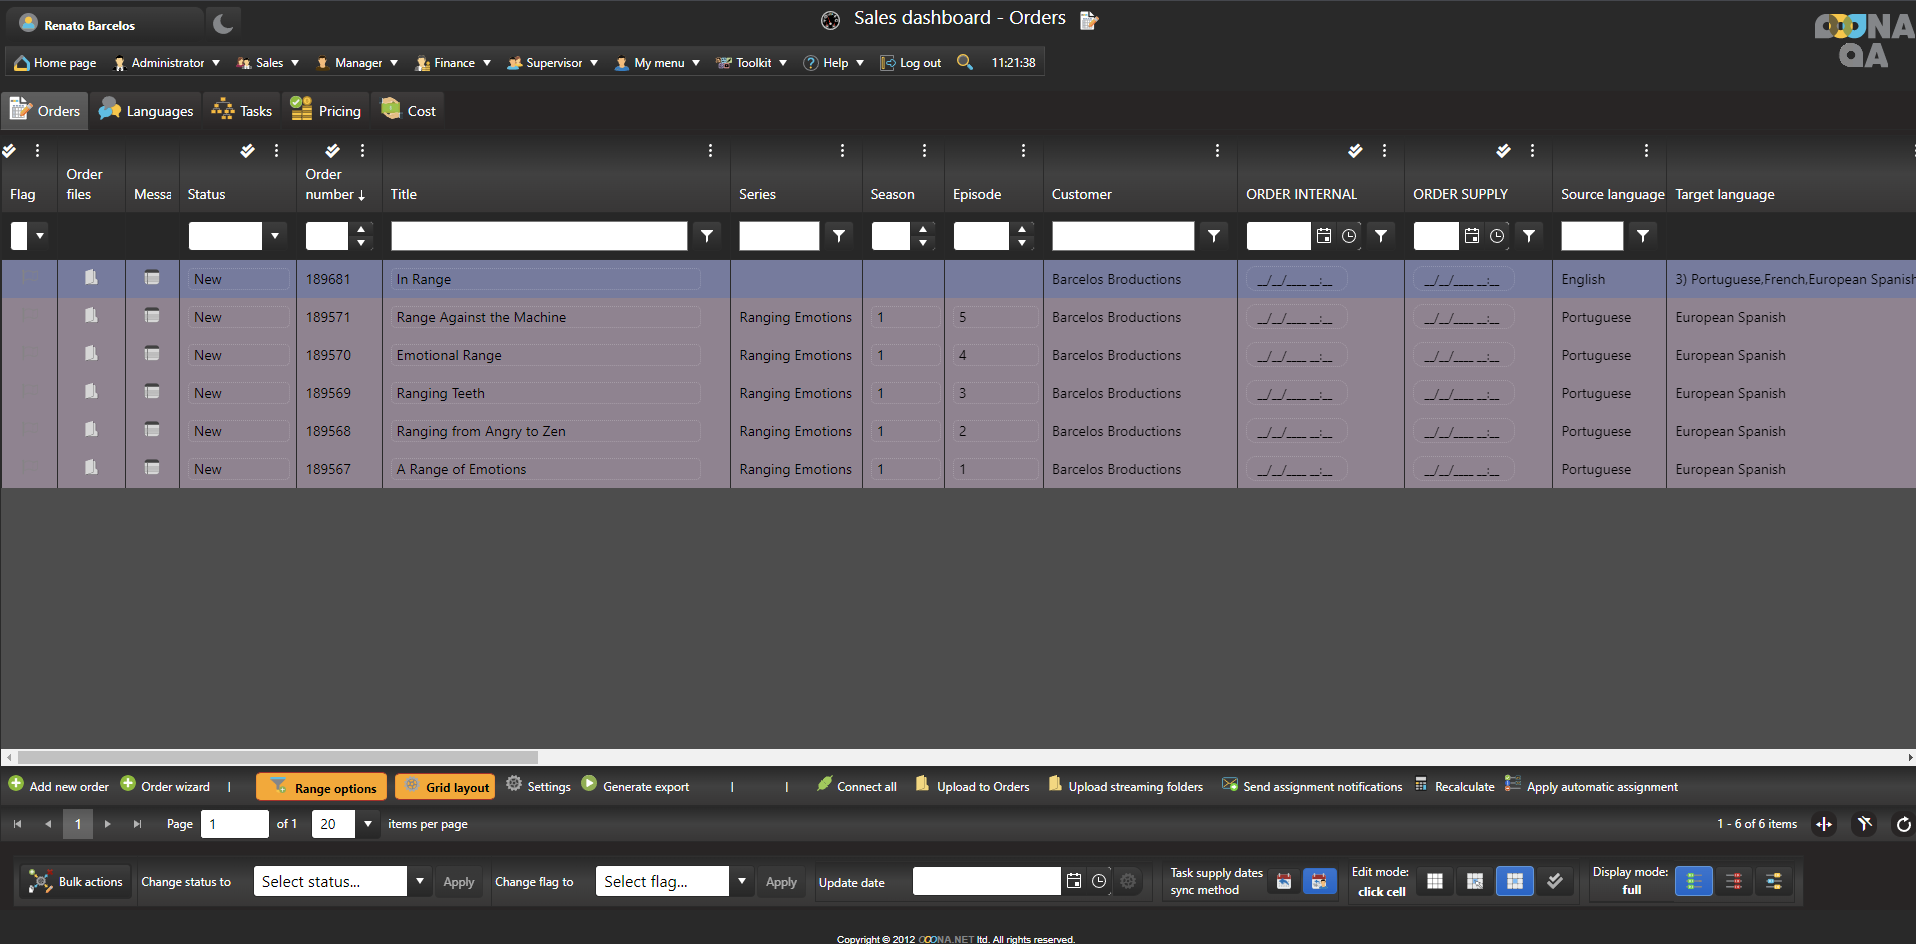
Once the range is applied, the current view will reflect the selection.
This fine-tuned range can also be saved for future use.
Filtering and Order creation for multiple media numbers
Filtering for multiple media numbers
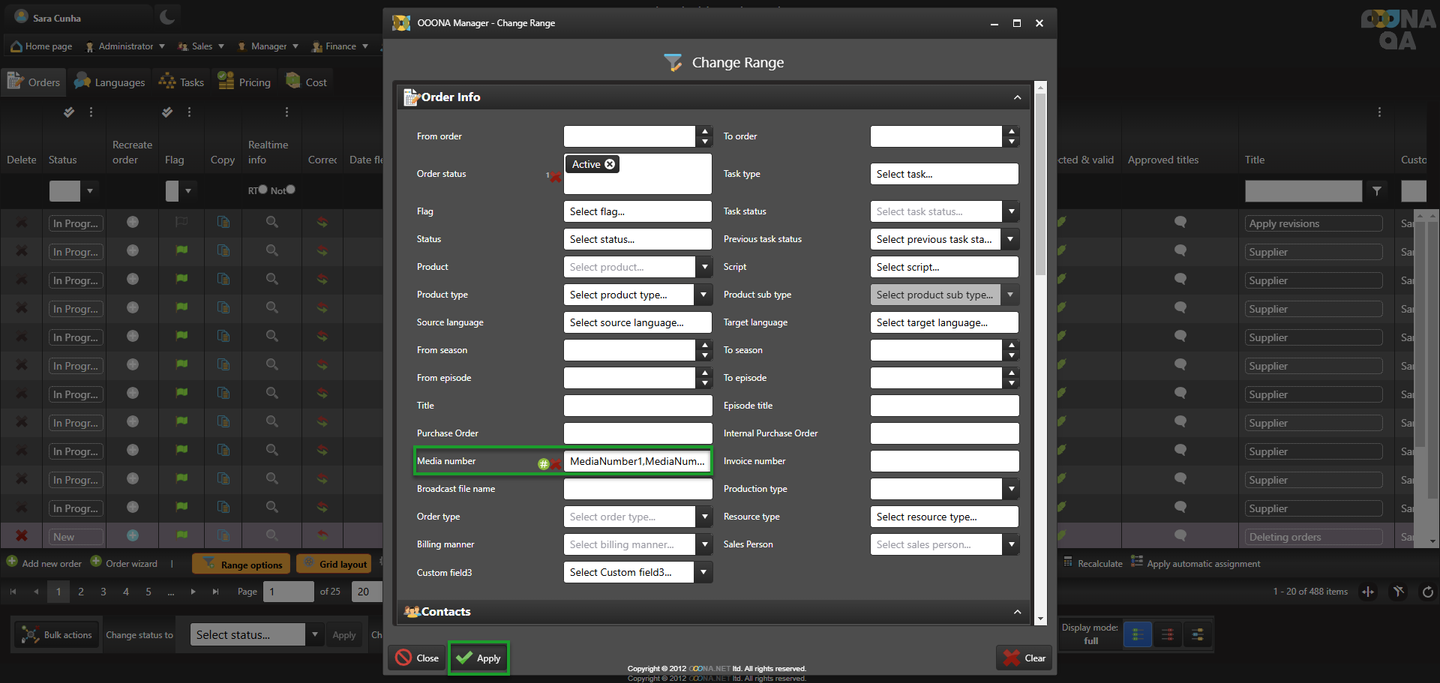
The system allows for filtering based on a list of media numbers.
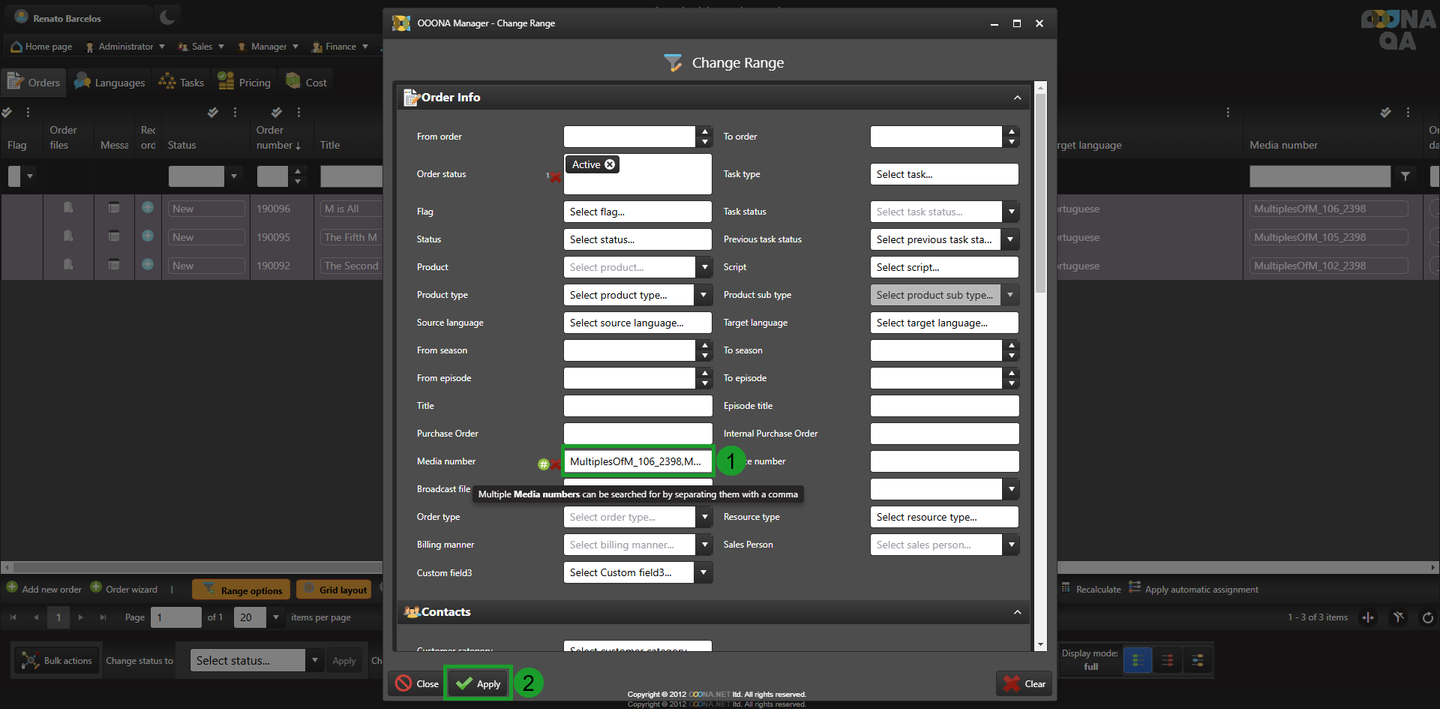
This functionality can be used by simply adding multiple media numbers, separated by commas, in the “Media number” field (1).
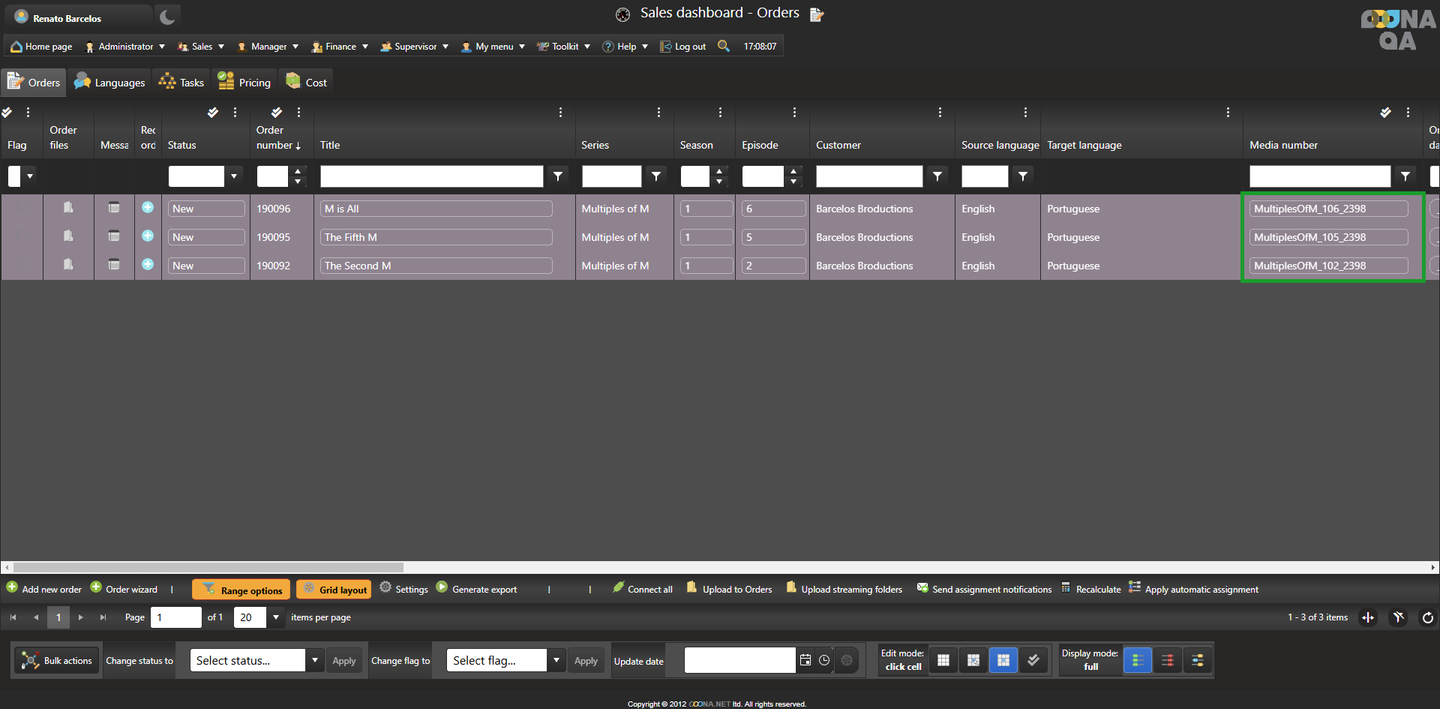
After applying (2), the range of the page will update to reflect the input values.

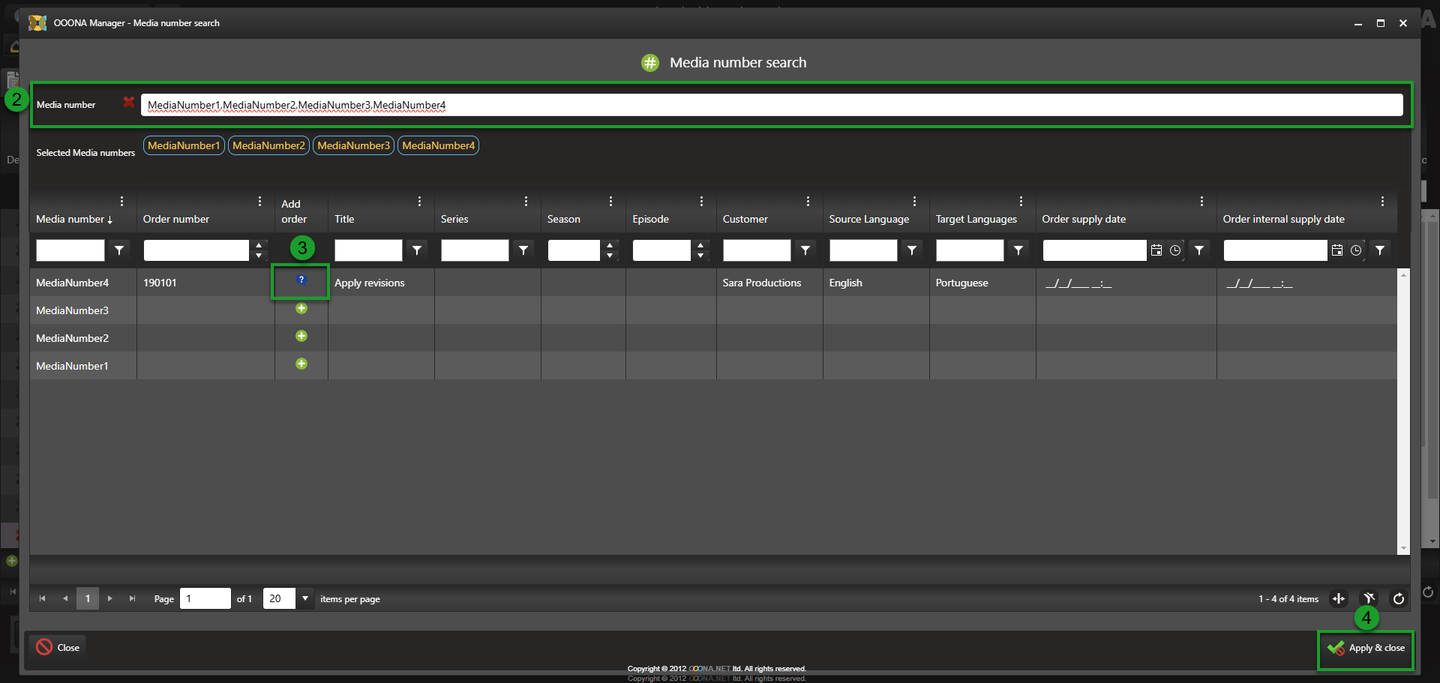
A popup will open, in which the desired media numbers can be added, separated by a comma (2).
It is also possible to copy directly from a list in an Excel file into this field, as each cell will be pasted separated by a comma automatically.
After adding the required media numbers, the list of orders containing them will be shown below (3).
Once the selection is complete, clicking on “Apply & close” (4) will apply it and return you to the range options page.
The “Media number” field will be updated with the selection and the range in the page will be applied accordingly, after clicking the “Apply” button. .webp)
Order creation for multiple media numbers
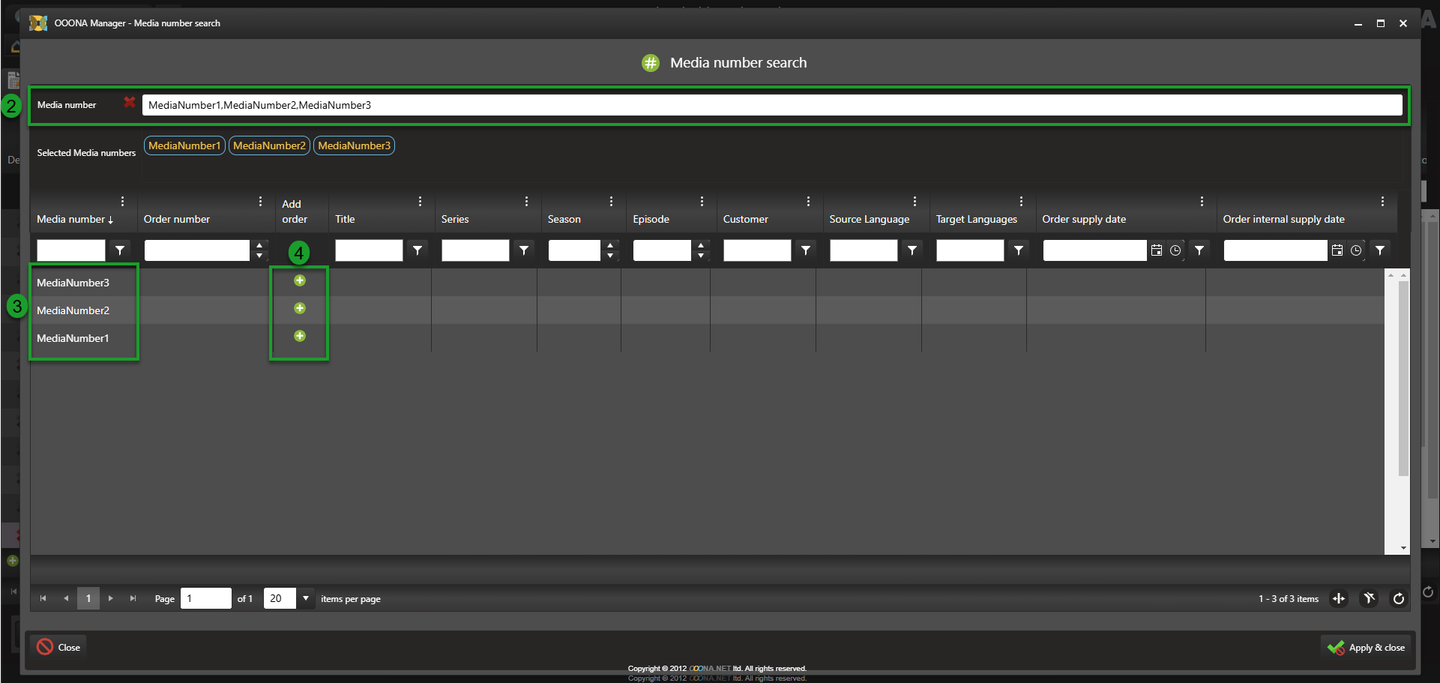
It is now possible to create an order from media numbers. To do so, click the icon next to the media number field (1).

A popup will open, in which the desired media numbers can be added, separated by a comma (2).
It is also possible to copy directly from a list in an Excel file into this field, as each cell will be pasted separated by a comma automatically.
After adding the required media numbers, they will be listed in the grid below (3). If there are no orders with the selected media numbers, an order can be added by clicking the icon in the “Add order” column (4).
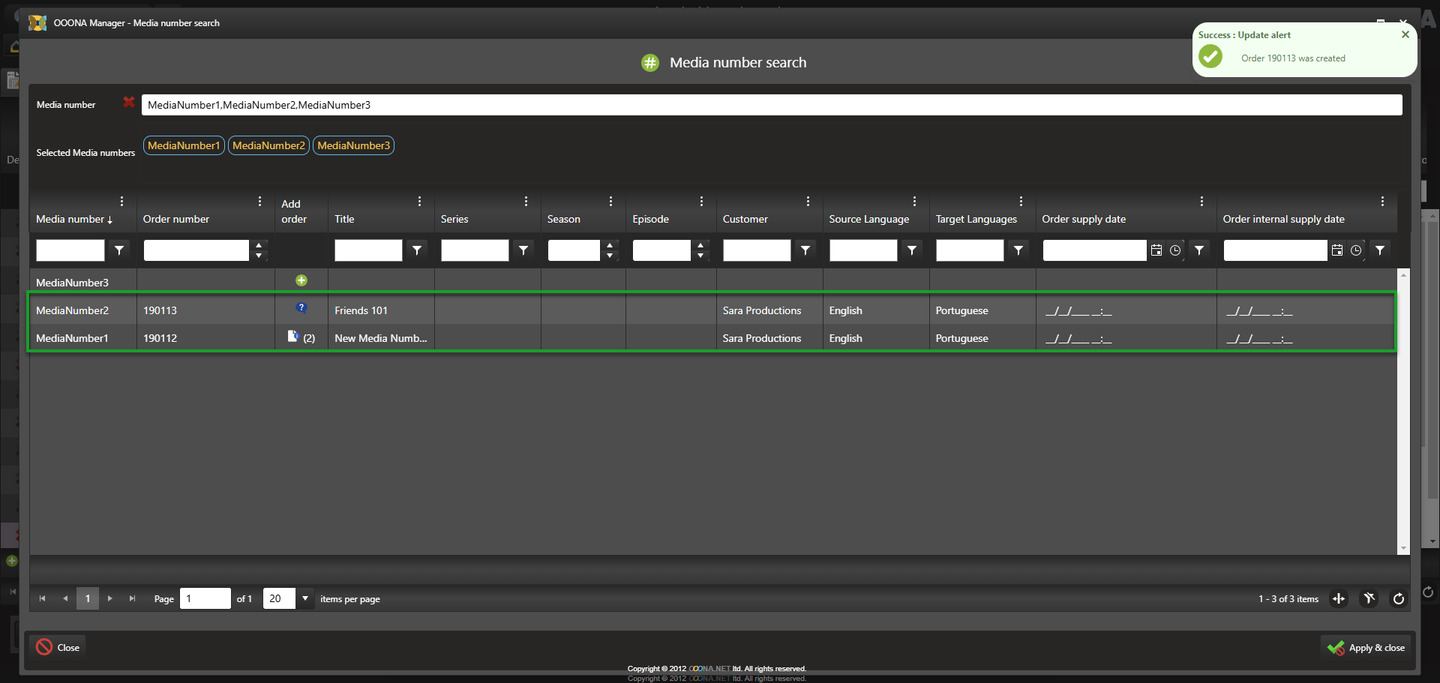
After clicking the icon in the “Add order” column next to the media number, the order creation pop-up will open and the process of order creation can be concluded as usual.
.webp)
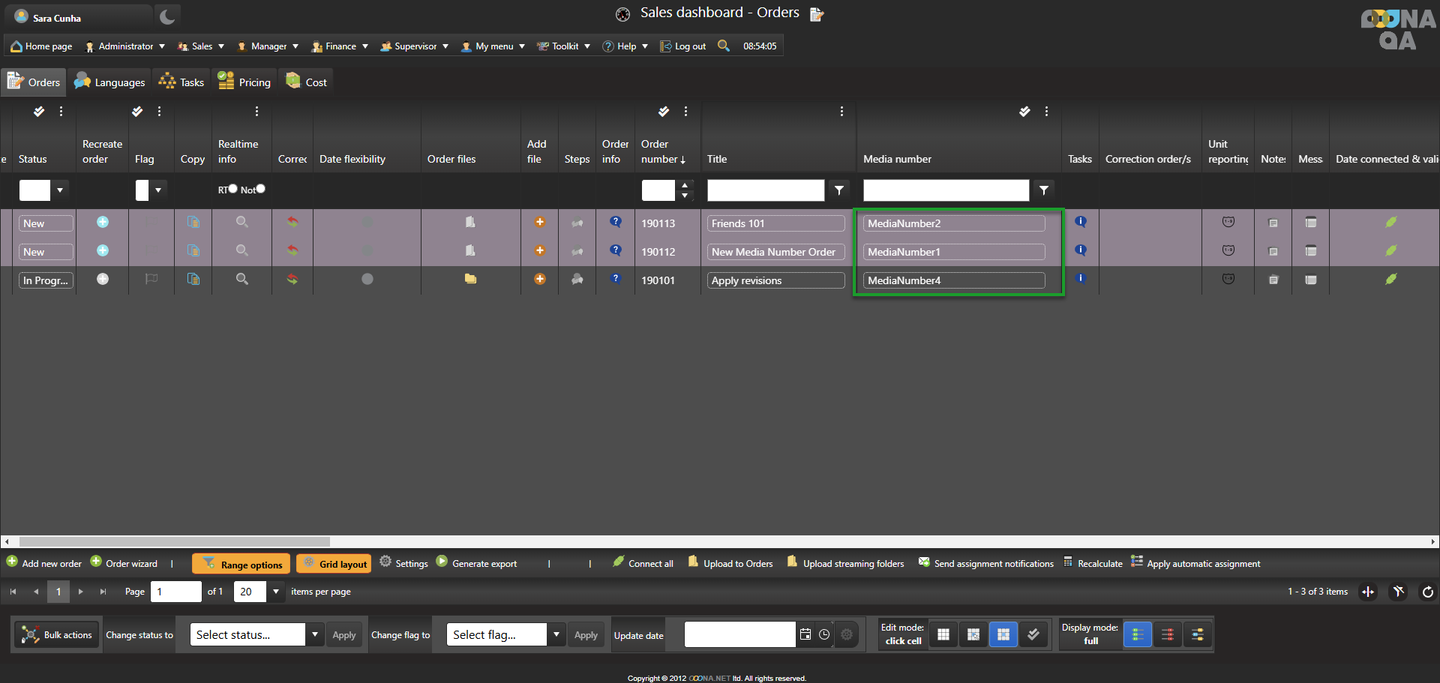
Once the order is created, all relevant information will be shown in the grid.
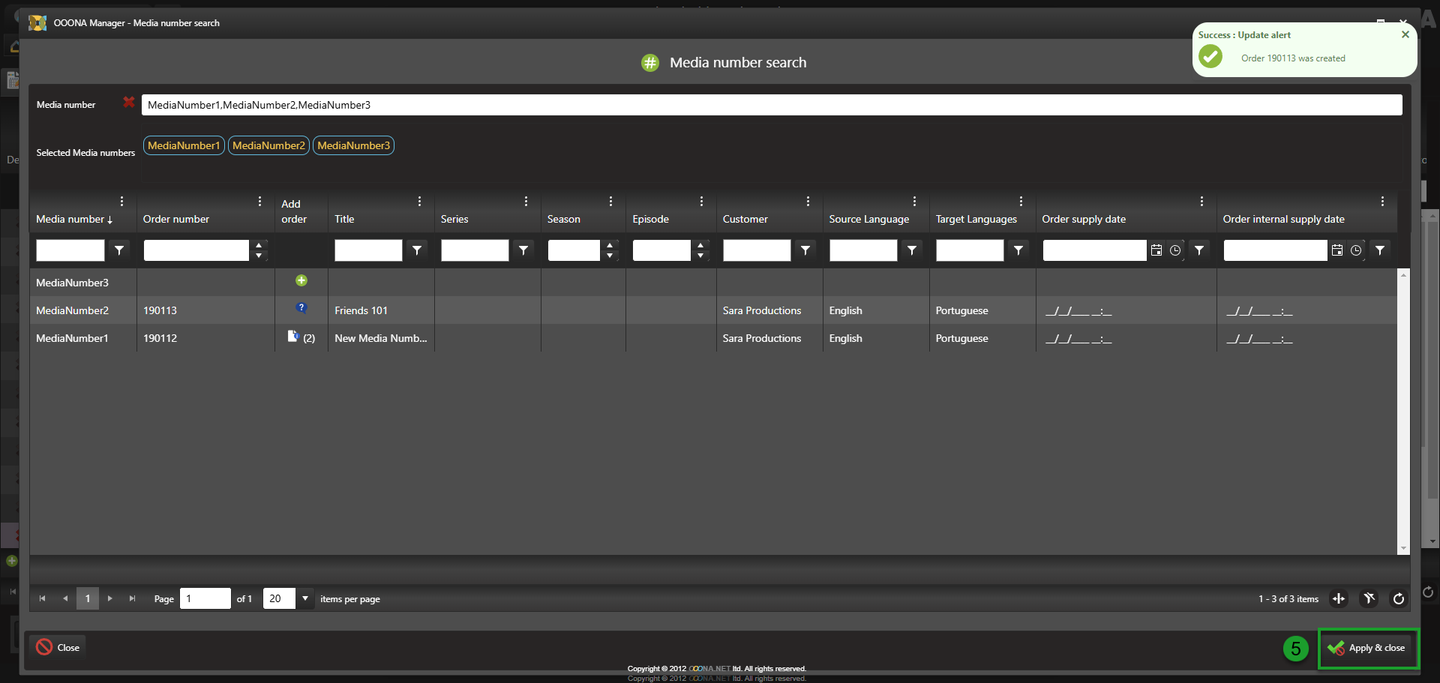
The “Media number” field will be updated with the selection and the range in the page will be applied accordingly, after clicking the “Apply” button.
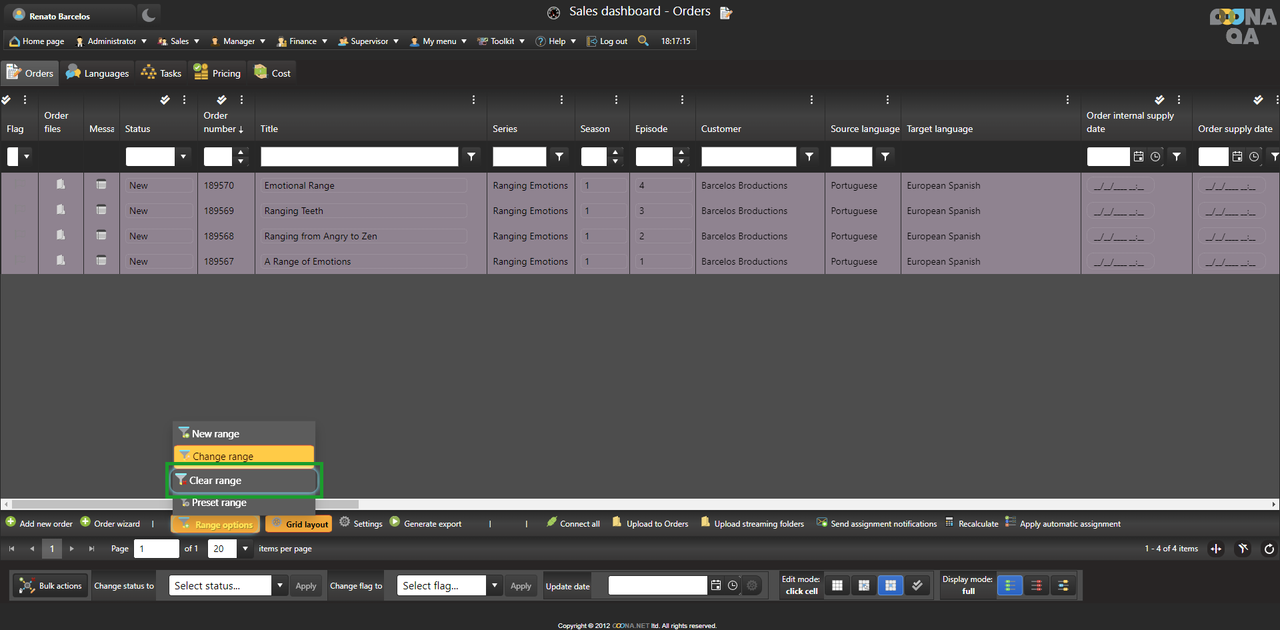
Clear range
The “Clear range” option will clear the current range and reset the page back to the default page range, or default preset range, if set.
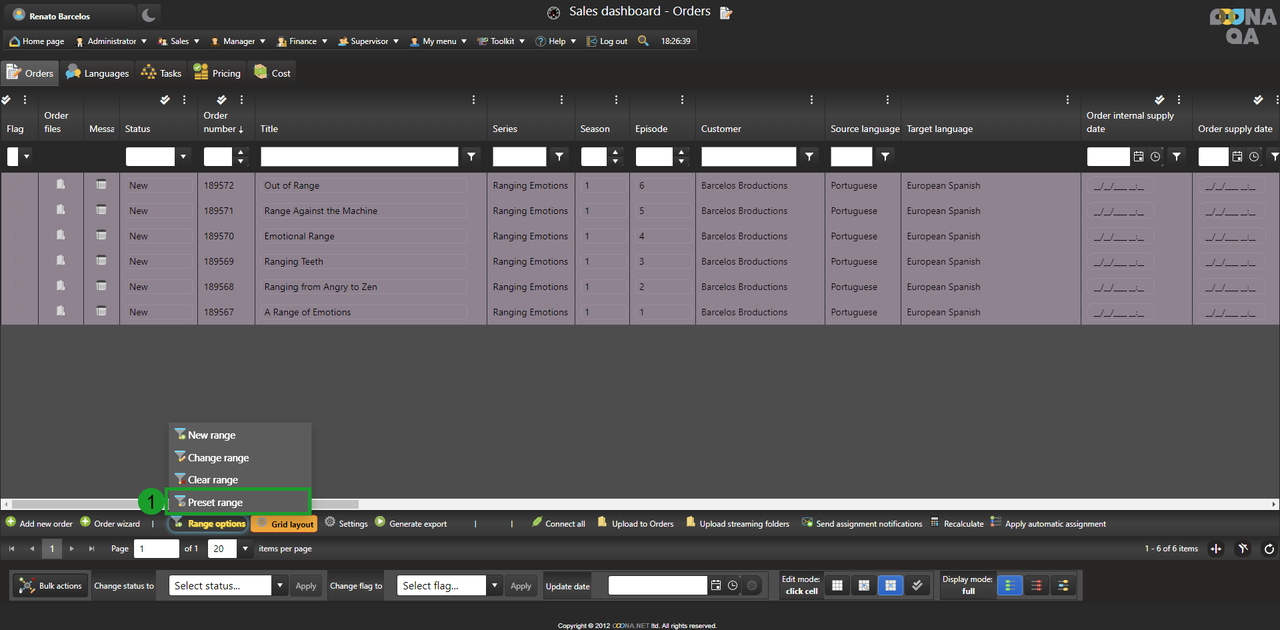
Preset range
The Preset range option enables you to save commonly used searches as “Preset ranges” and easily apply them without having to re-select all search parameters.
Each page has its own list of preset ranges, except for the Sales dashboard, which shares its preset ranges across all tabs.

After creating a range and applying it to the page, it can be saved as a preset for future use:
-
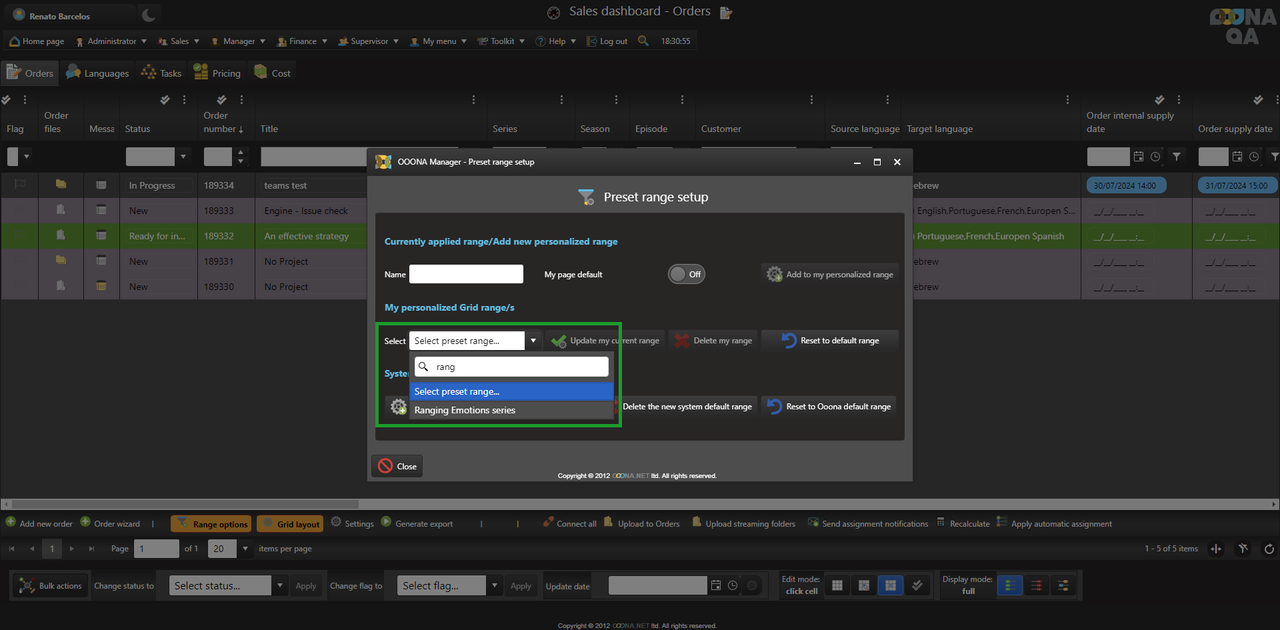
Select “Preset range” within the range options (1).
2. Input a name for the range. This is for your own use only.
3. Click on “Add to my personalized range”.
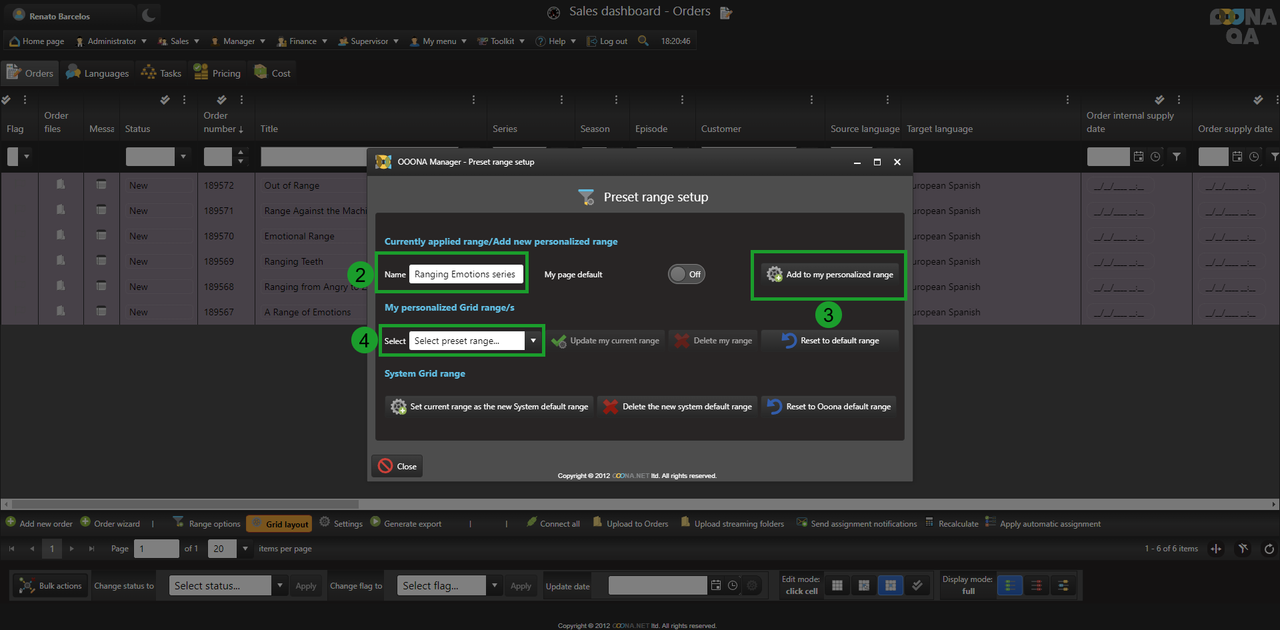
To apply it, just select it from the dropdown menu.
Multiple preset ranges can be saved for future uses
A custom range can also be saved as the page default, so it will be automatically applied whenever the user navigates to the page:
-
After setting the desired range, select “Preset range” within the range options (1)

2. Input a name for the range. This is for your own use only.
3. Switch on “My page default”
4. Click on “Add to my personalized range”.

This will also be visually indicated by the “Range options” in orange.

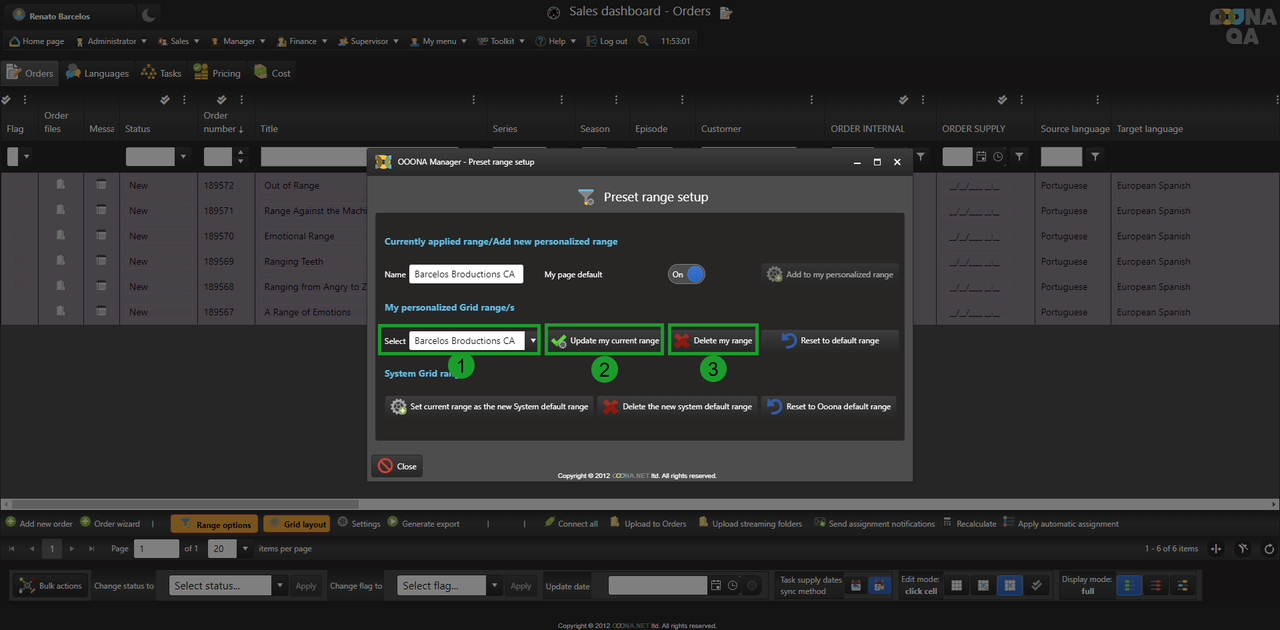
From the preset range page, it’s also possible to save changes done to a preset range or delete existing ones.
Within the preset range options, select the desired preset range from the “Select” dropdown menu (1) and click “Update my current range” (2) to overwrite it with the current range.
Likewise, after selecting a preset range (1), it can be deleted using the “Delete my range” option (3).
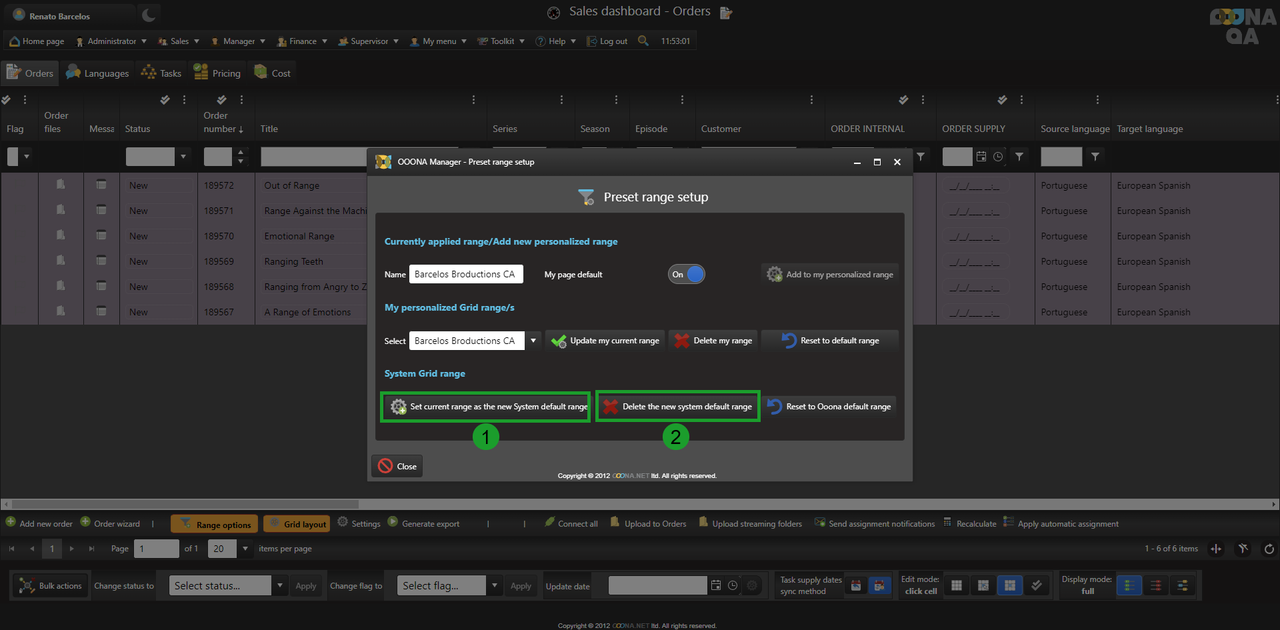
Users with the Administrator role can apply the current role and make it the new default of the page for all users who didn’t set their own default preset range.
This will also be every user’s default range for the page if they delete their currently existing default preset range.
After setting the desired range, from the Preset range page, click on “Set current range as the new System default range” (1).
Like other preset ranges, it can also be deleted, restoring the system default, using the “Delete the new system default range” option (2).