This article will show you how to set up a Customer portal
Sections in this article:
Information shown in the Customer Portal
Overview
The Customer portal enables you to provide your customers with a limited view of their orders’ status, files, deadlines and additional information.
Setting up a Customer
To create a Customer Portal, first, you need to create a login for the customer you want to create the portal for.
Please note that when creating “regular” users, not for customer portal purposes, we strongly recommend to duplicate users and not creating from scratch.
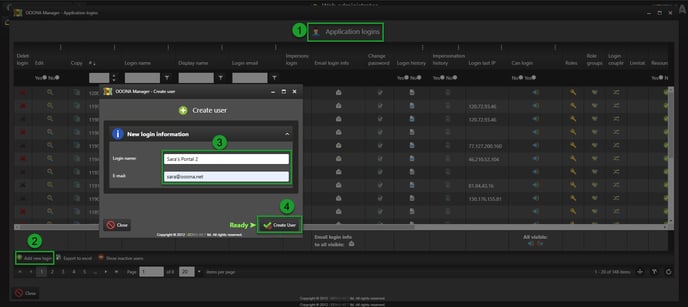
To create the login, go to Administrator > Web Administrator > Logins and click "Add new login". Fill out the "Login name" and "E-mail" fields and click "Create User".

Selecting user type
If you already have a customer created, you can skip the following steps and go directly to the section on how to connect the login to the customer or consolidated account.
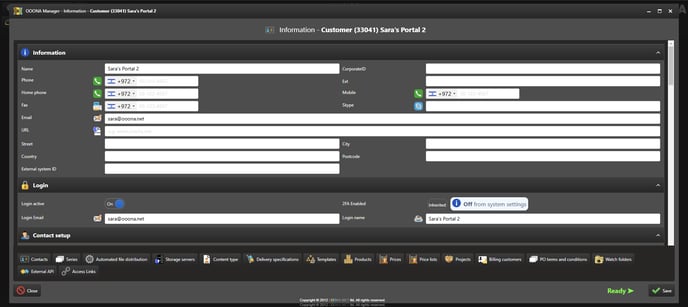
Next, you need to select the user type for the newly created login: customer or consolidated account.
And fill out the missing details (if there are any):

Connecting to the customer/consolidated account
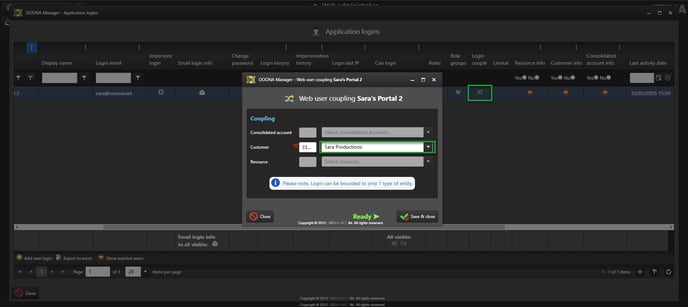
Next, you must connect the new created user to the existing customer/consolidated account you’d like to give the access to.

Adding the necessary role group
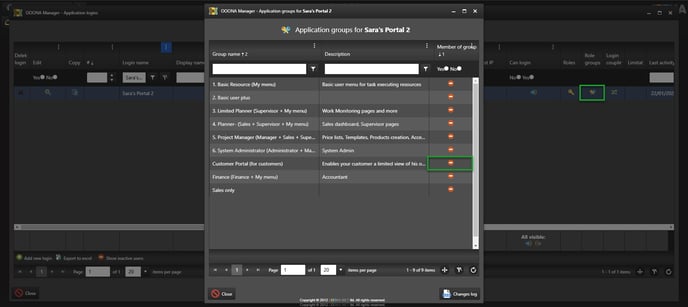
To give your customer access to their Customer Portal, they will need to have the Customer portal (for customers) role group.

Now, that everything is set up, the customer portal should look like this:
Information shown in the Customer Portal
Orders
The customer will have access to their own orders, from Accounts > Dashboard > Orders tab.
Files
You may allow customers to access certain files from the Customer Portal.
To do so, go to Administrator > Tables > File tables > File types and check the "Customer file" checkbox for the files you want the customer to have access to.
Flags
The customer will only see the orders and not the tasks in them.
To configure what flags will be displayed to the customer, go to Administrator > Tables > Flags and click the icon under the “Is a customer flag" column:


