Sections in this article:
- What are Correction orders?
- Creating “Products” Correction orders (Relevant only for OOONA users that are using Products)
- Creating Correction orders without Products (Relevant only for OOONA users that are NOT using Products)
- Correction orders' pricing
What are Correction orders?
If files that have been created in a certain order require correction, a Correction order can be created.
A correction order is created directly from the original order that requires the correction.
All Order files available in the original order will also be available in the correction order.
In integrated systems, all Toolkit projects that have been created in the original order will be available in the correction order so users can correct the required projects directly without having to manually import the project files to the correction order.
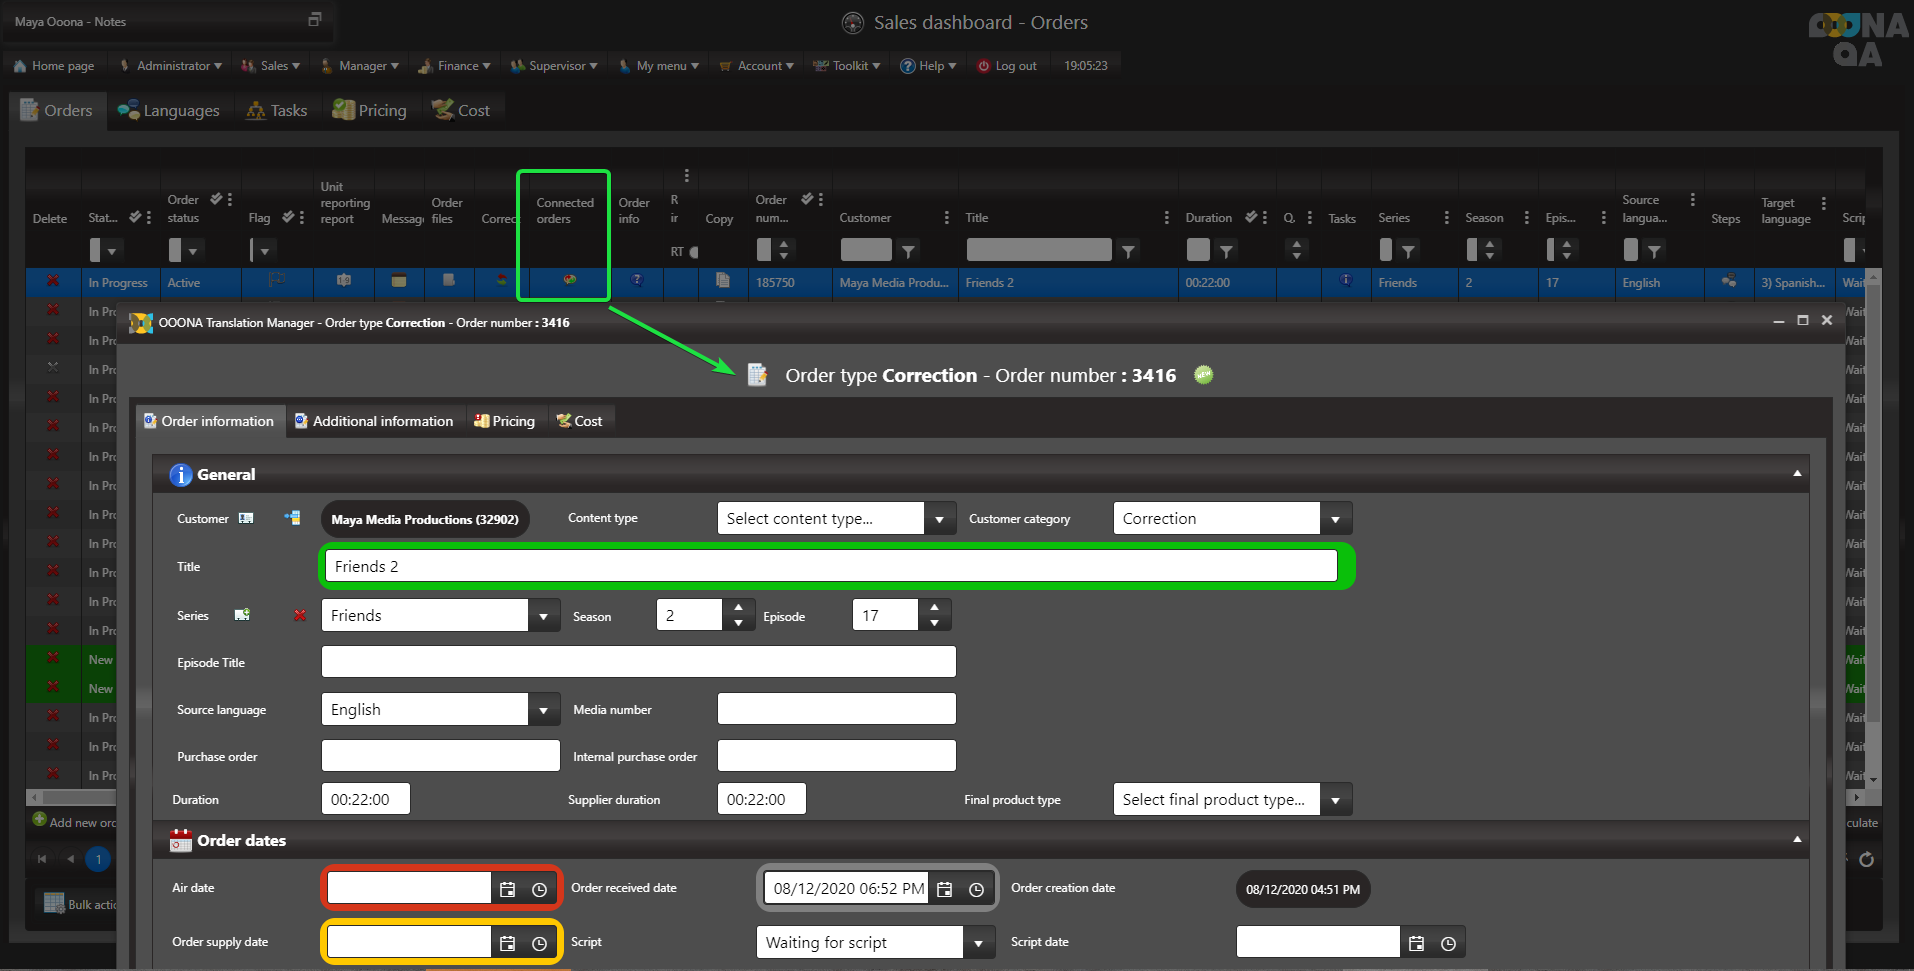
Once a Correction order was created for an order, a button will be added in the “Connected orders” column.
Once clicked, the Correction order’s order info page will open to provide easy access to the correct order:
Creating “Products” Correction orders (Relevant only for OOONA users that are using Products)
Correction orders can be created from preset Correction products or Manually by adding all the required Steps, Products, and tasks.
Creating preset Correction products
“Products” correction orders are created using preset Correction products.
To be able to create correction orders, you must first create preset correction products in the system.
Once the correction products are created, they will be available for selection when creating correction orders.
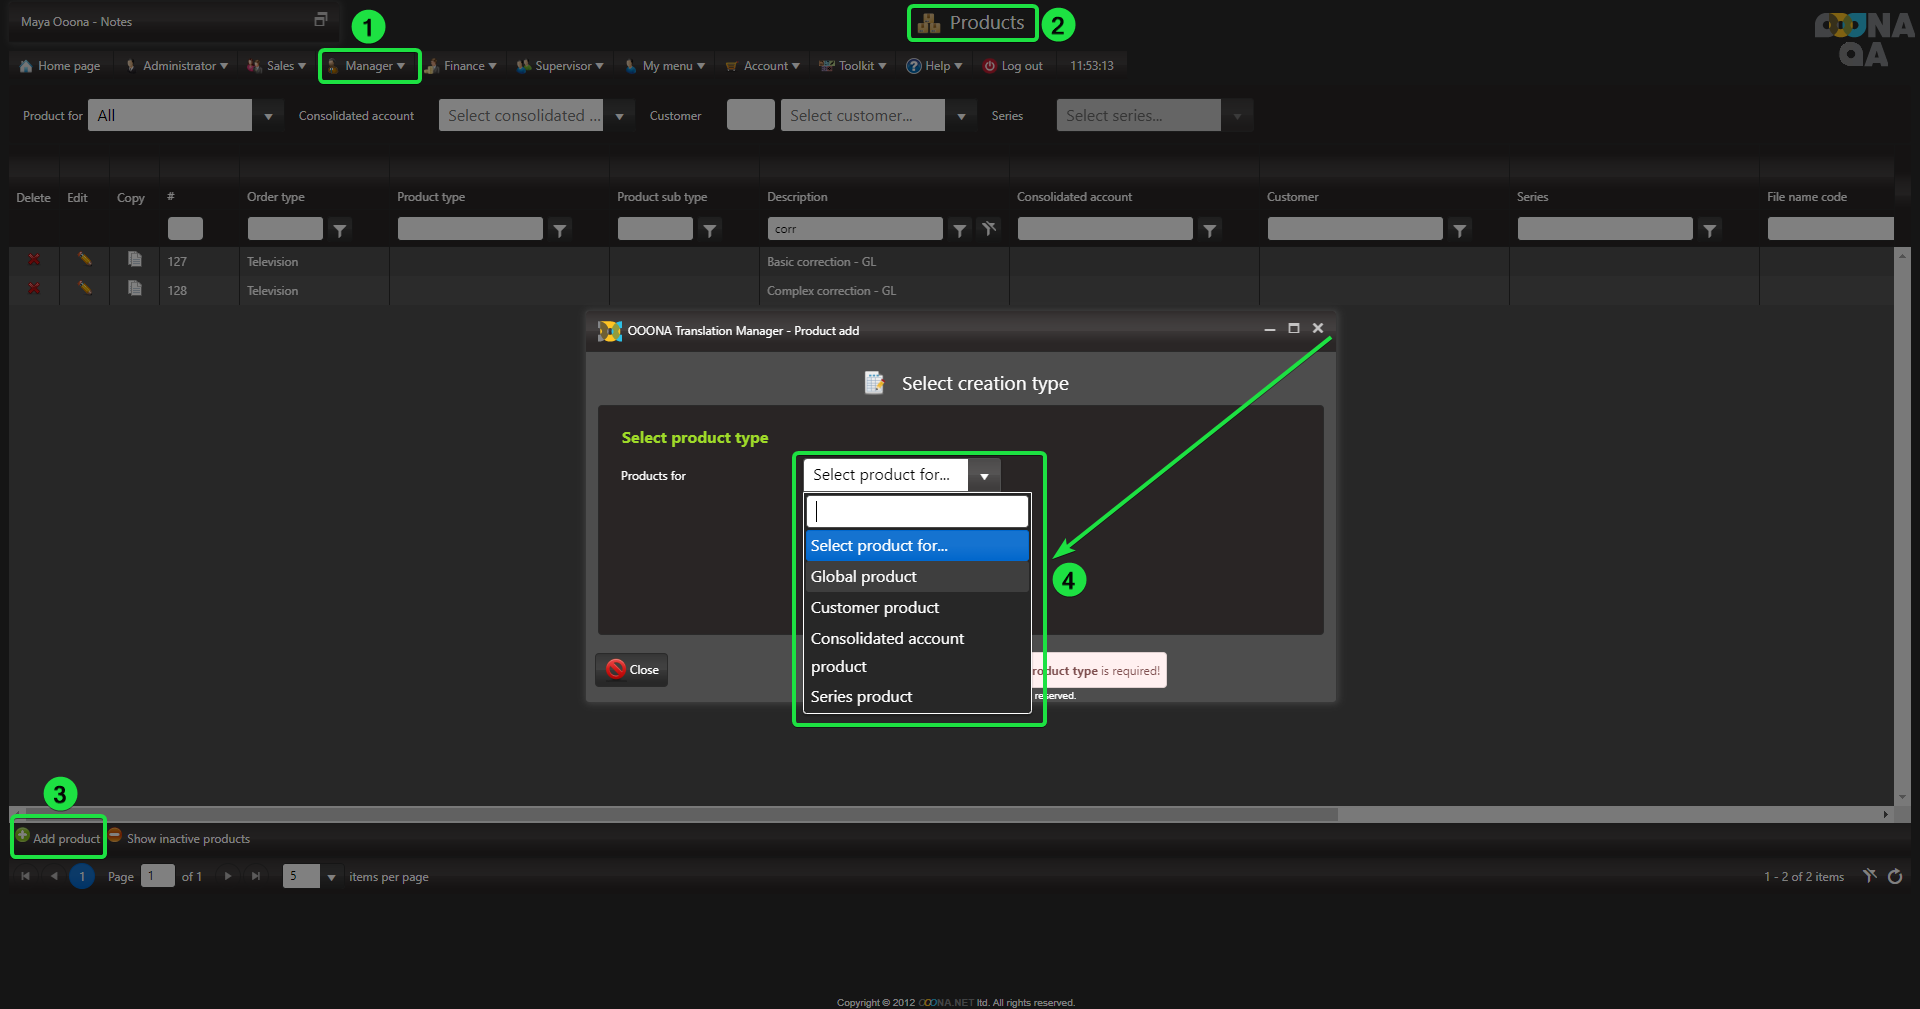
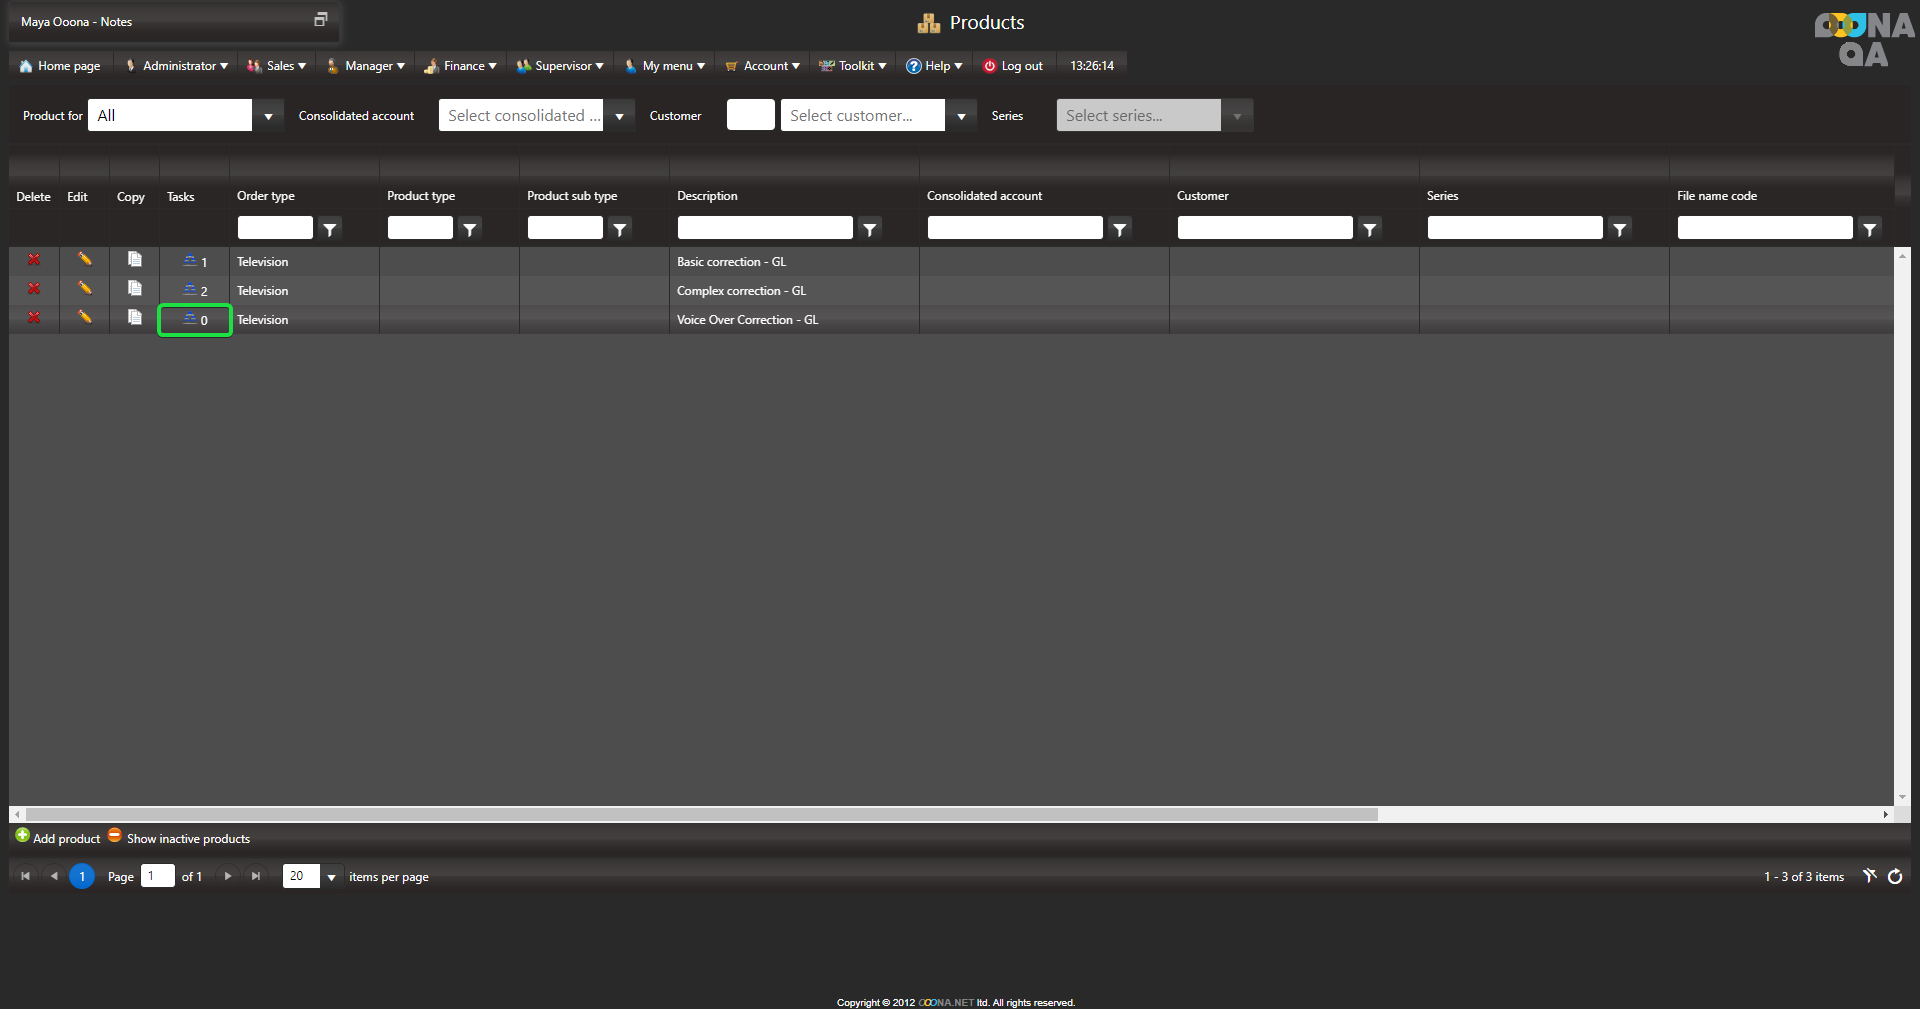
To create Correction products, navigate to: Manager > Pricelists and Workflow templates > Products.
Click “Add product” (fig 3).
Select the Product type: Specific to a certain Consolidated account/Customer/Series or Global that can be used for all Customers (fig 4).
If you’re unsure which Product type to select, prefer Global. It would be the least limiting option
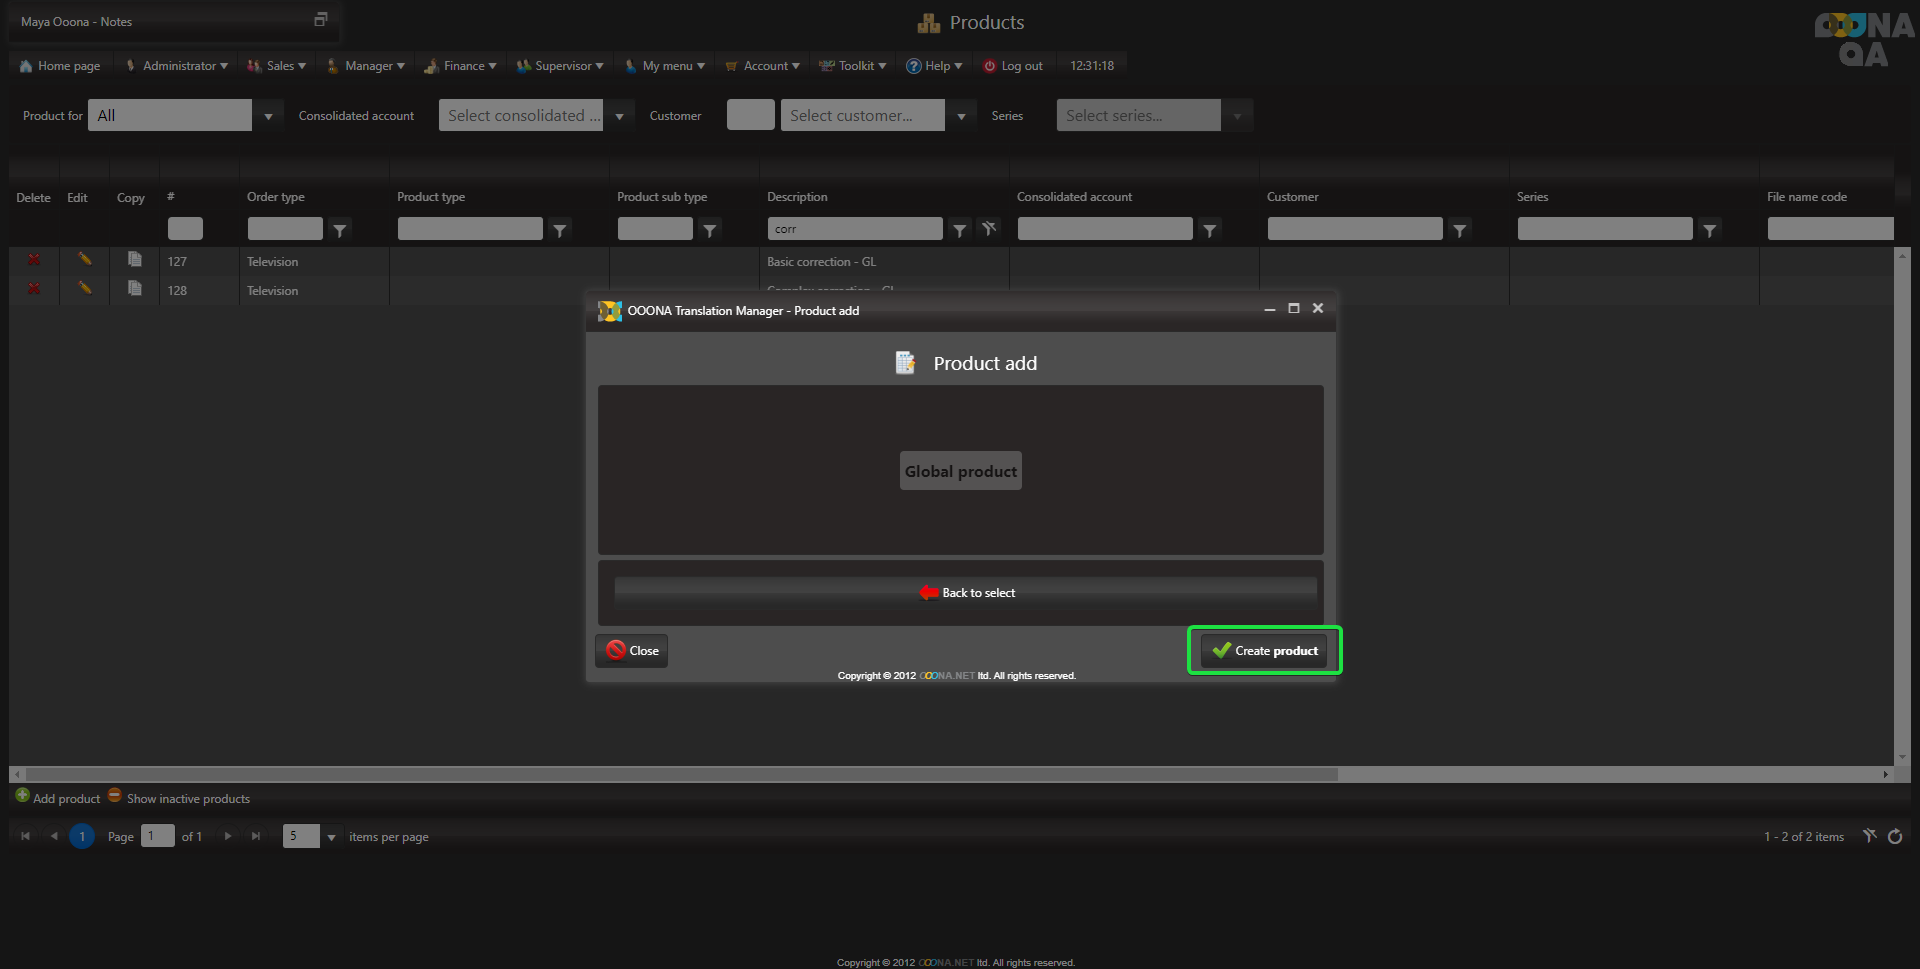
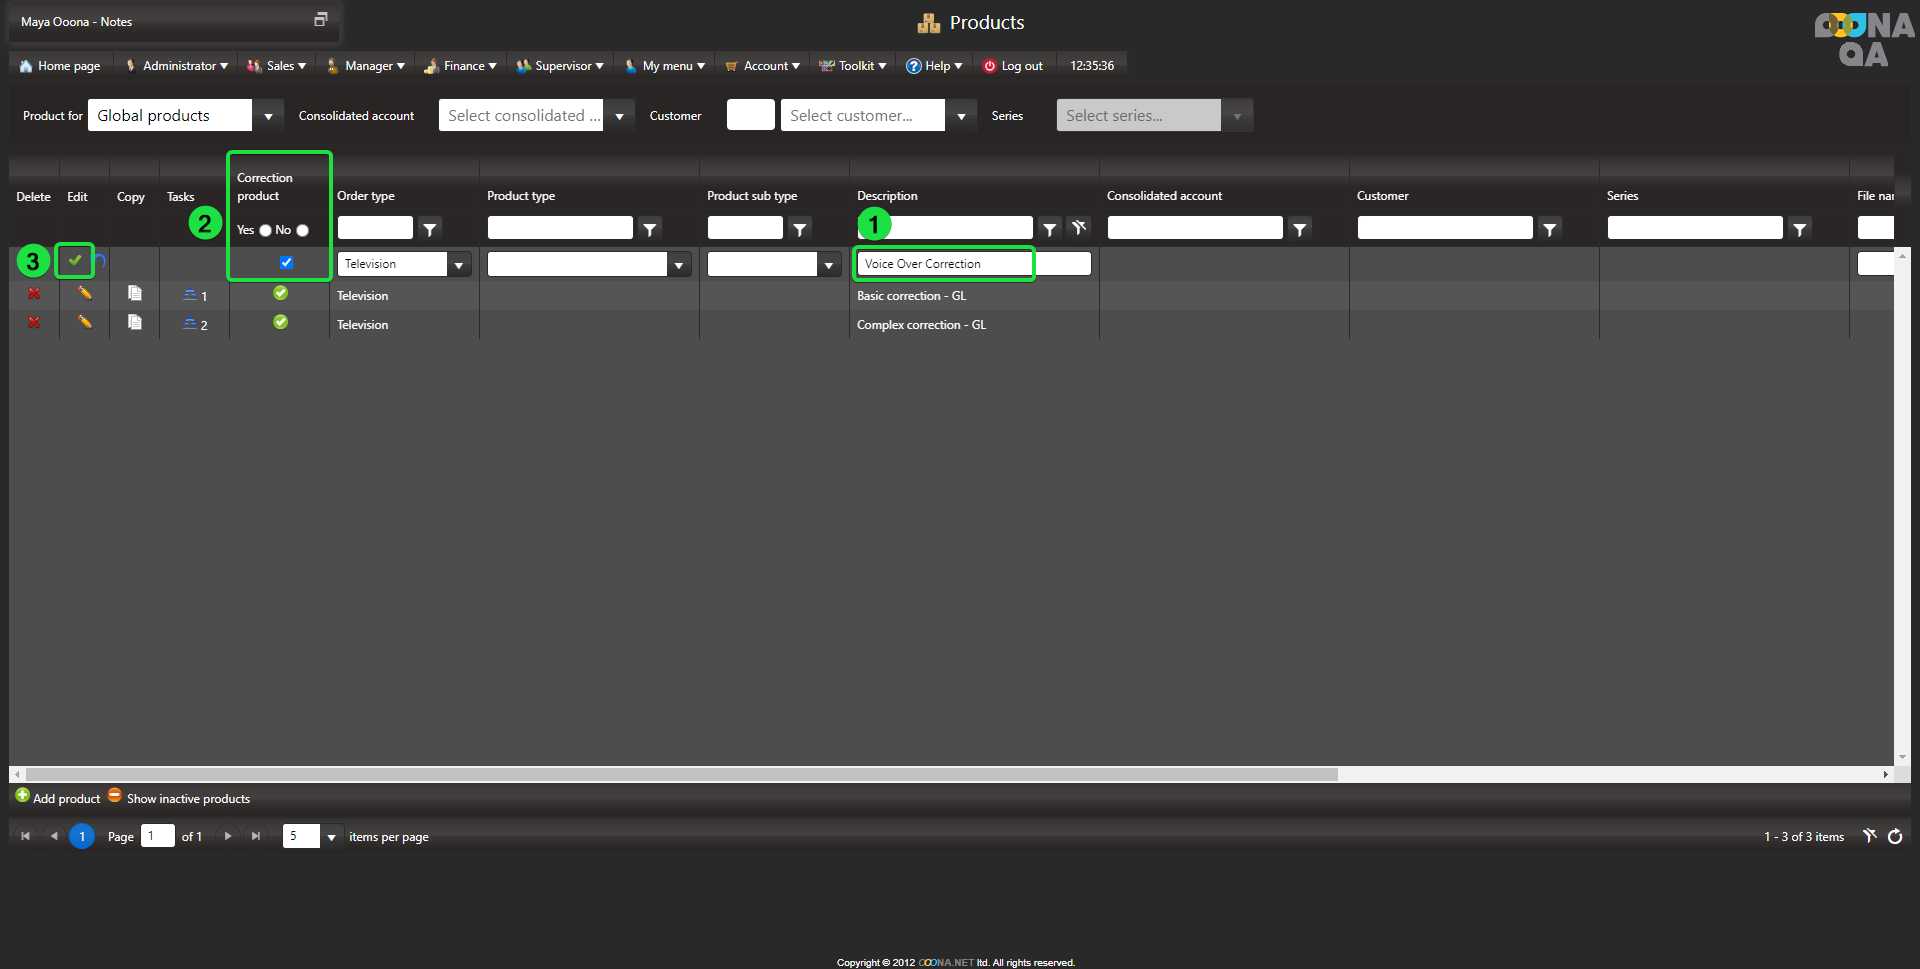
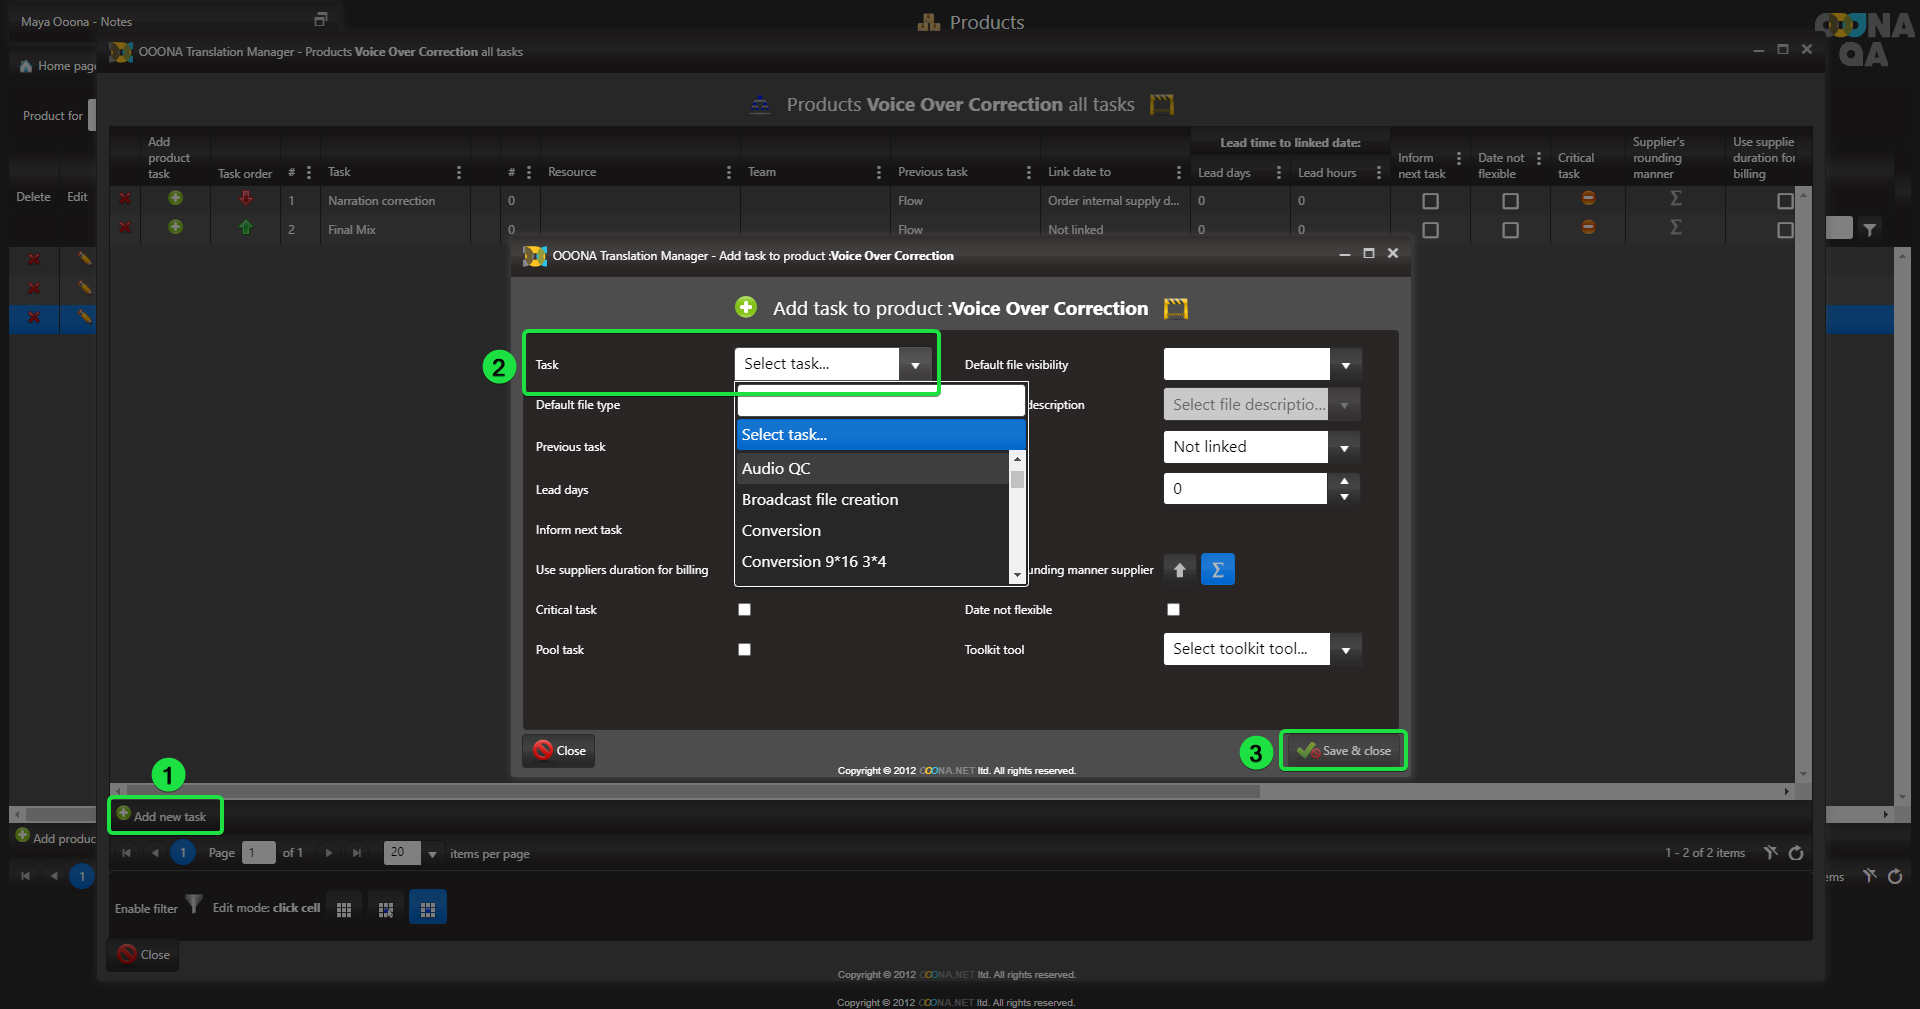
Click the green ✓ to save:
Click “Save and close” to add the task to the Correction product.
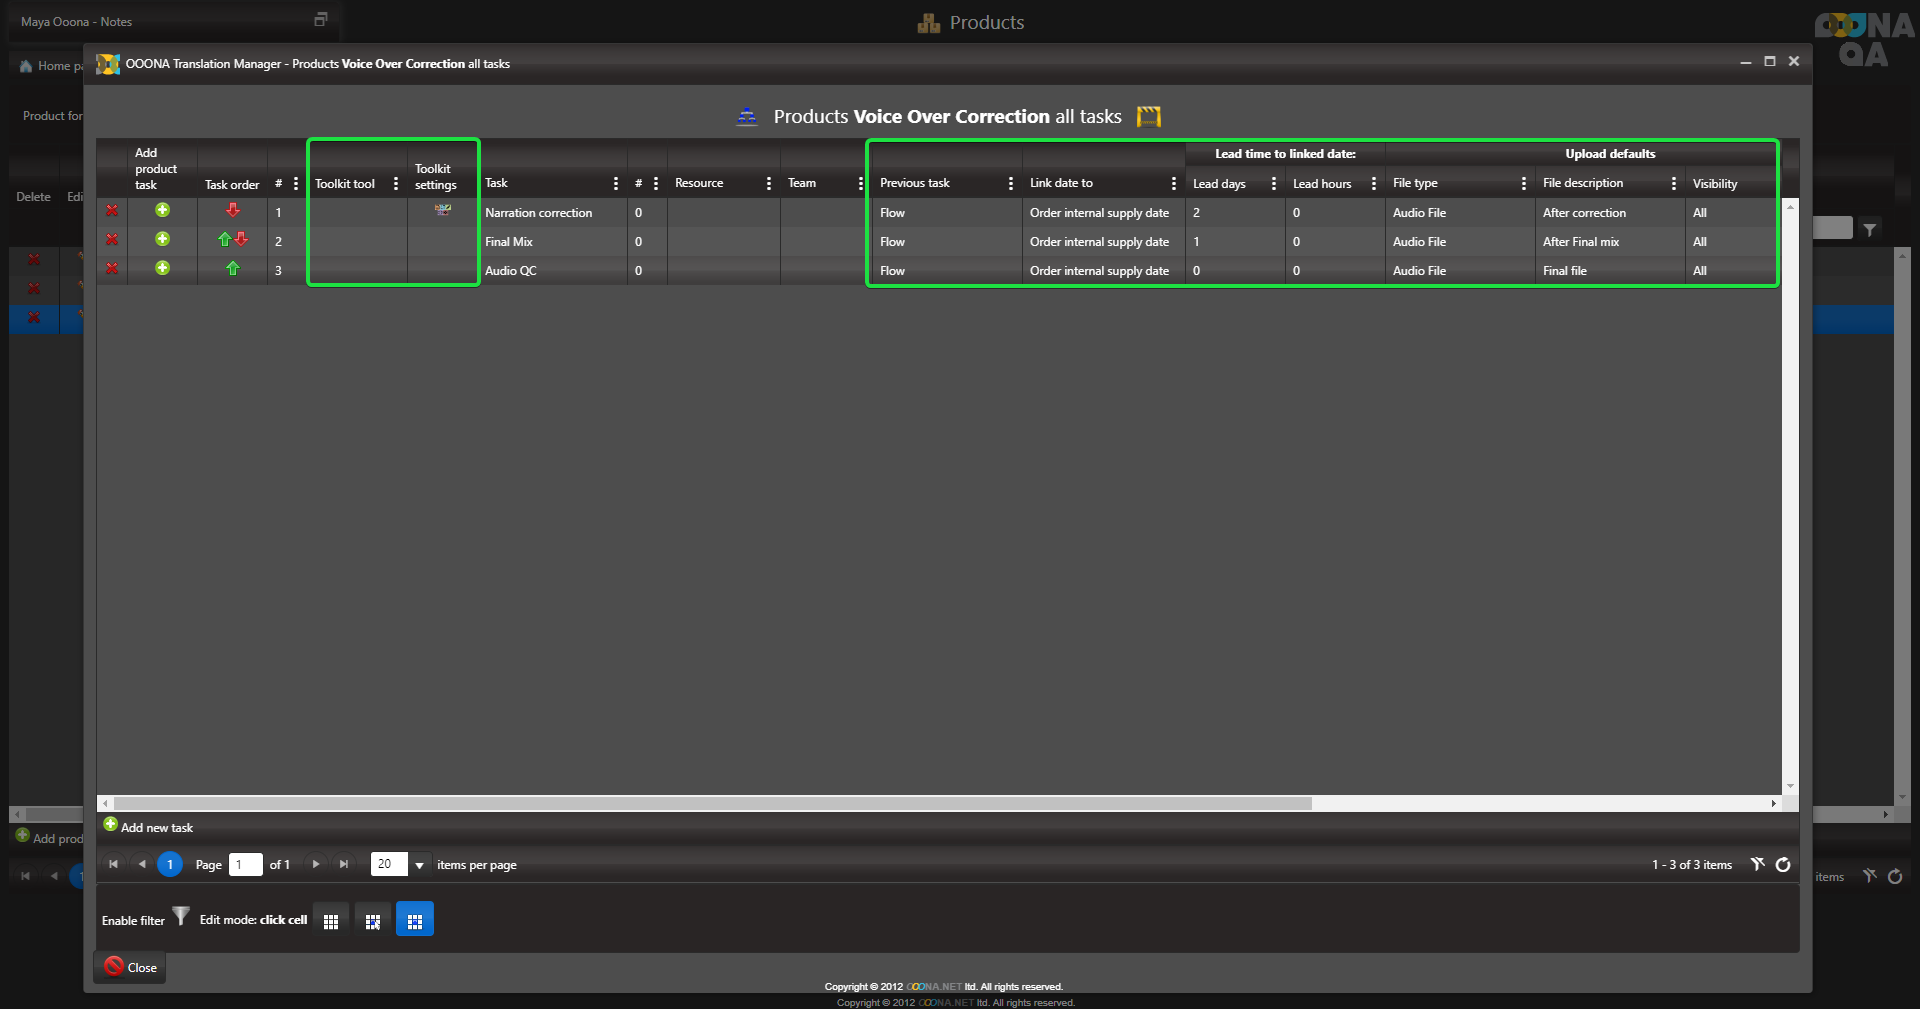
Repeat the process to add additional tasks, if necessary:
-
Toolkit tool and setting (in integrated systems)
-
Link date to and lead days
-
Previous task
-
Upload defaults, if necessary (File type and description)
-
Default assignments
-
And more
In the “Orders” page, click the “Correct” button (fig 4) of the order that requires the correction:
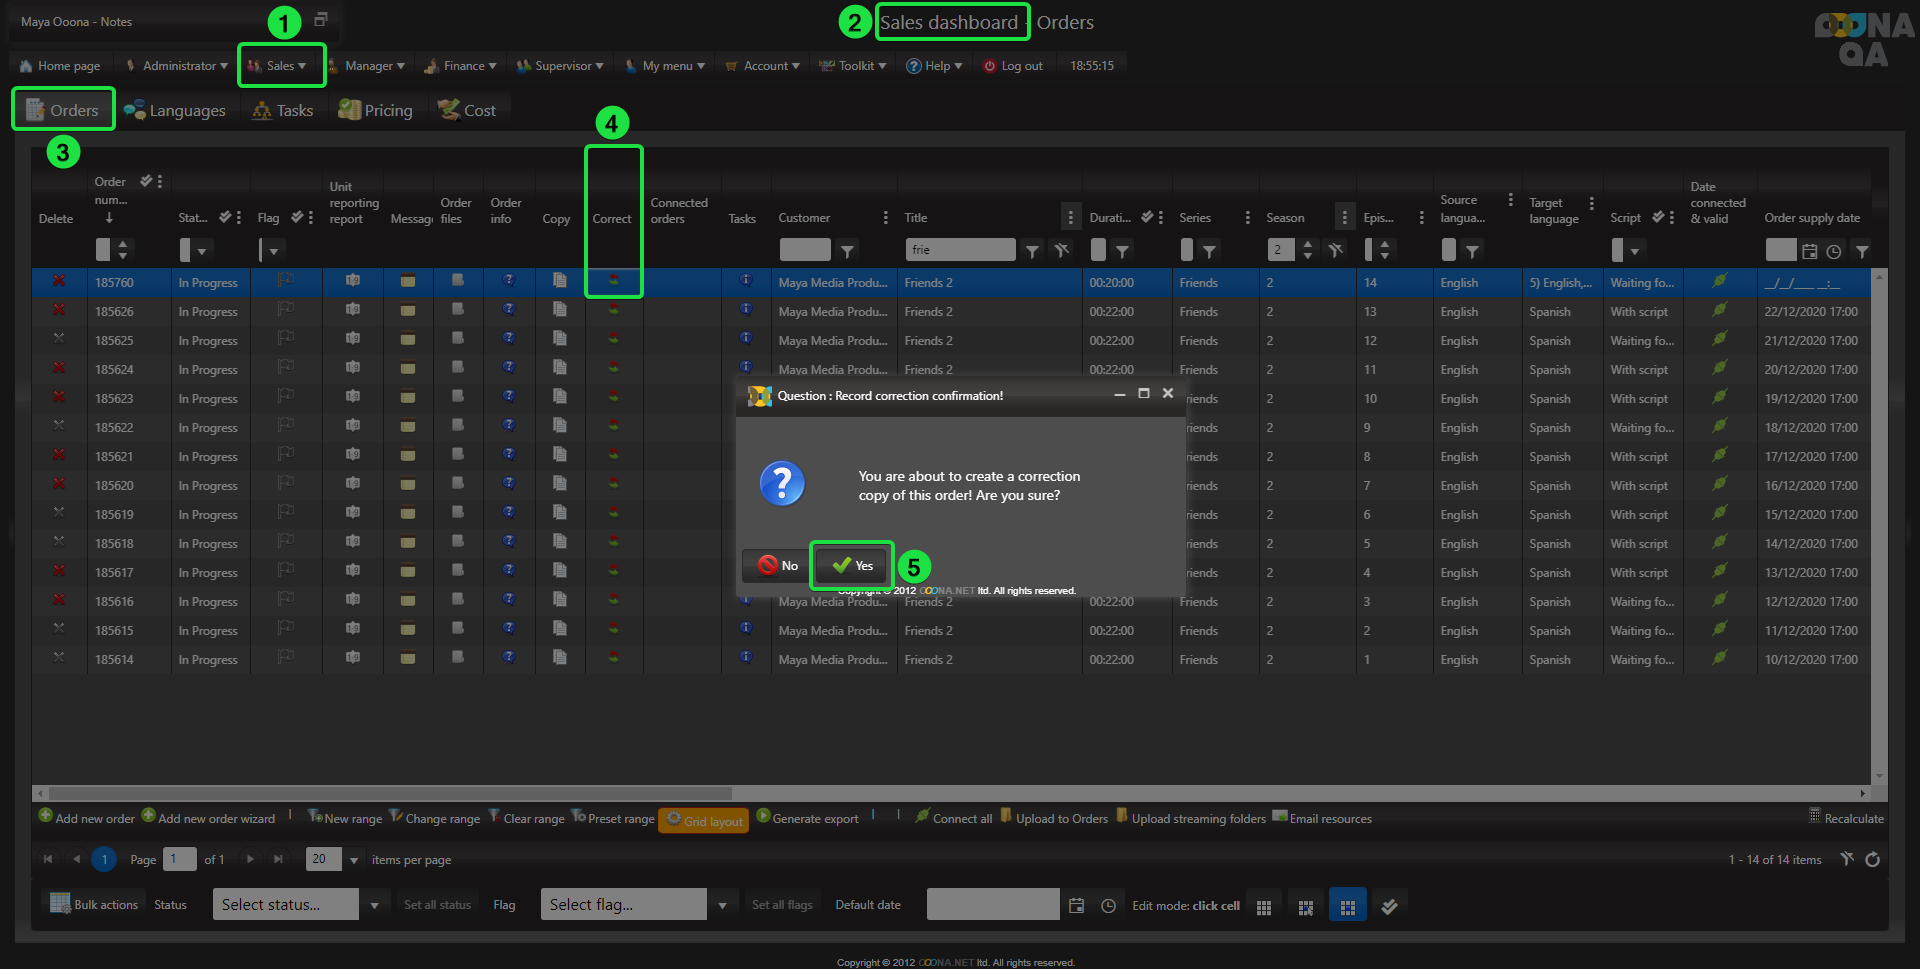
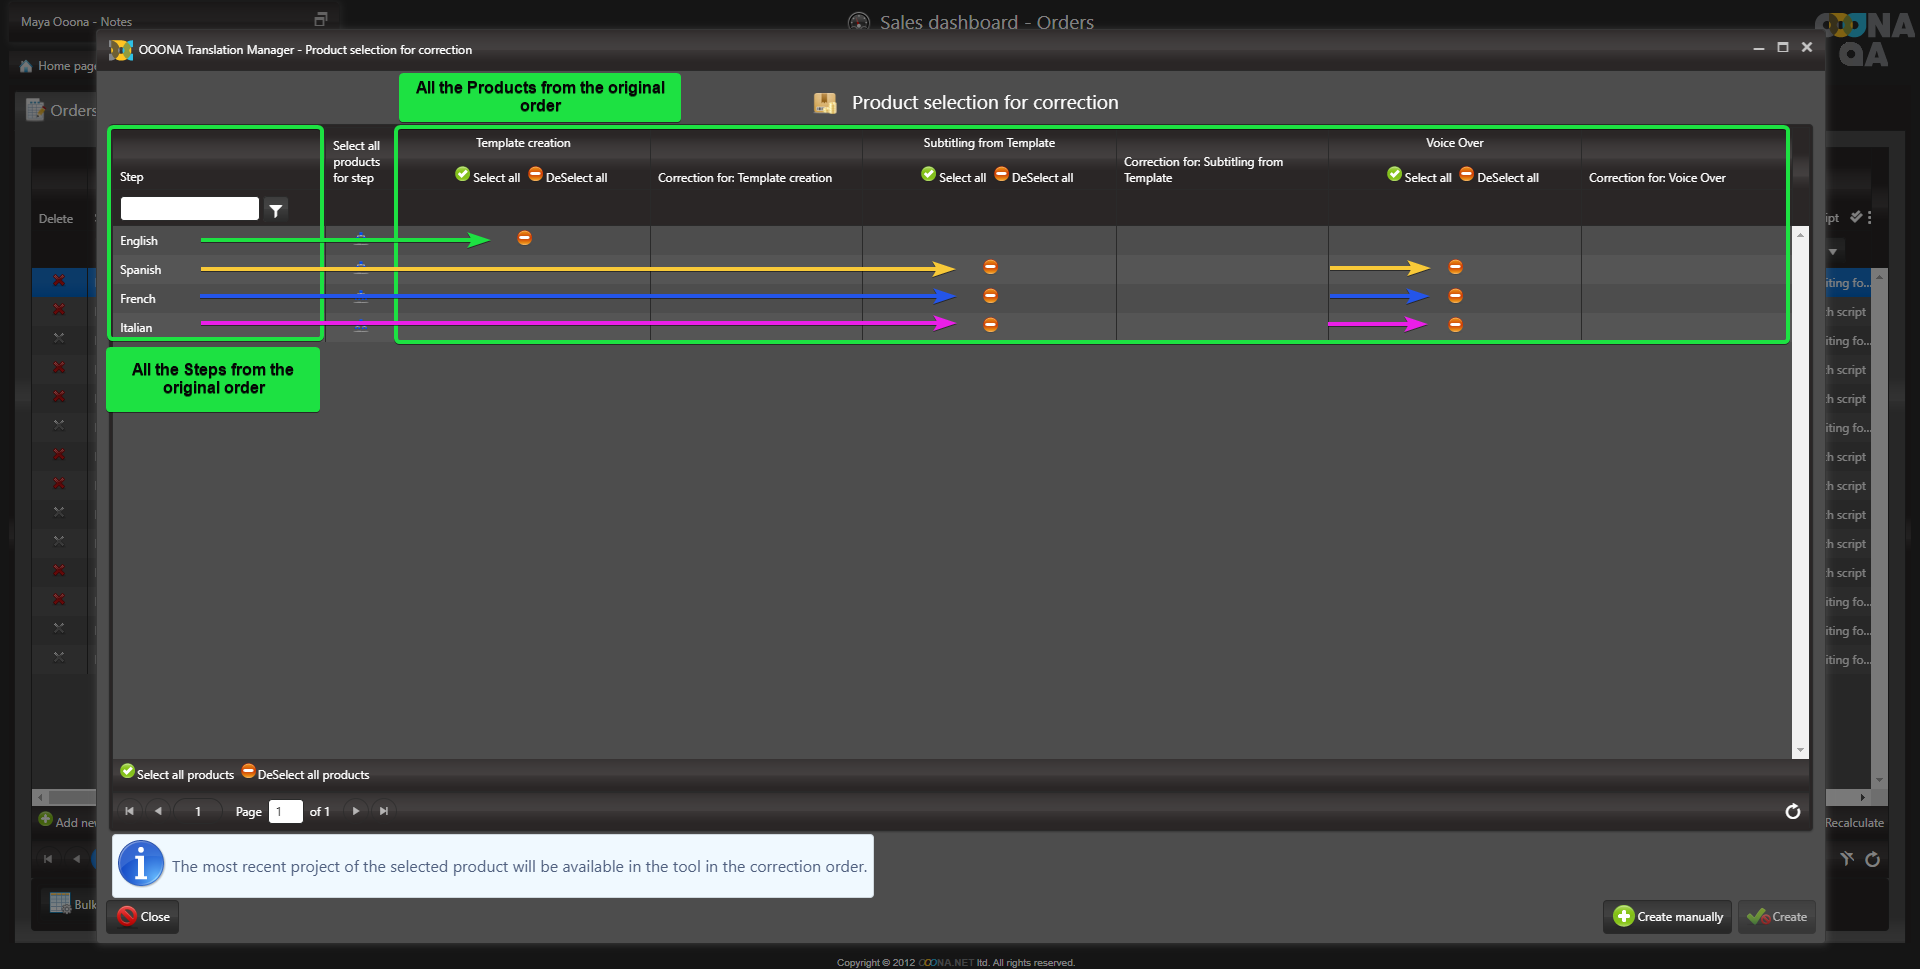
Select the products that require correction by clicking their orange selection buttons (fig 1-2).
Once selected, you must select the required correction product for all products that require correction (fig 3-4).
Only once all correction products are selected, can you proceed to create the correction order (fig 5):
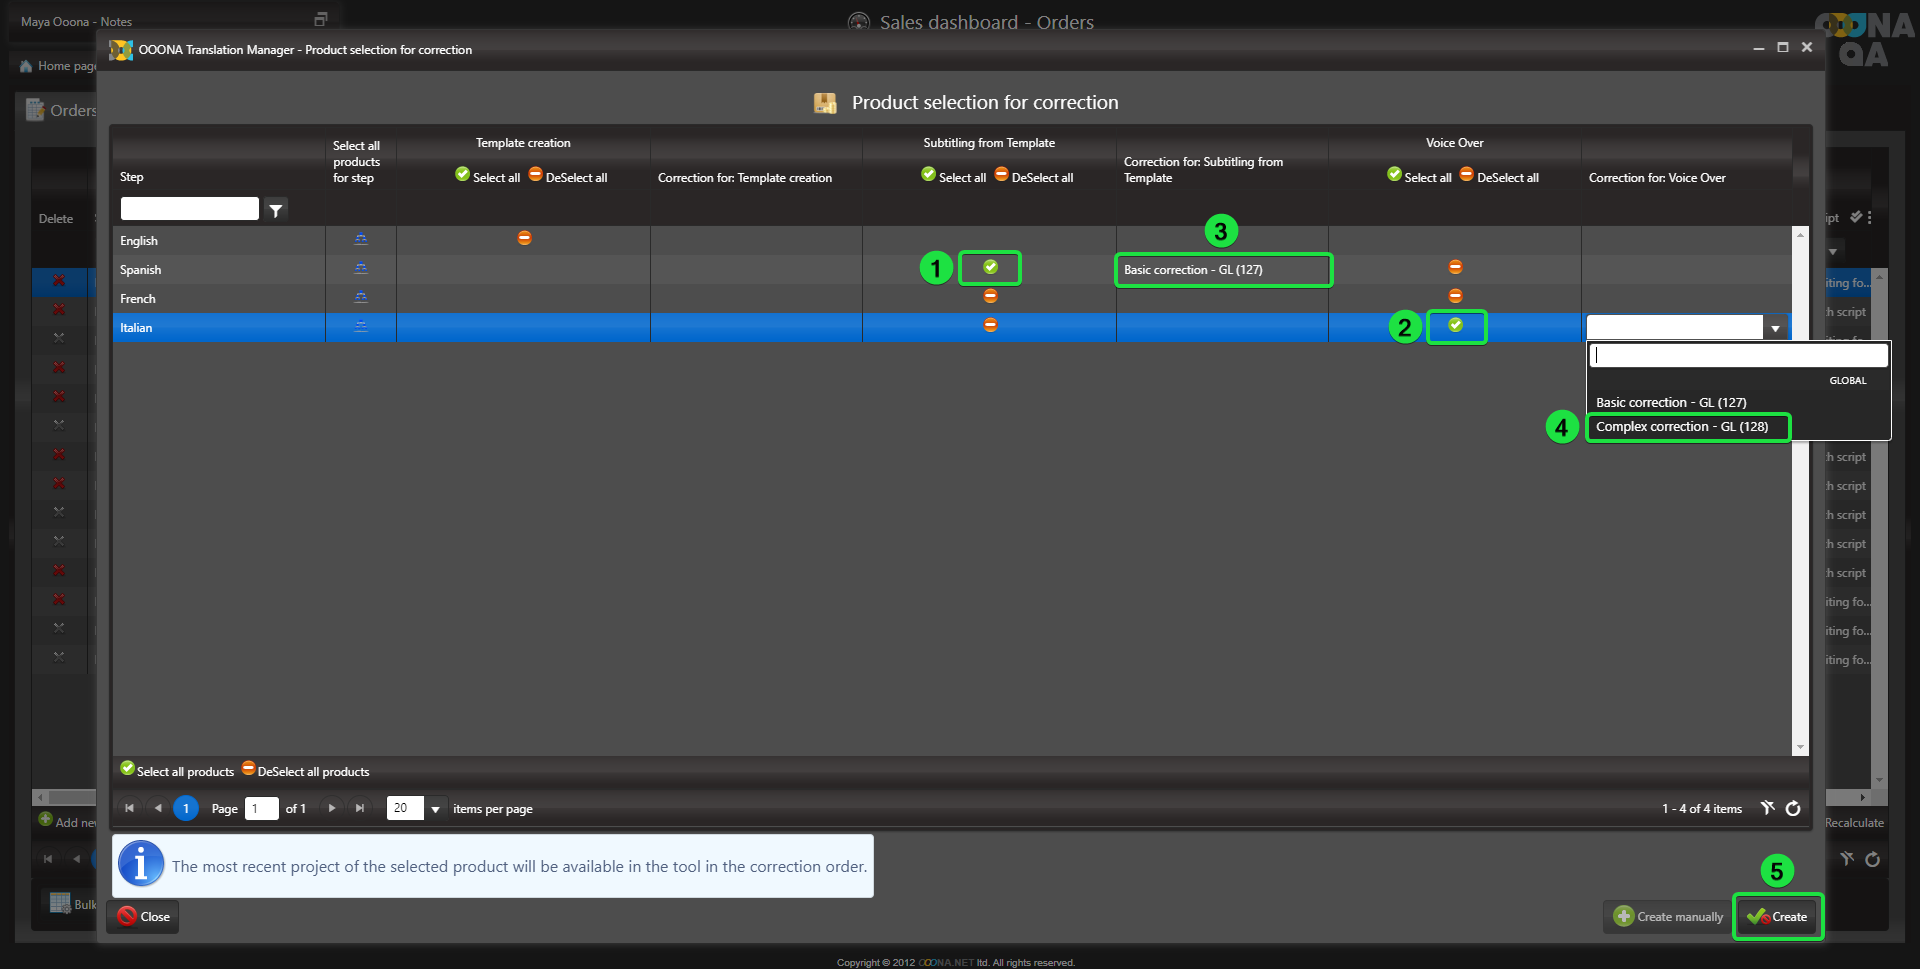
In integrated systems, the most recent projects created in the selected products will be available in the tool in the correction order
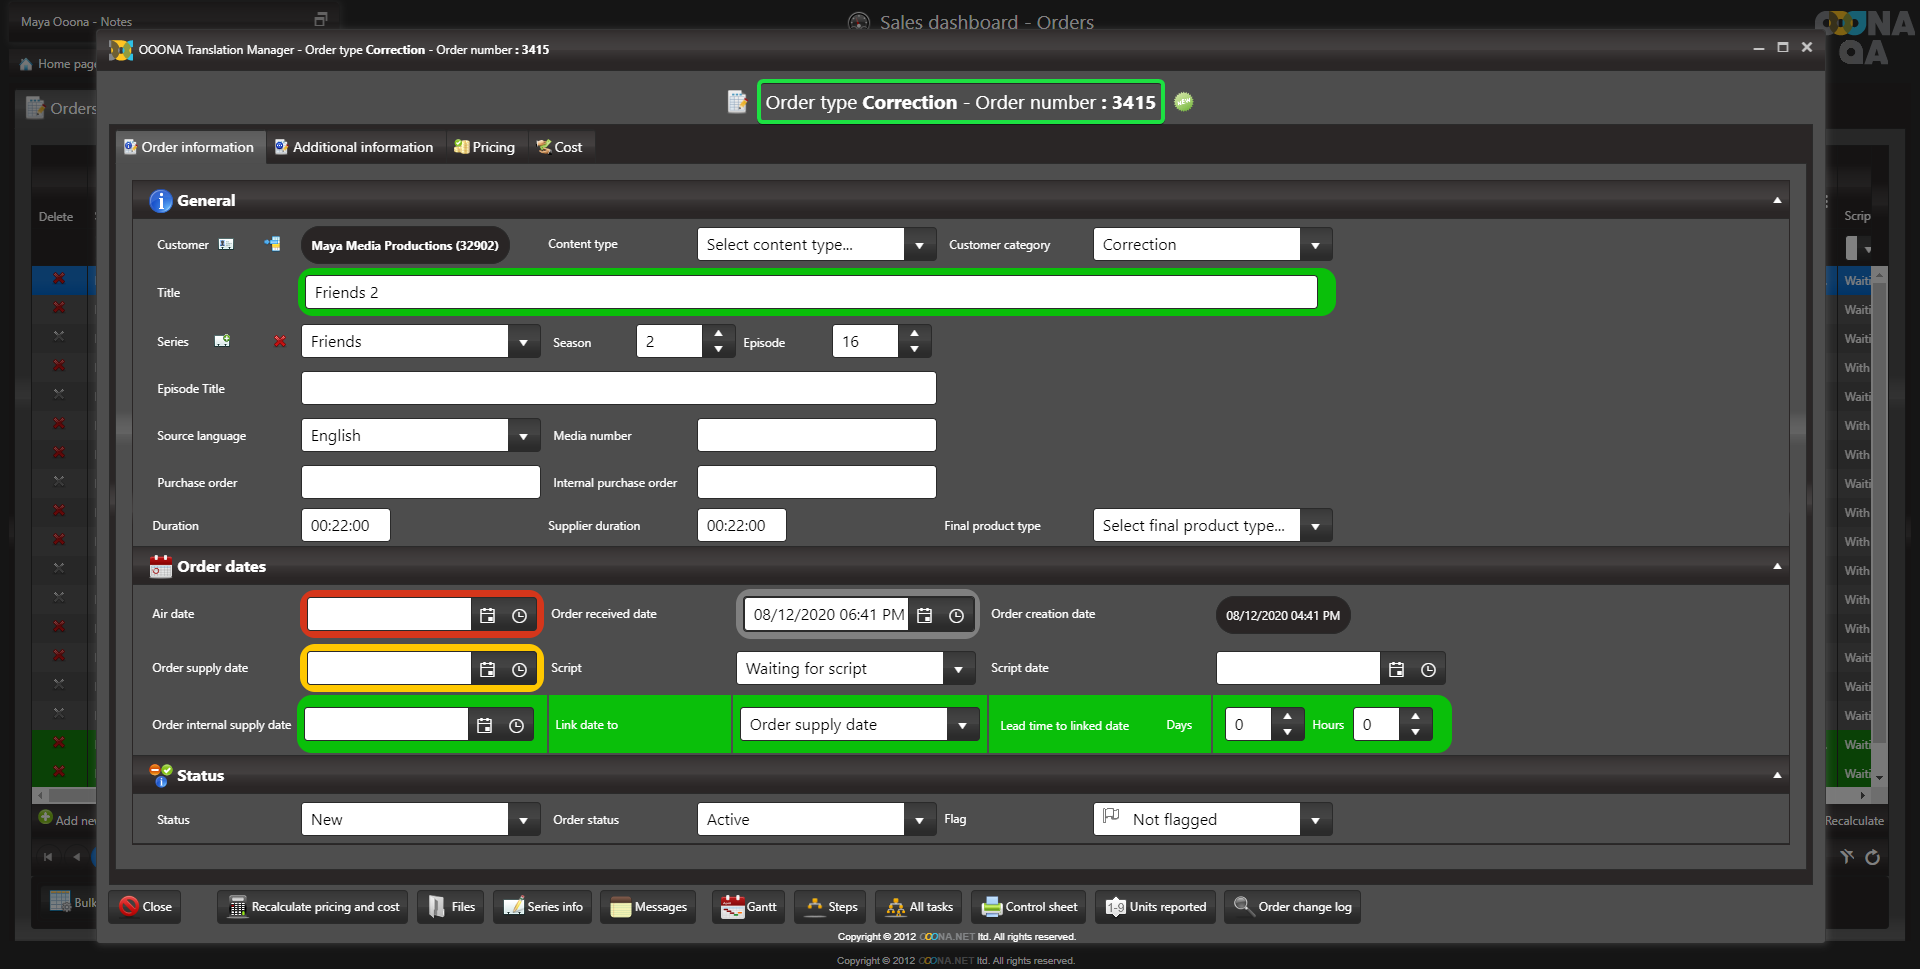
Once created, the correction order’s order info page will open.
Correction orders receive a four-digit order number.

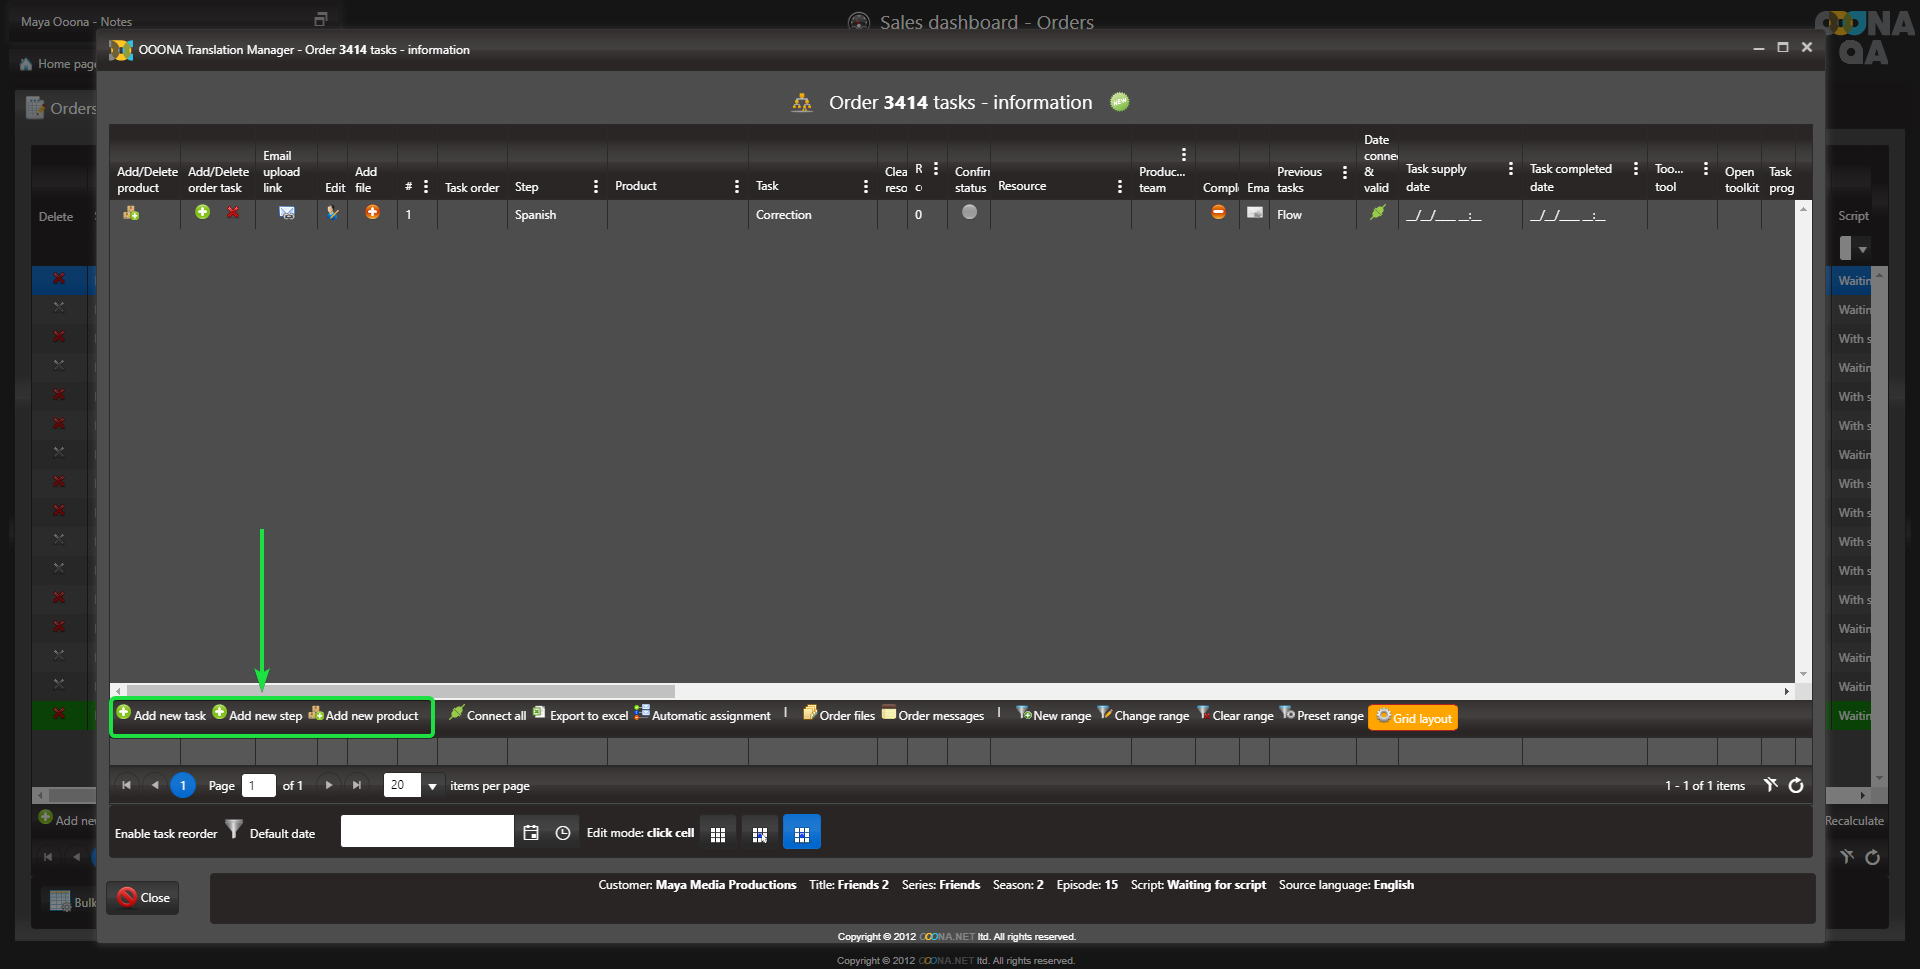
To Manually create a correction order, click the Correction order button of the order that requires correction (fig 4):

 Follow by clicking “Create manually” (fig 1):
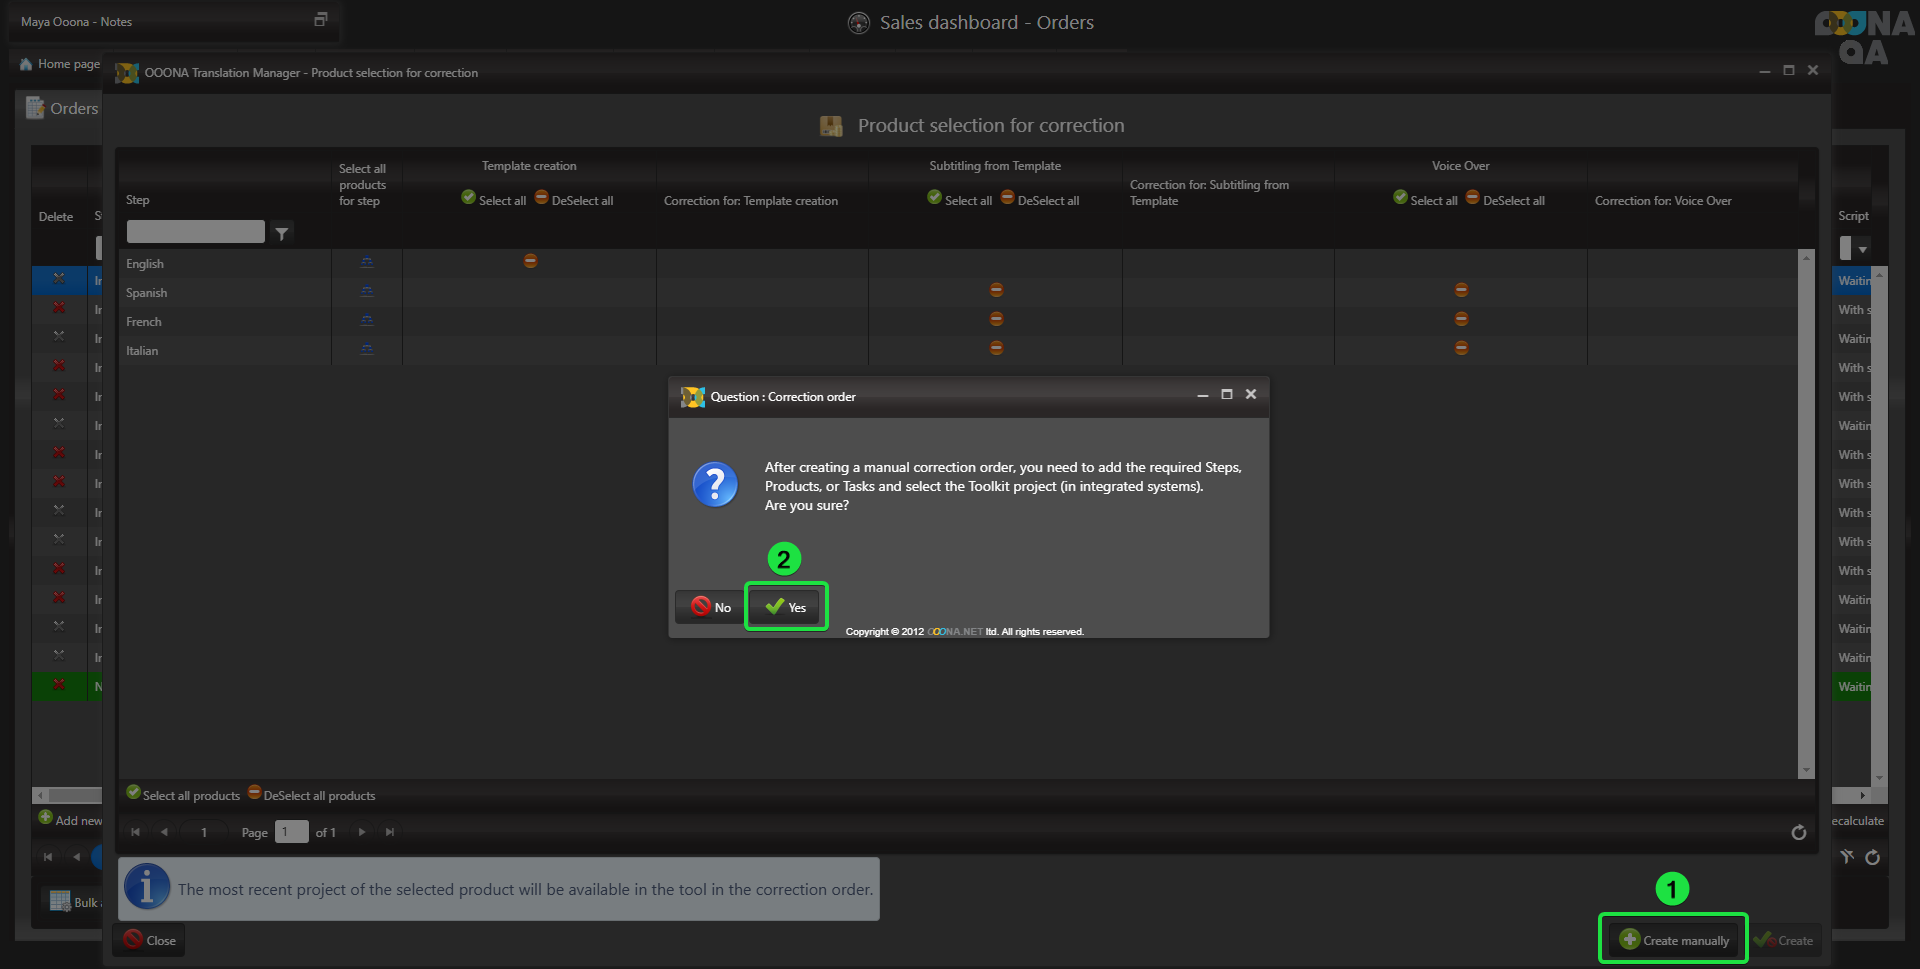
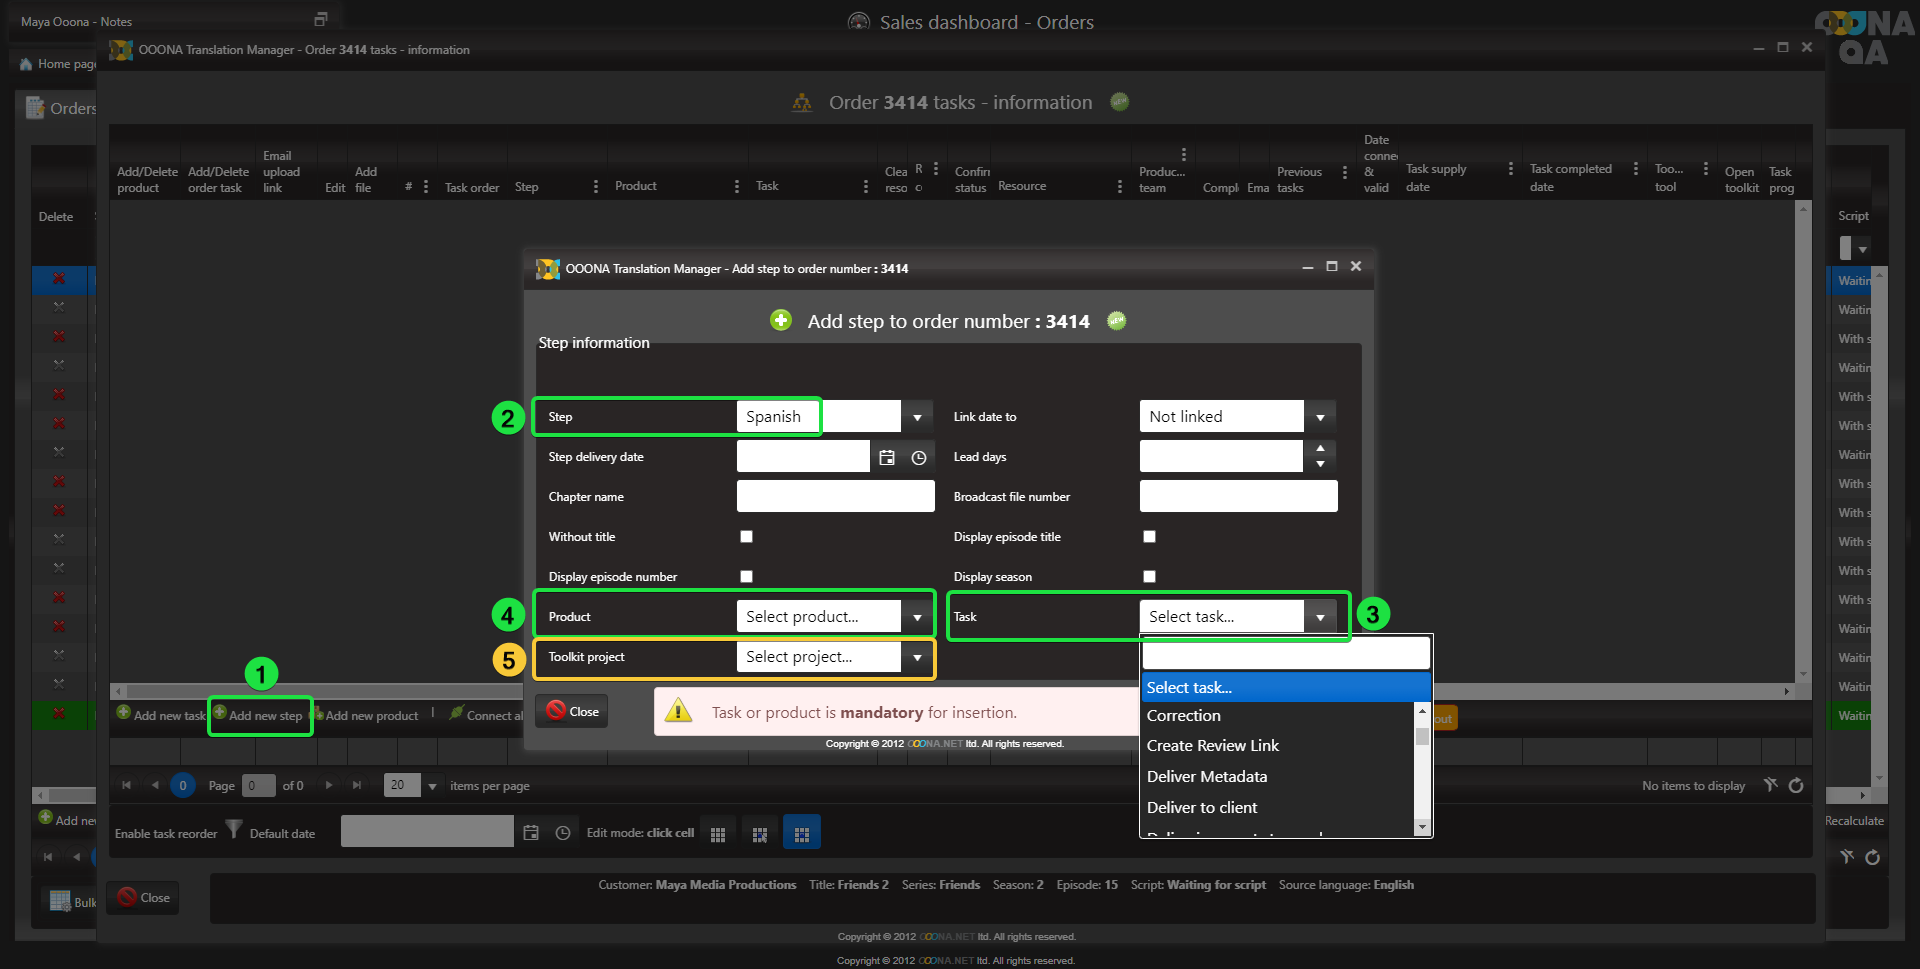
Start by adding the steps that require correction.
- Click “Add new step” fig 1).
- Select the Step required for correction (fig 2).
- Select a Task (fig 3) or a Product (fig 4) to add to the selected step.
In integrated systems, you can also select the Toolkit project that requires correction. This project will be available for correction in the correction order (fig 5):
Creating Correction orders without Products (Relevant only for OOONA users that are NOT using Products)
Creating preset Correction workflow templates
Correction orders can be created from preset Correction workflow templates or Manually by adding all the required Steps and tasks.
Correction orders are created using preset Correction workflow templates.
To be able to create correction orders, you must first create preset Correction workflow templates in the system.
Once the Correction workflow templates are created, they will be available for selection when creating correction orders.
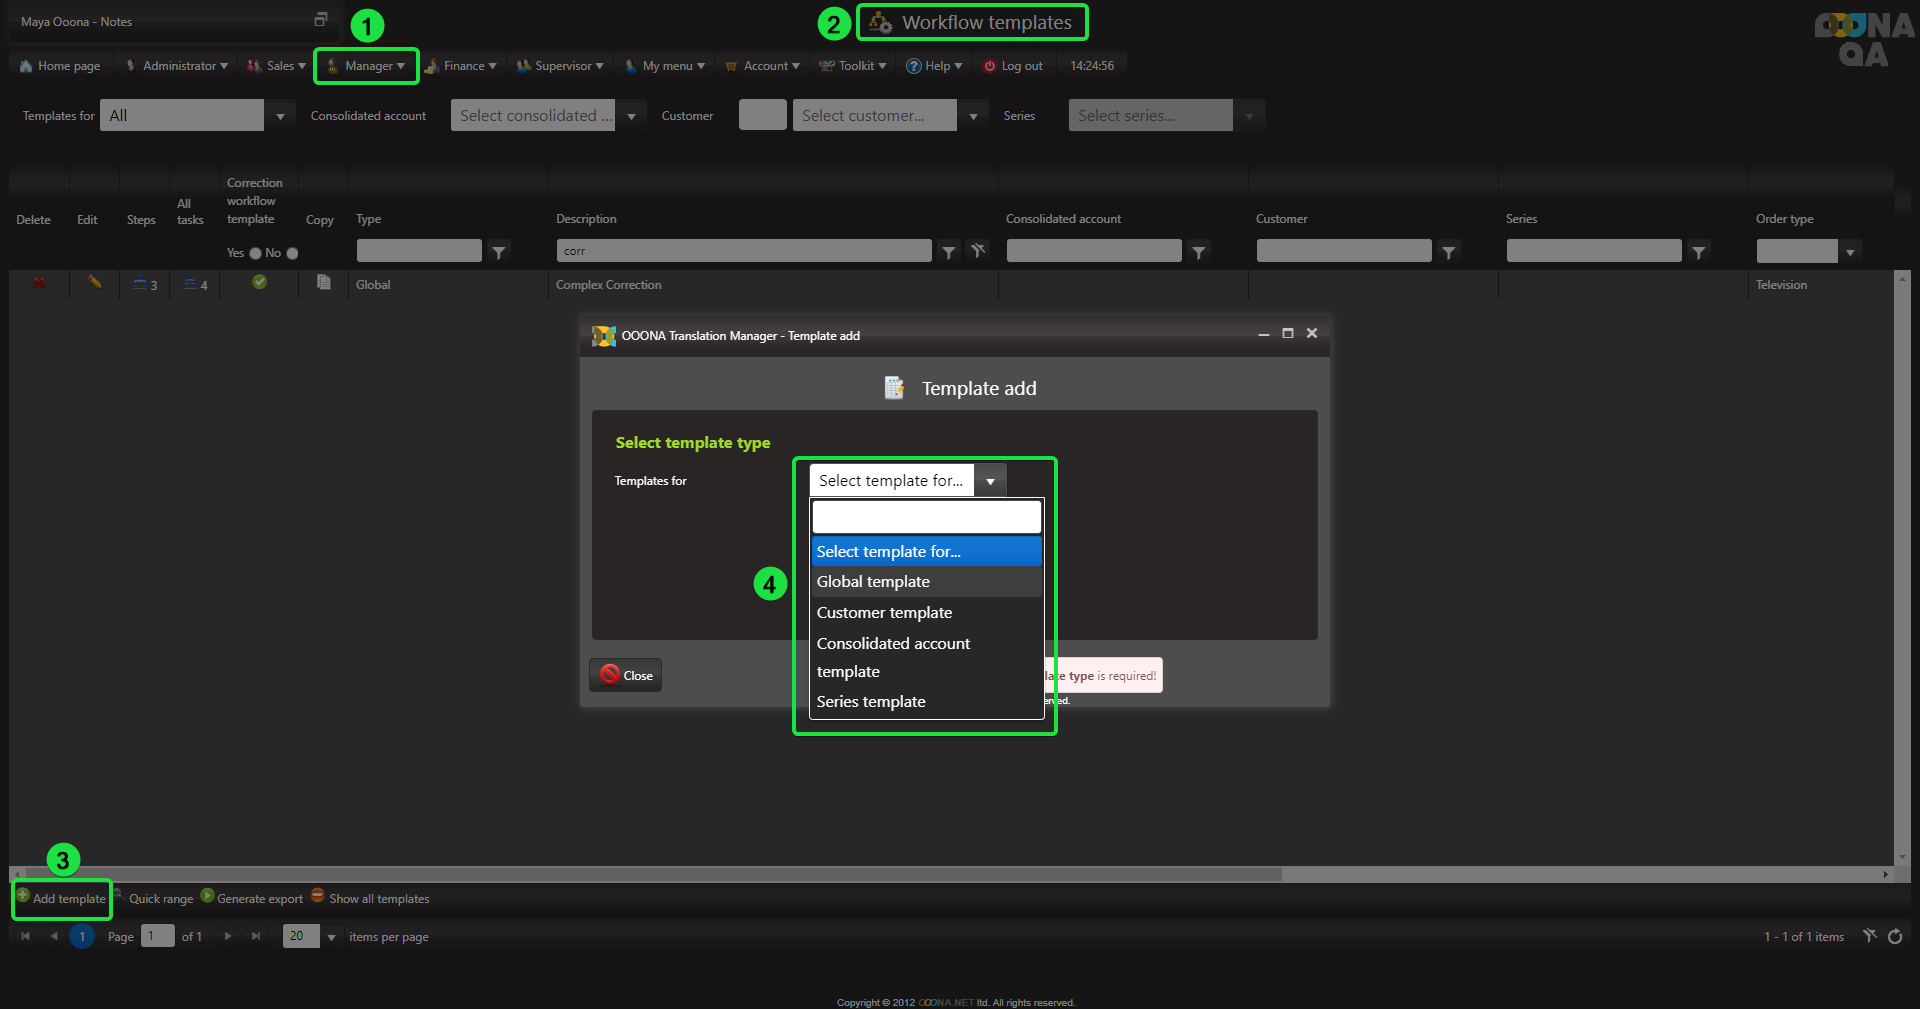
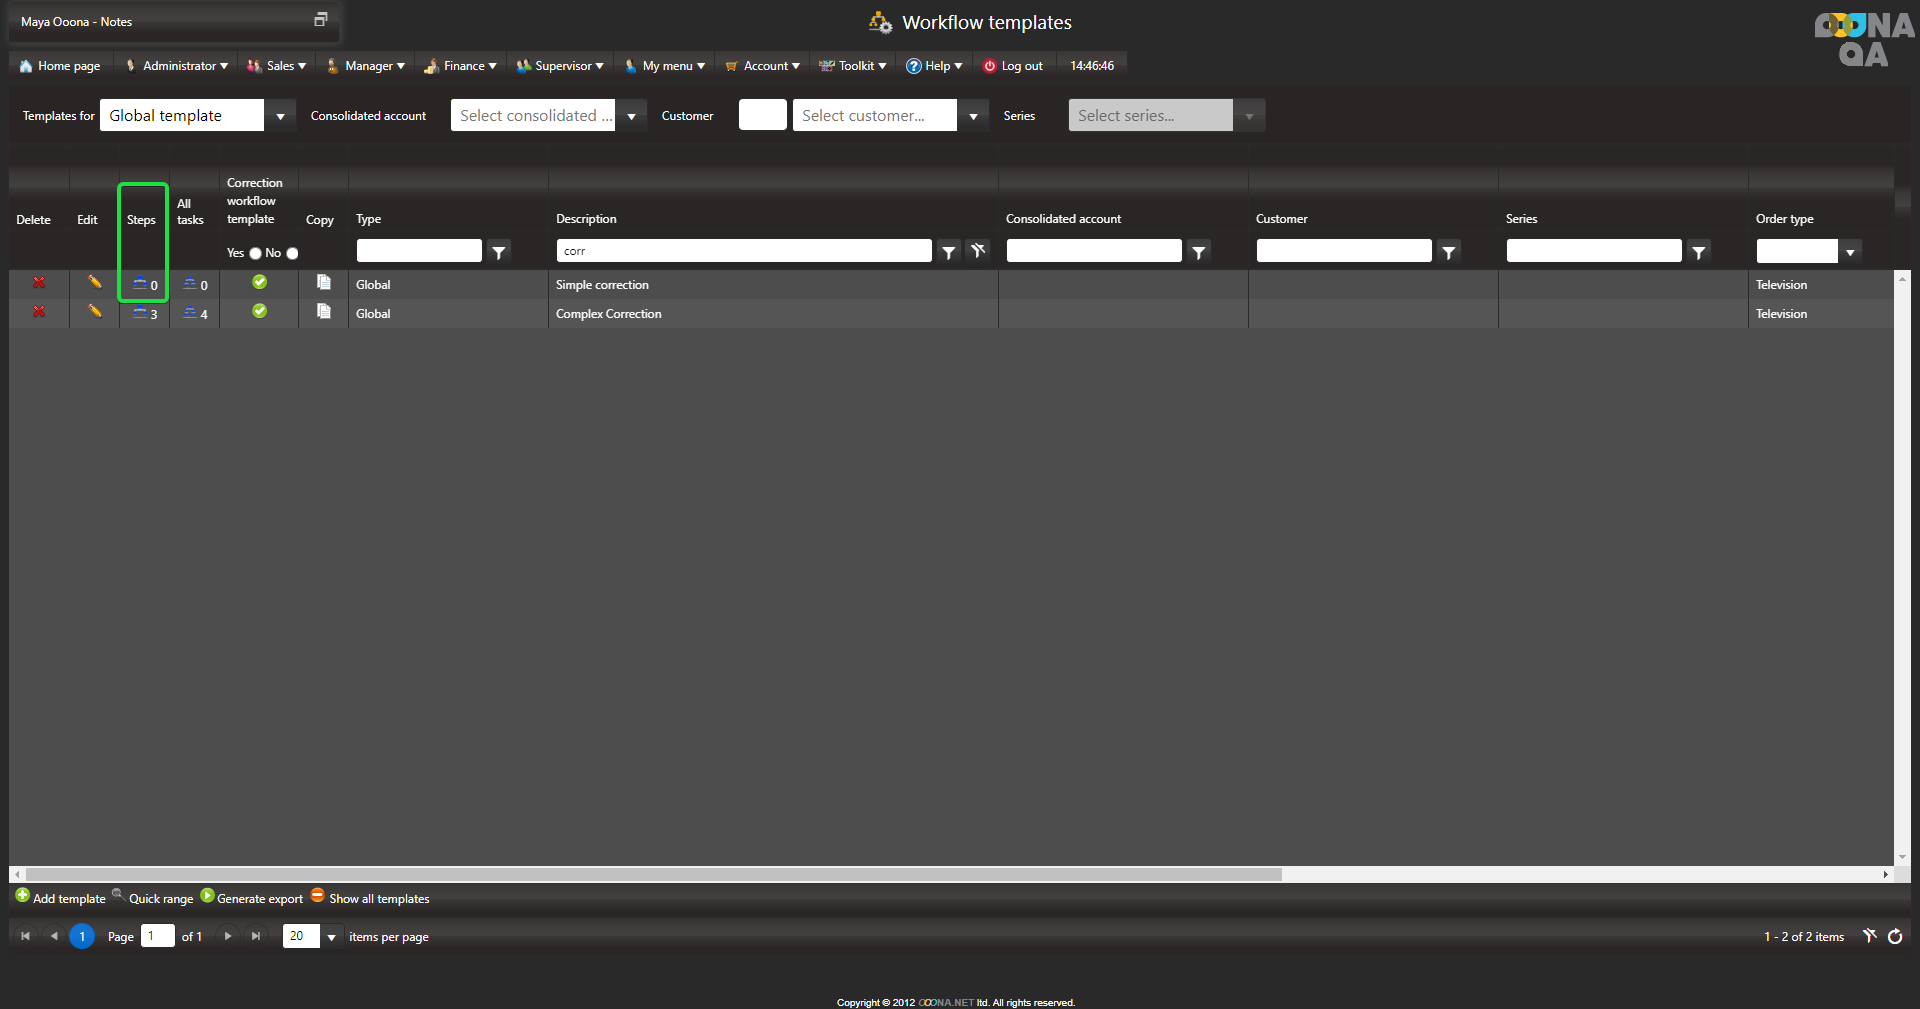
To create Correction workflow templates, navigate to: Manager > Pricelists and Workflow templates > Workflow templates.
Click “Add template” (fig 3).
Select the Template type: Specific to a certain Consolidated account/Customer/Series or Global that can be used for all Customers (fig 4).
If you’re unsure which Workflow type to select, prefer Global. It would be the least limiting option
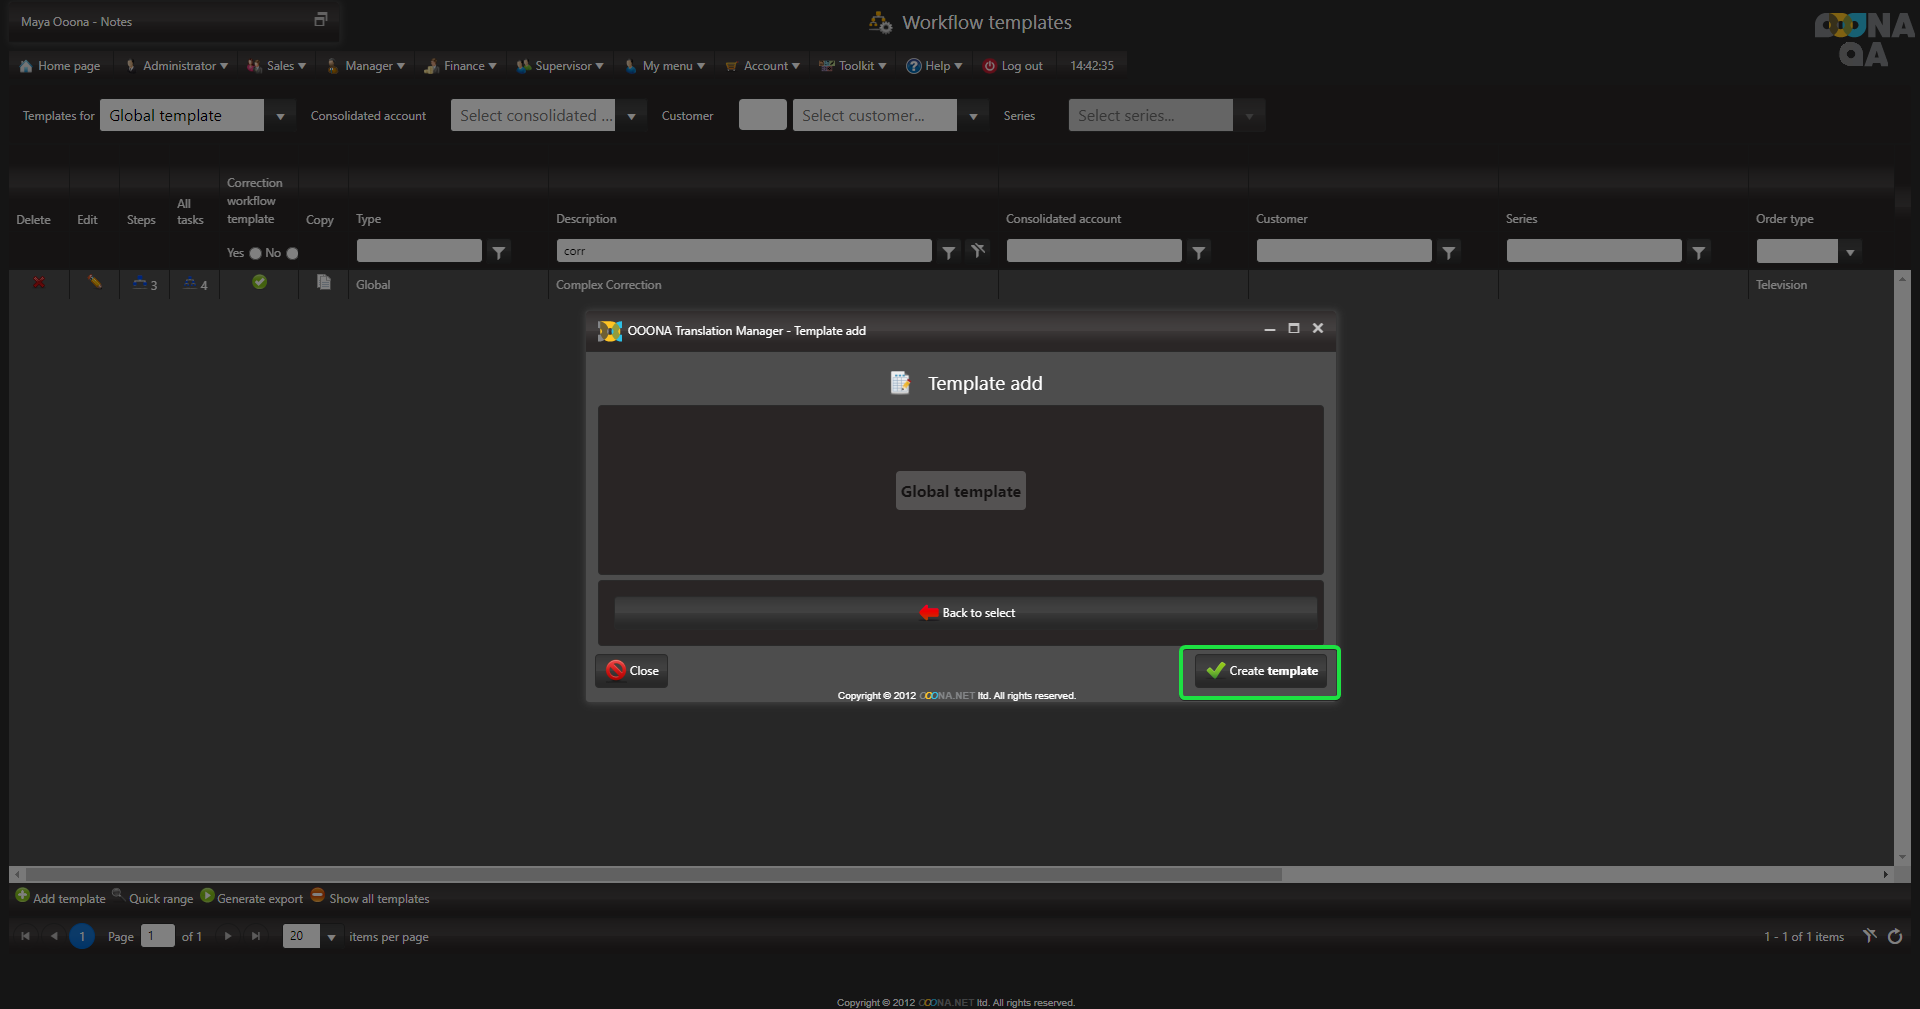
Click “Create template” to continue:
Click the Green ✓ to save:
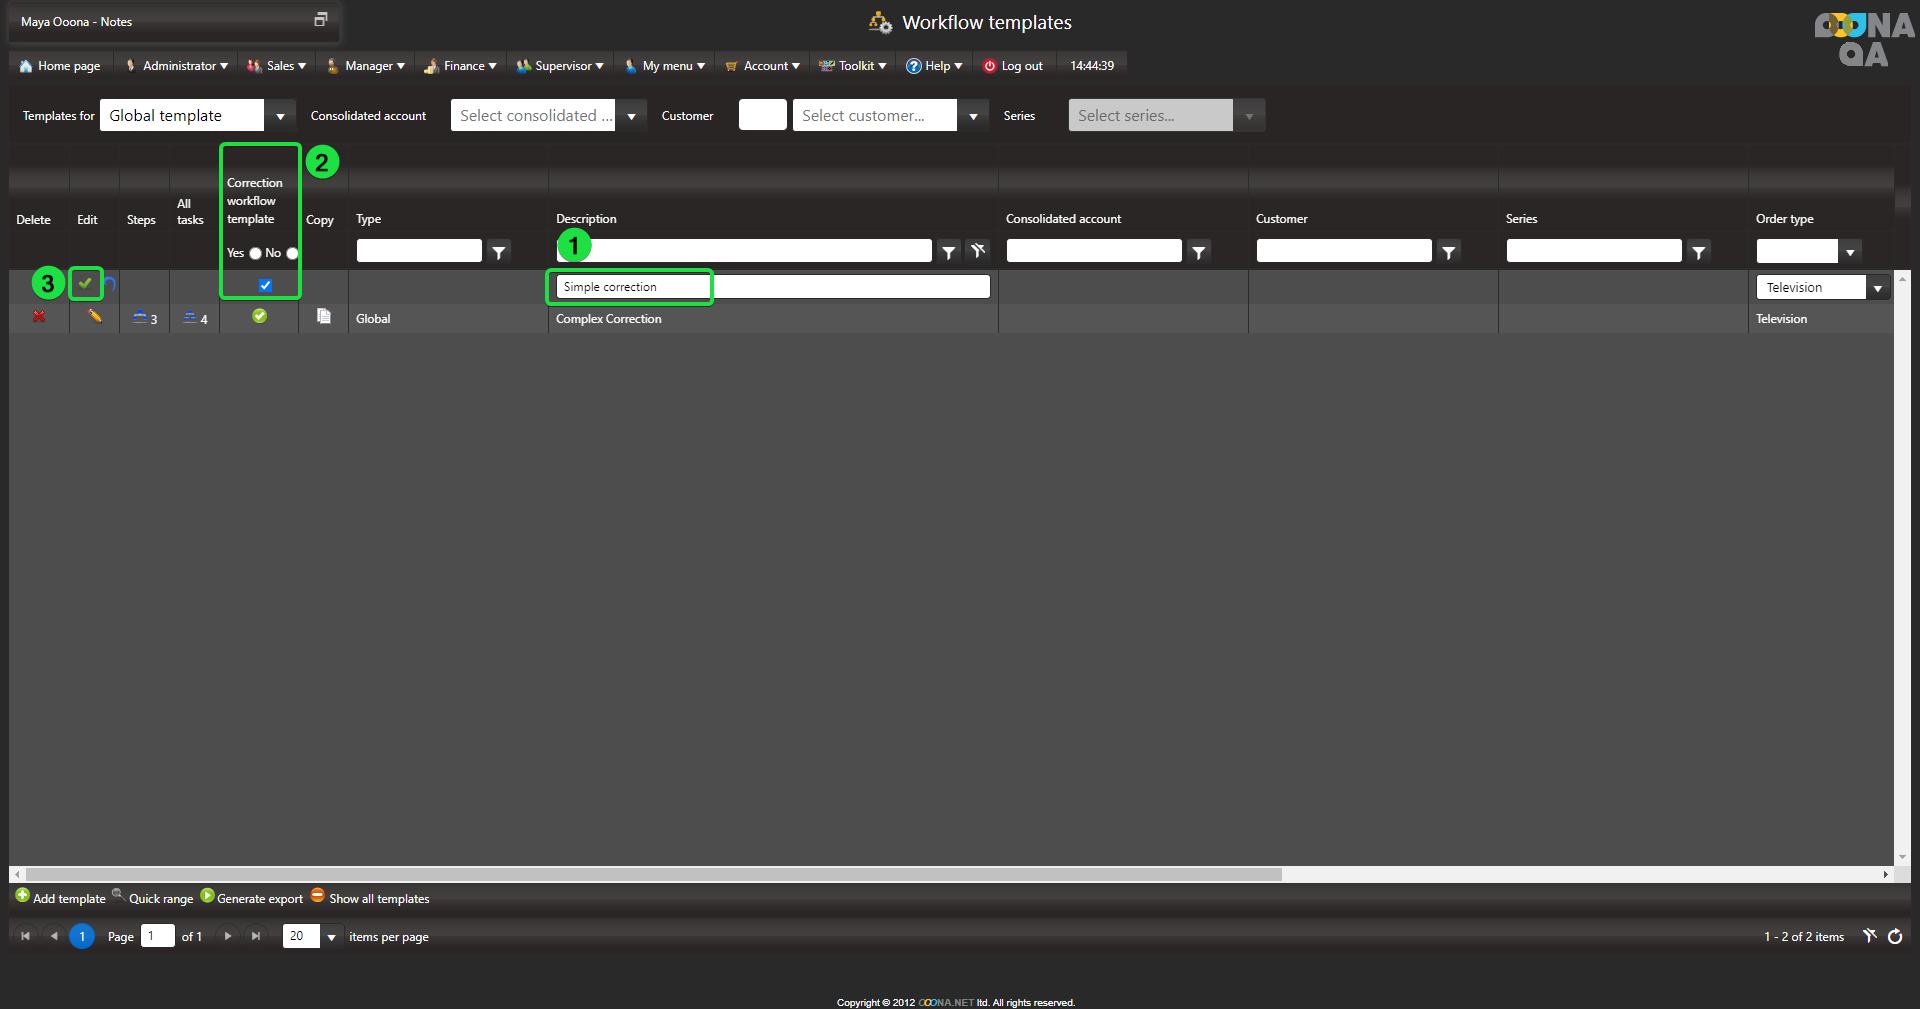
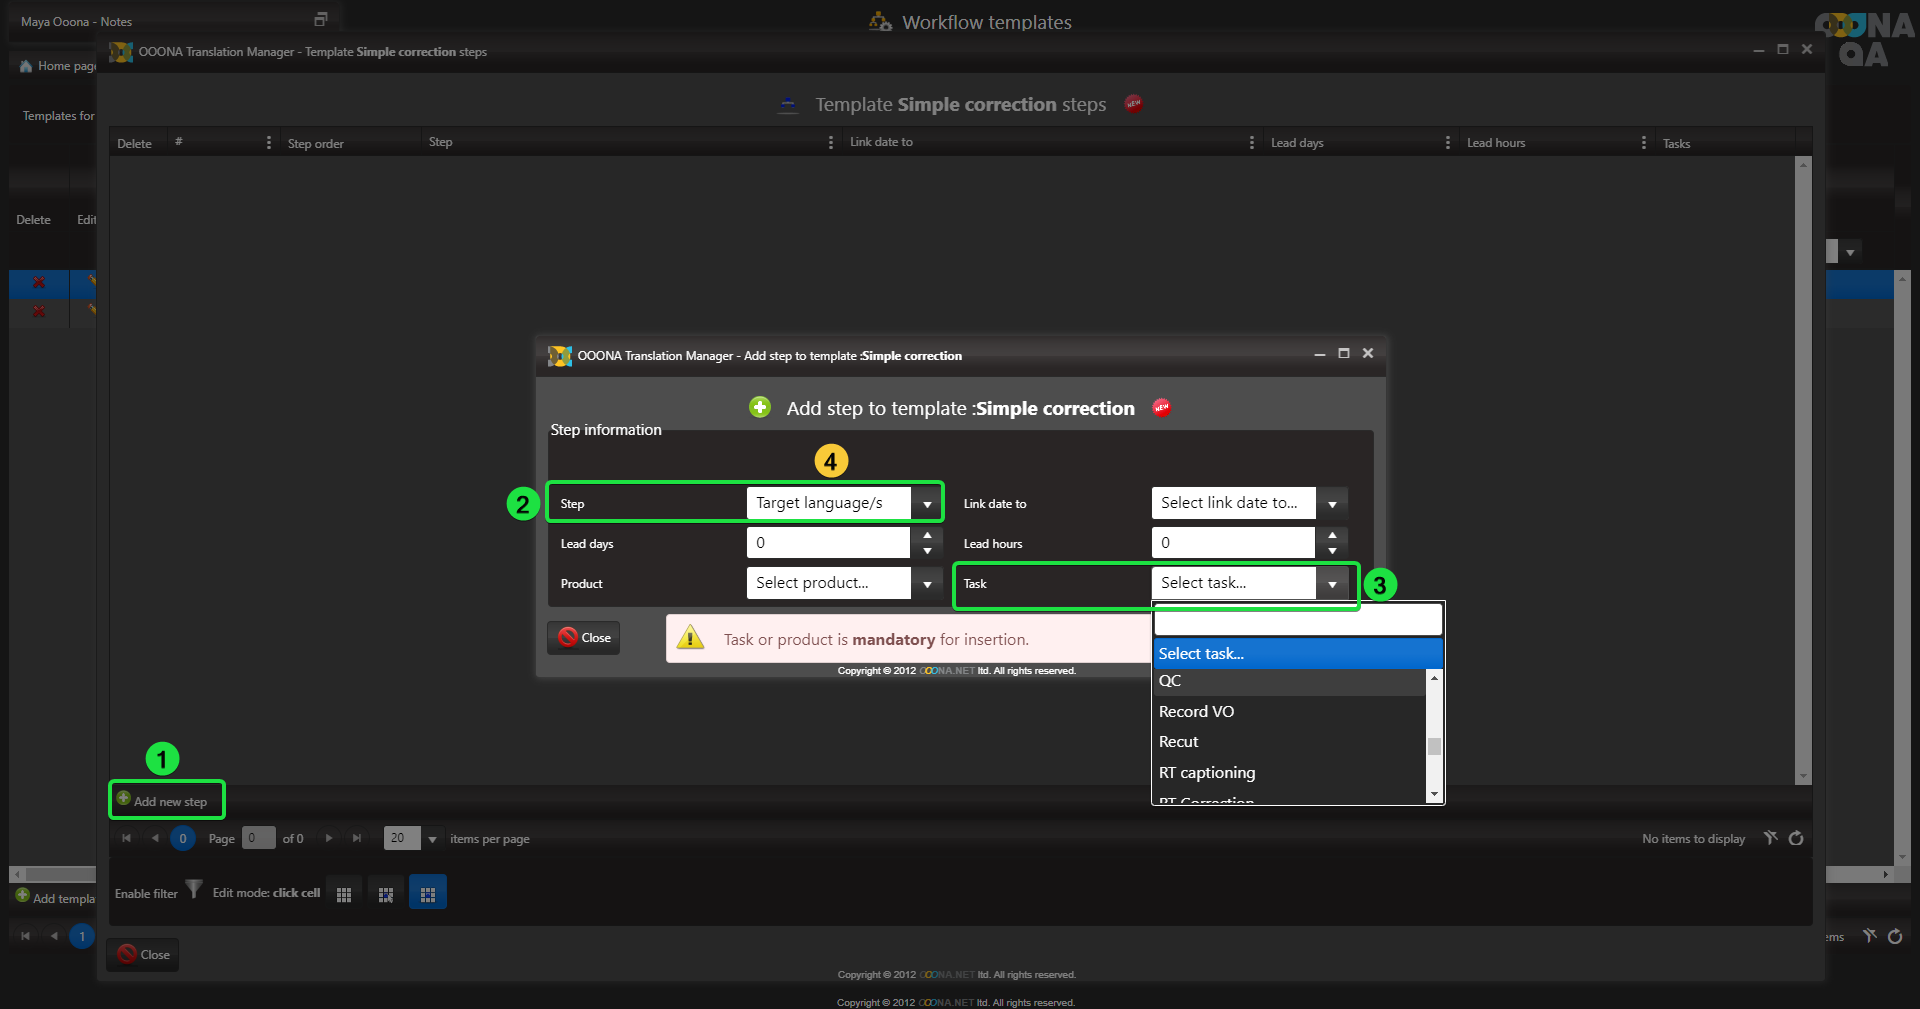
Select the required step (fig 2).
Select the required task to add to the selected step (fig 3).
When selecting a specific target language, the Correction workflow template can only be used to create correction orders for the selected target language.
Make sure to select the flexible step “Target languages/s” to enable using the Correction workflow template for any target language (fig 4).
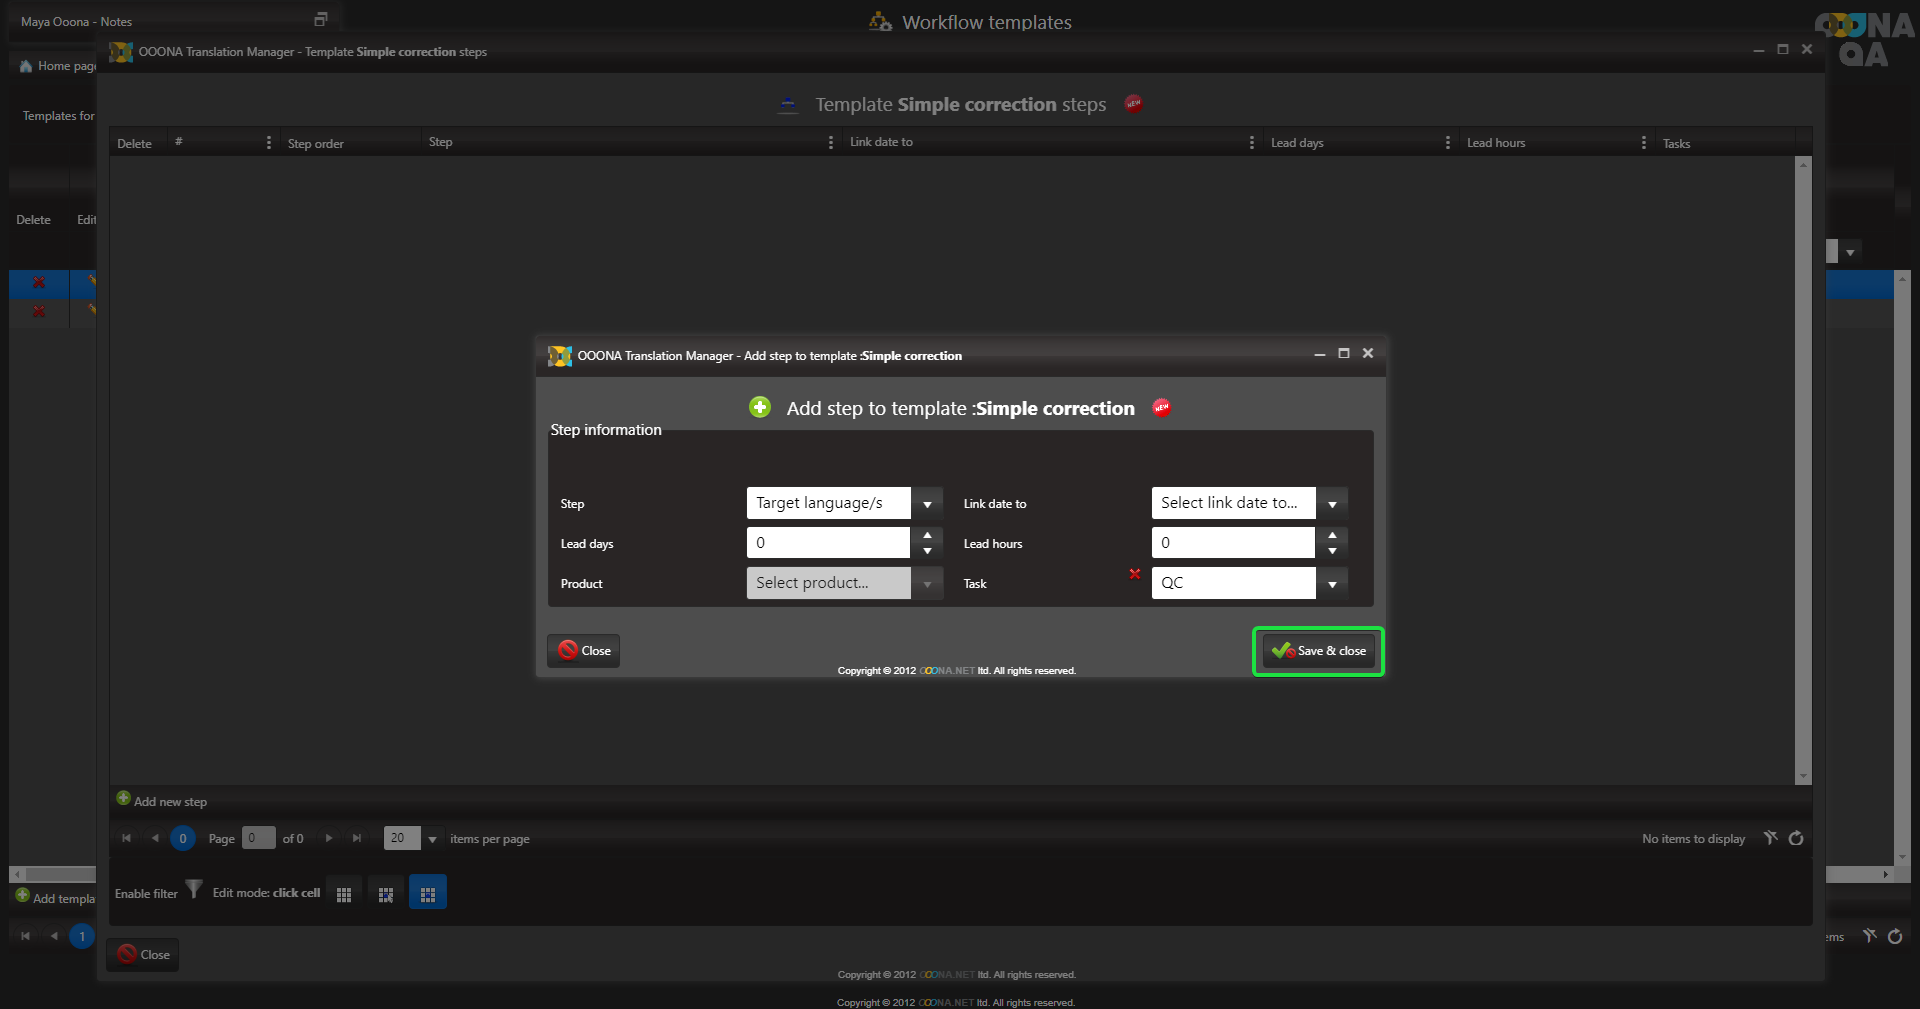
Click “Save and close” to add the selected Step and task.
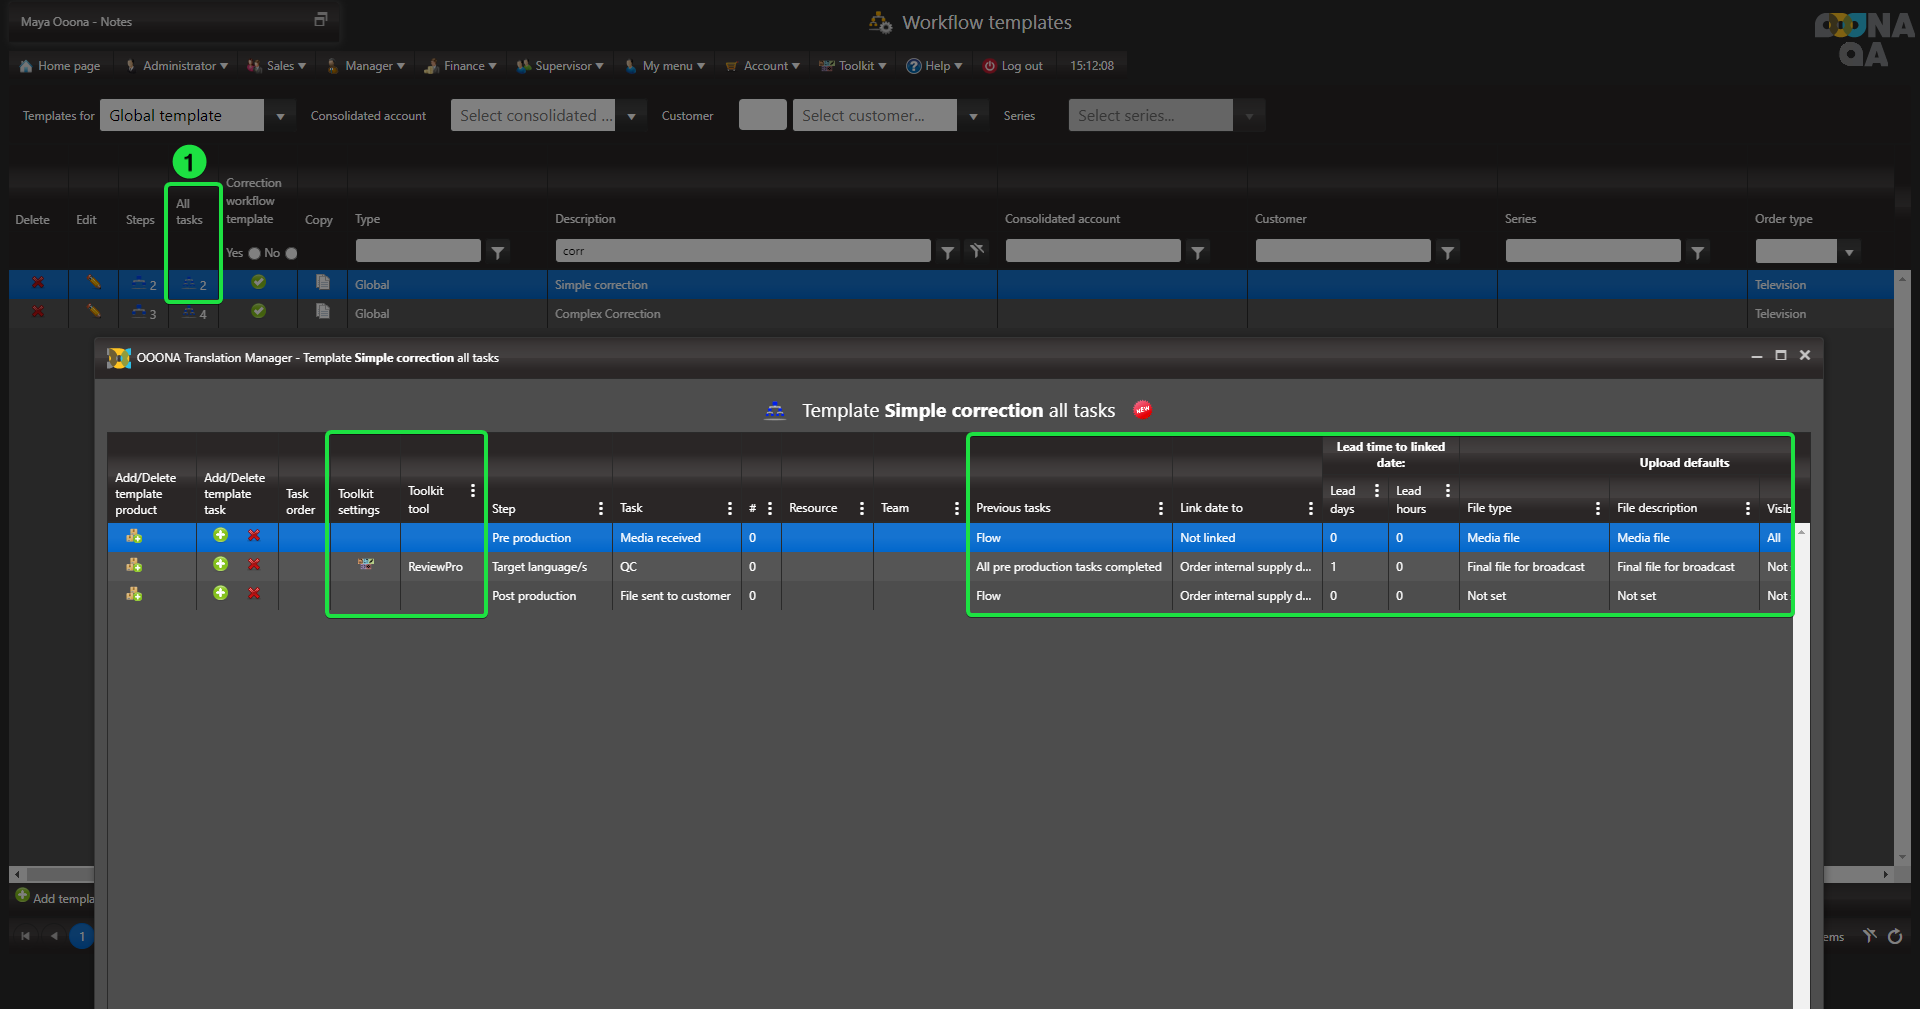
Repeat the process to add additional tasks, if necessary.
-
Toolkit tool and setting (in integrated systems)
-
Link date to and lead days
-
Previous task
-
Upload defaults, if necessary (File type and description)
-
Default assignments
-
And more
In the “Orders” page, click the “Correct” button (fig 4) of the order that requires the correction:
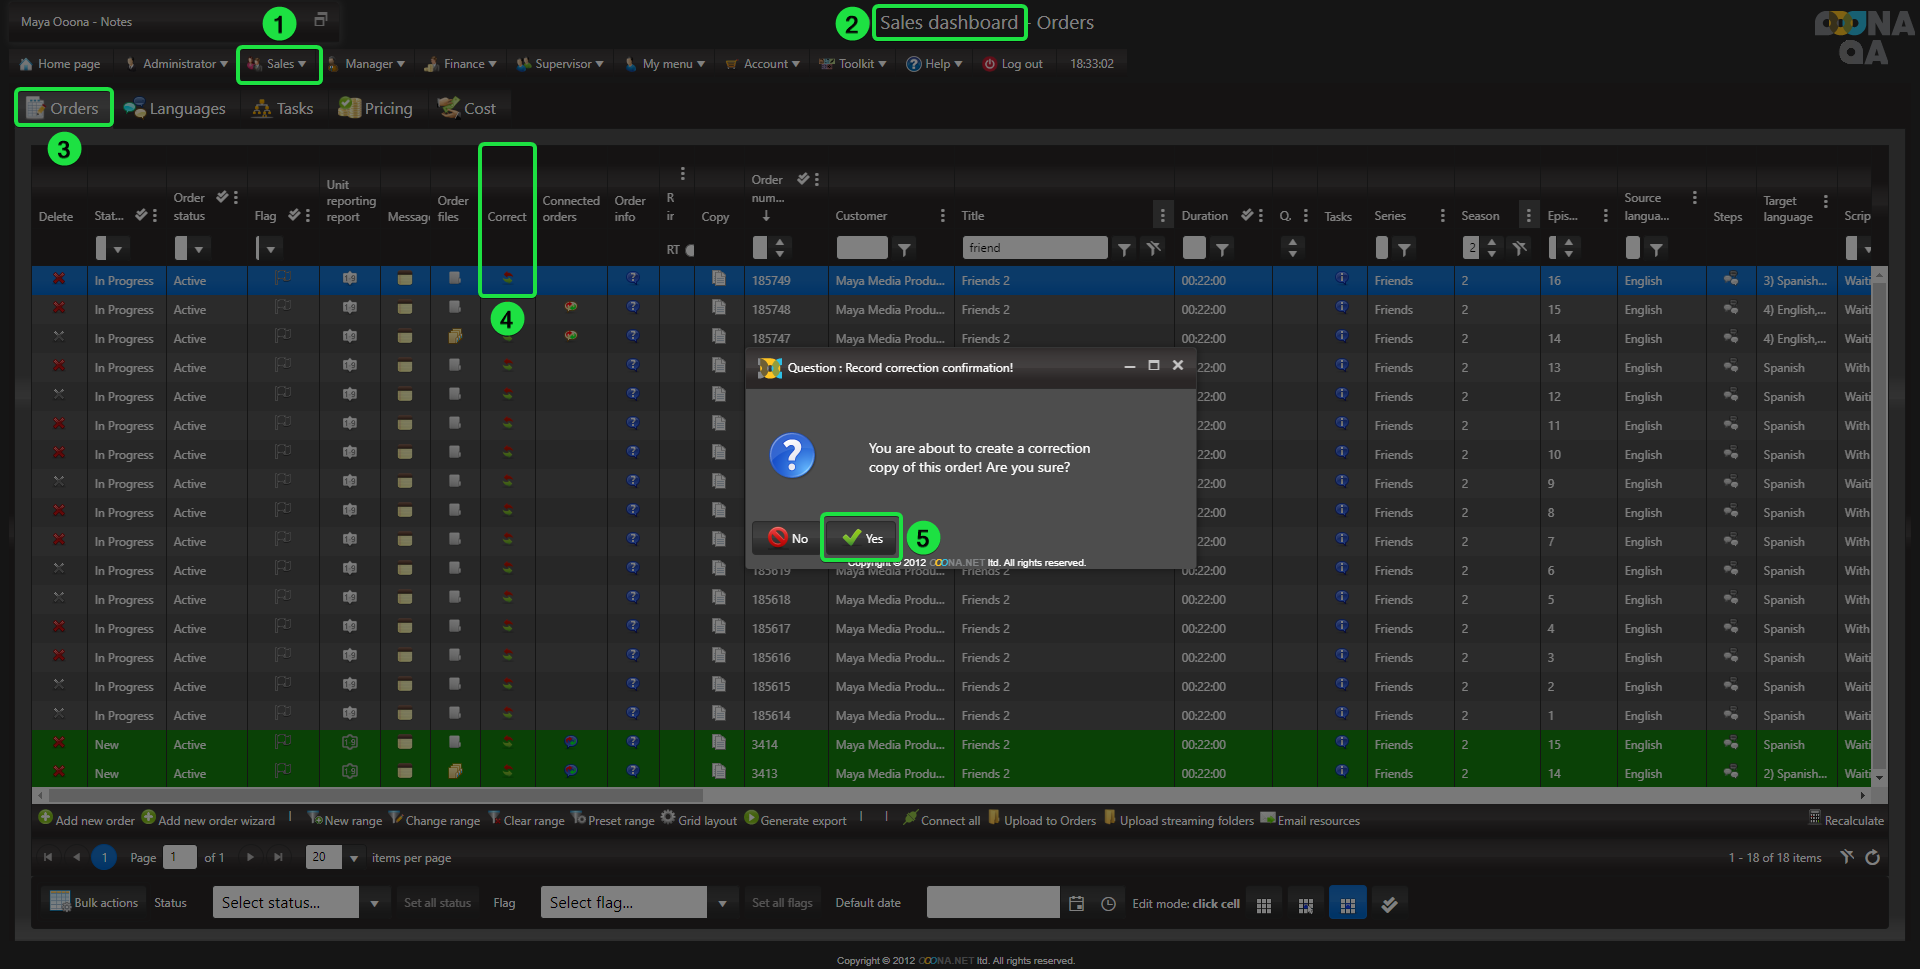
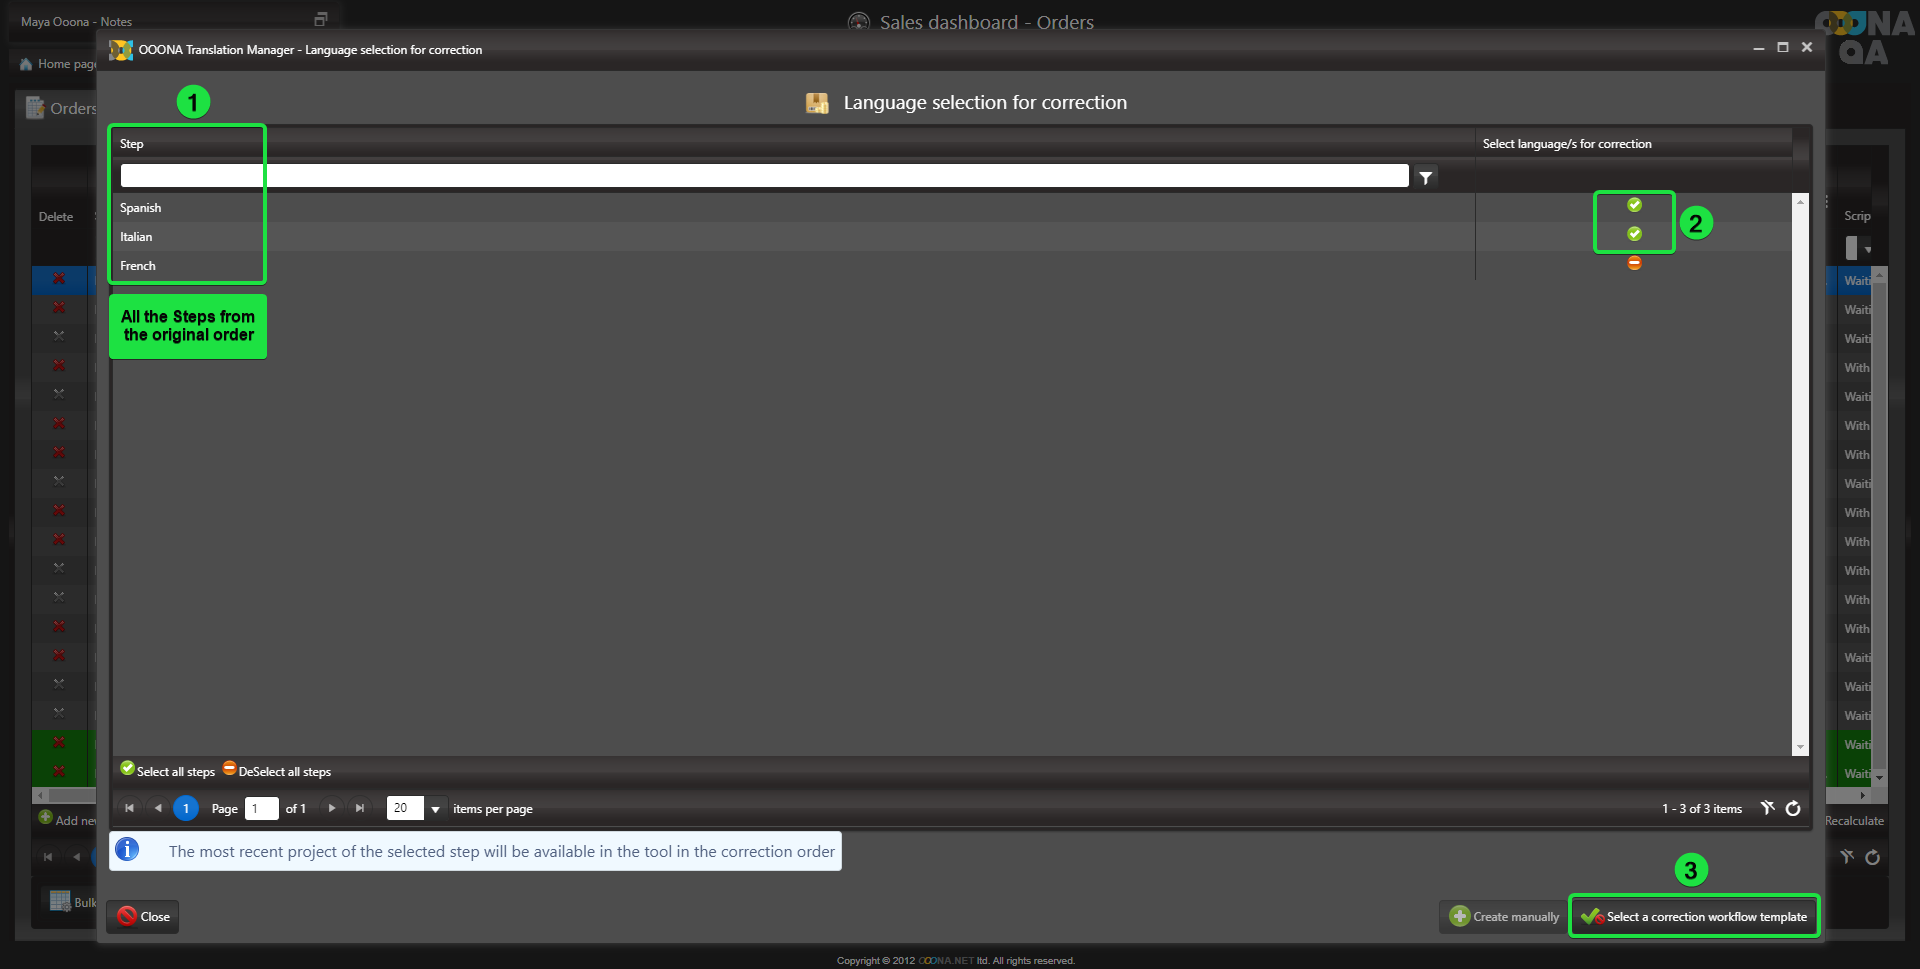
Select the Steps required for correction by clicking their orange selection button (fig 2).
In the following example, the Spanish and Italian steps are required for correction.
Once selected, click “Select a correction workflow template” (fig 3):
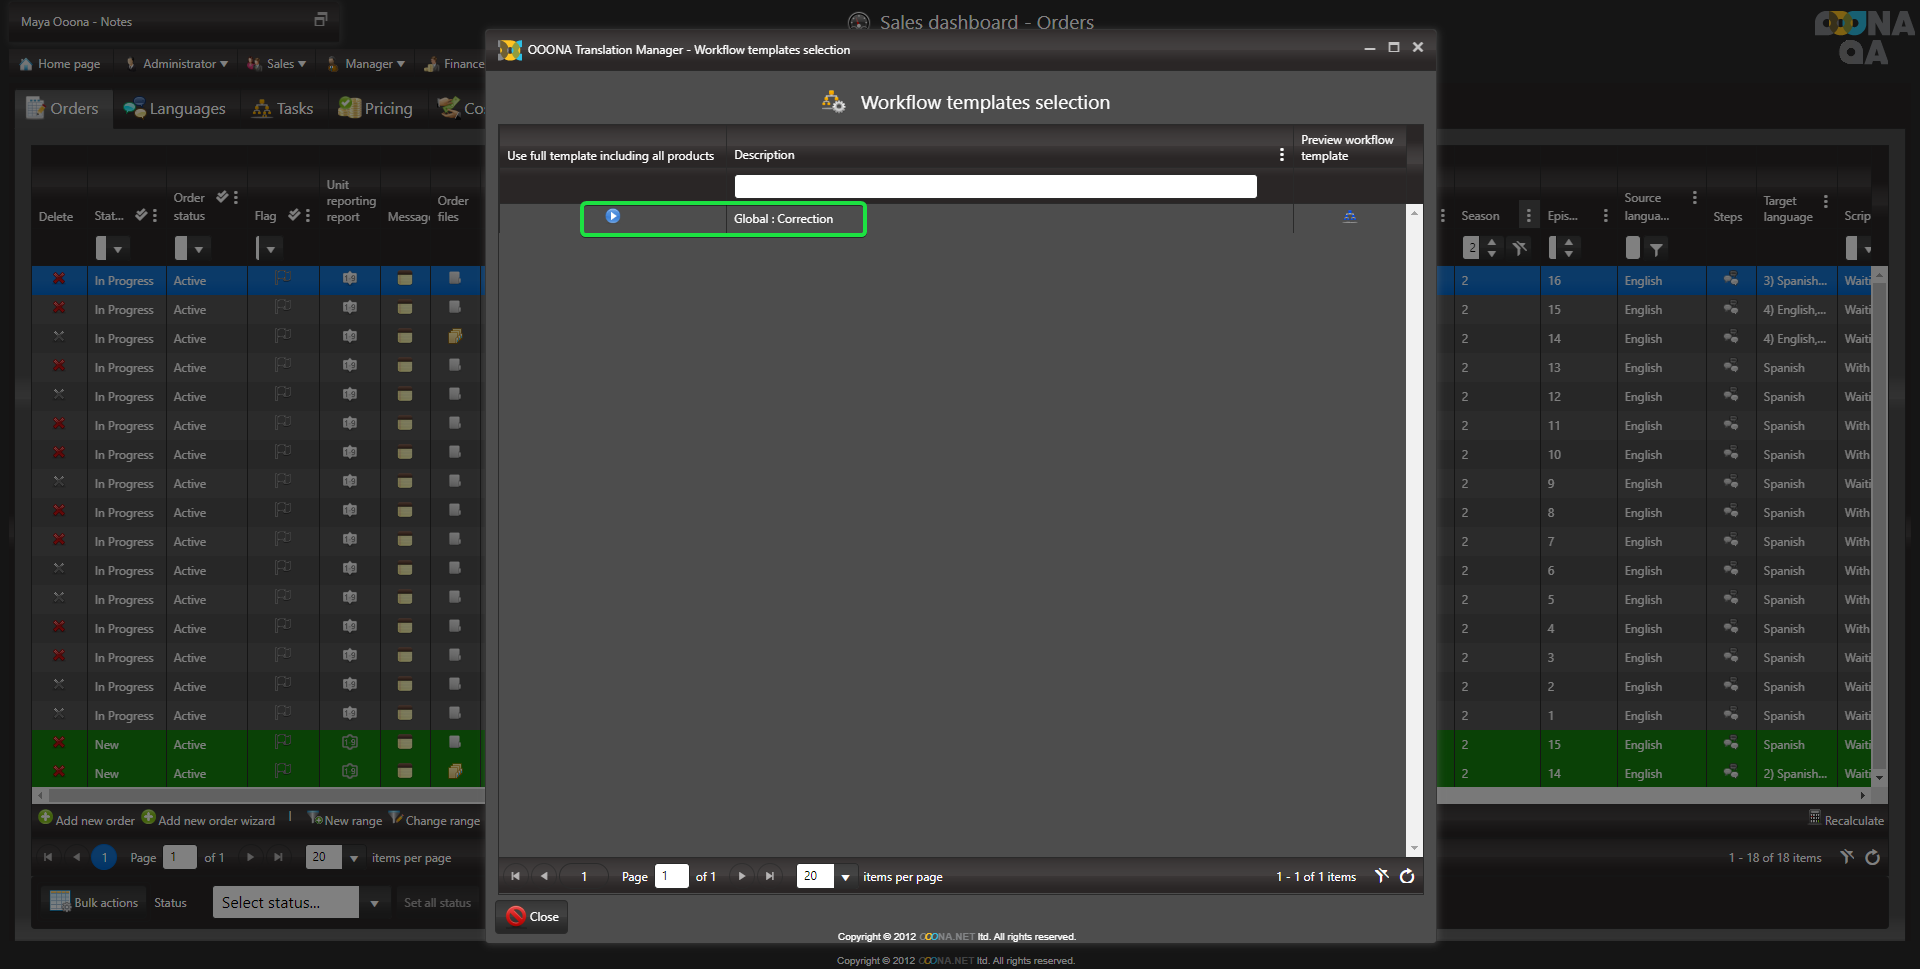
Select the required Correction workflow template by clicking the blue selection button:
Correction orders receive a four-digit order number.
To Manually create a correction order, click the Correction order button of the order requires correction (fig 4):

 Follow by clicking “Create manually” (fig 1).
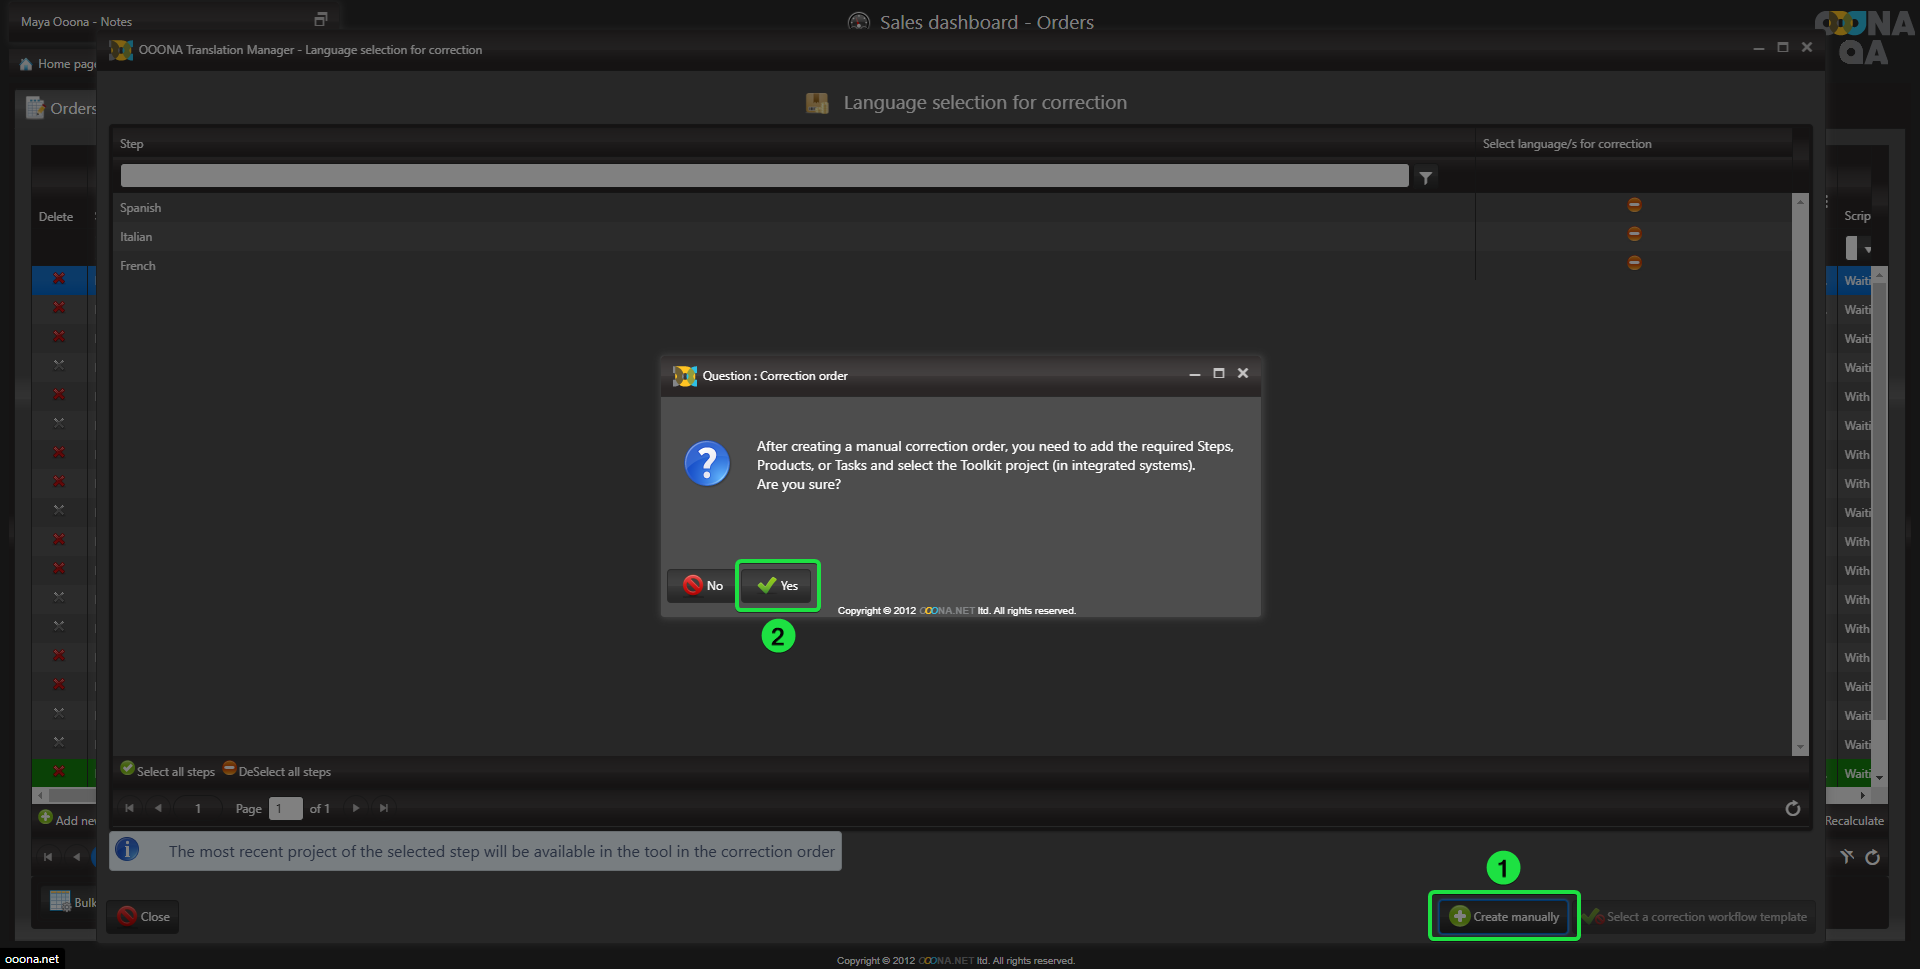
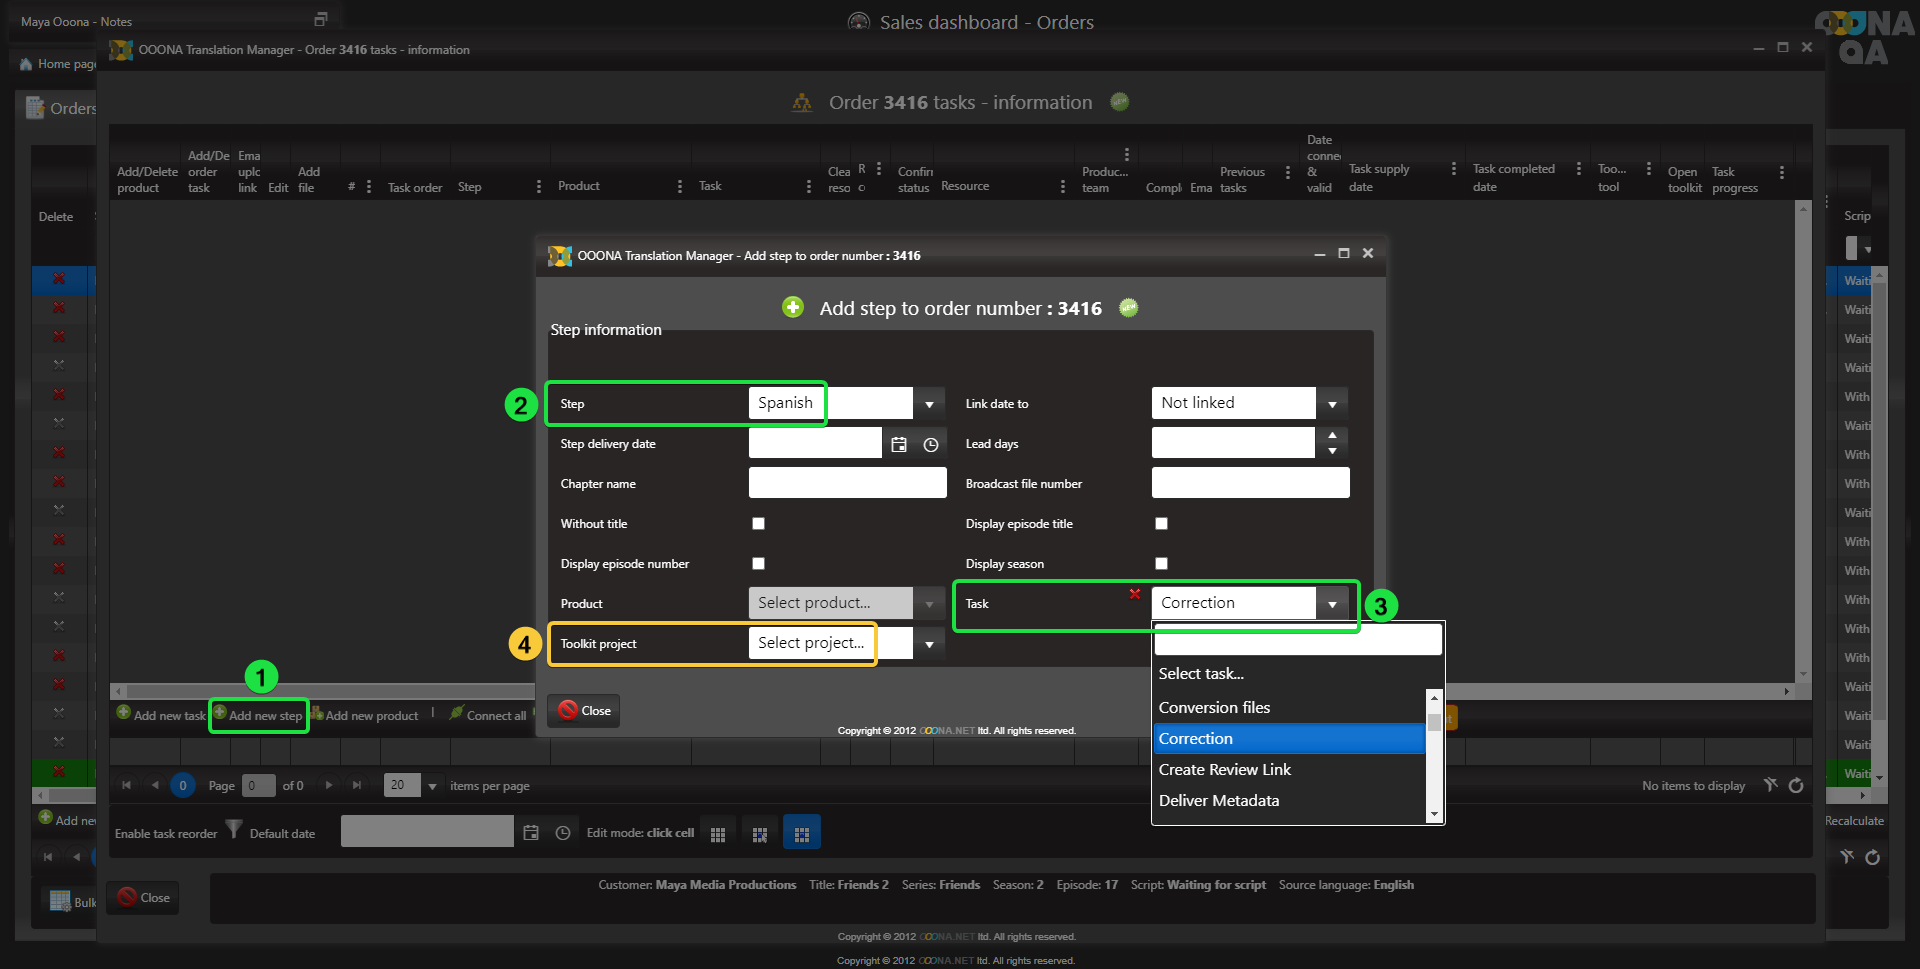
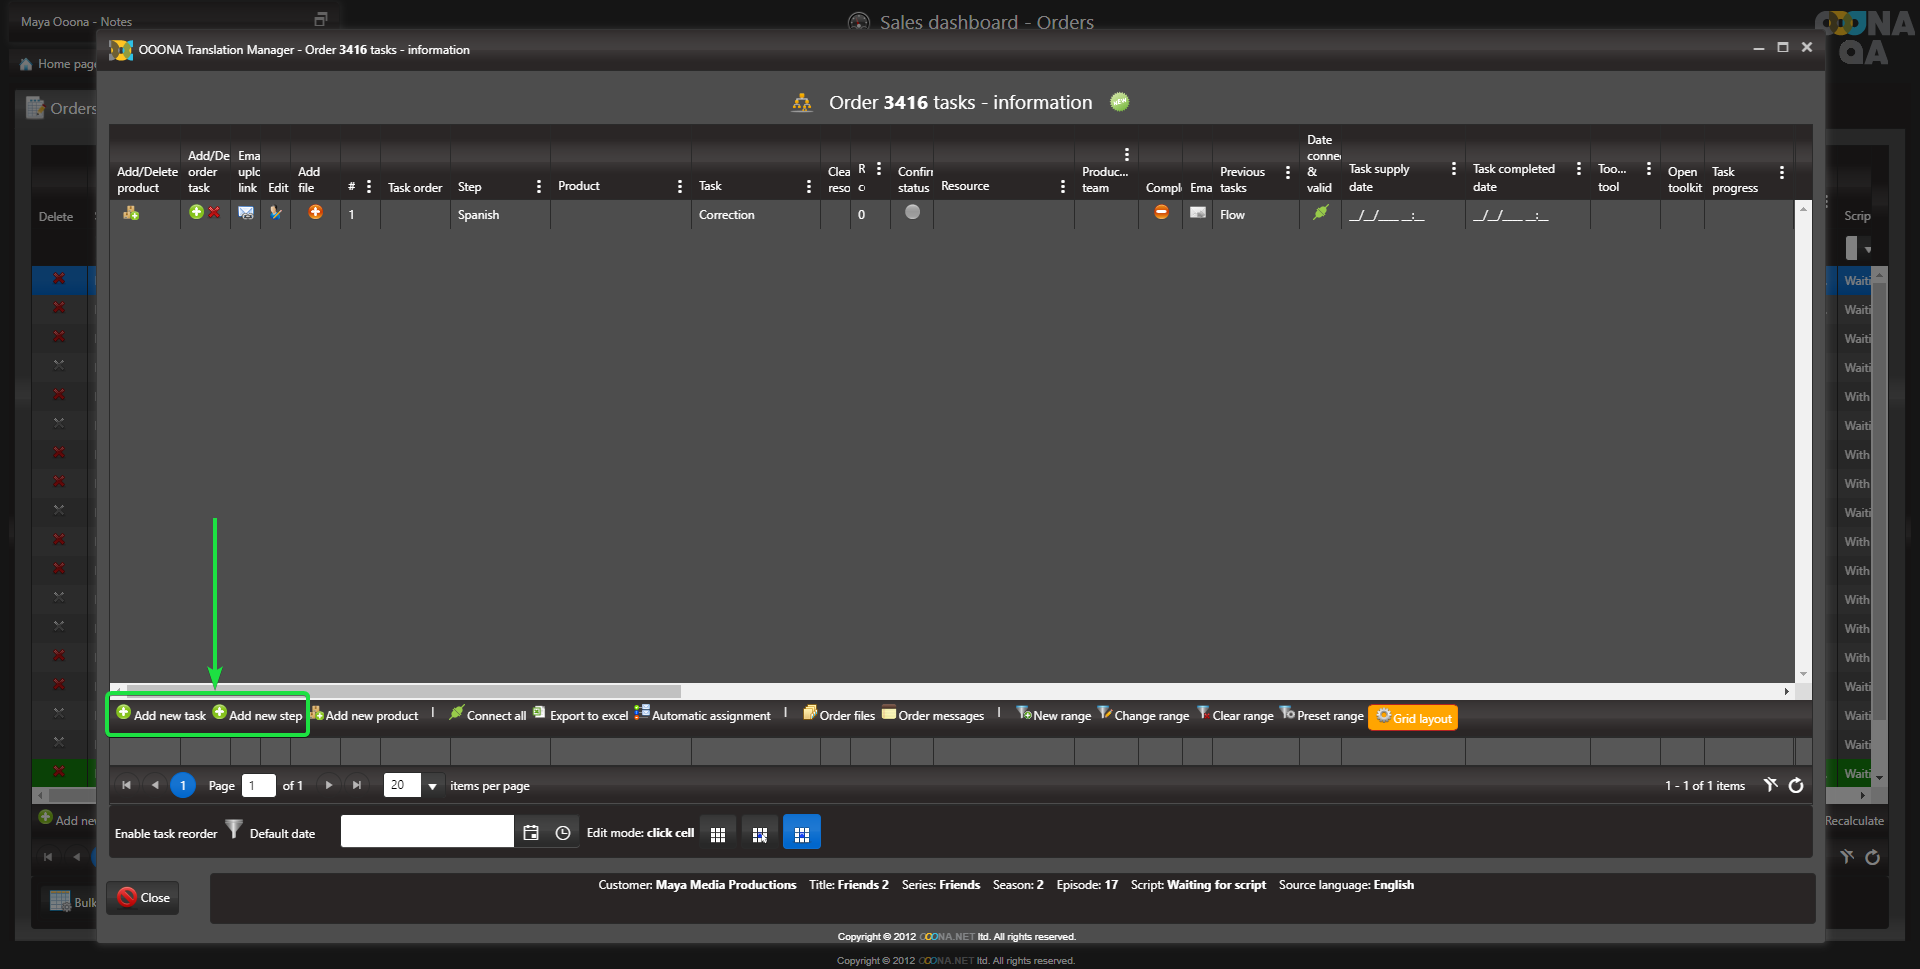
Start by adding the step/s that require correction.
Click “Add new step” (fig 1).
Select the Step required for correction (fig 2).
Select a Task to add to the selected step (fig 3).
In integrated systems, you can also select the Toolkit project that requires correction. This project will be available for correction in the correction order (fig 4):
Correction orders' pricing
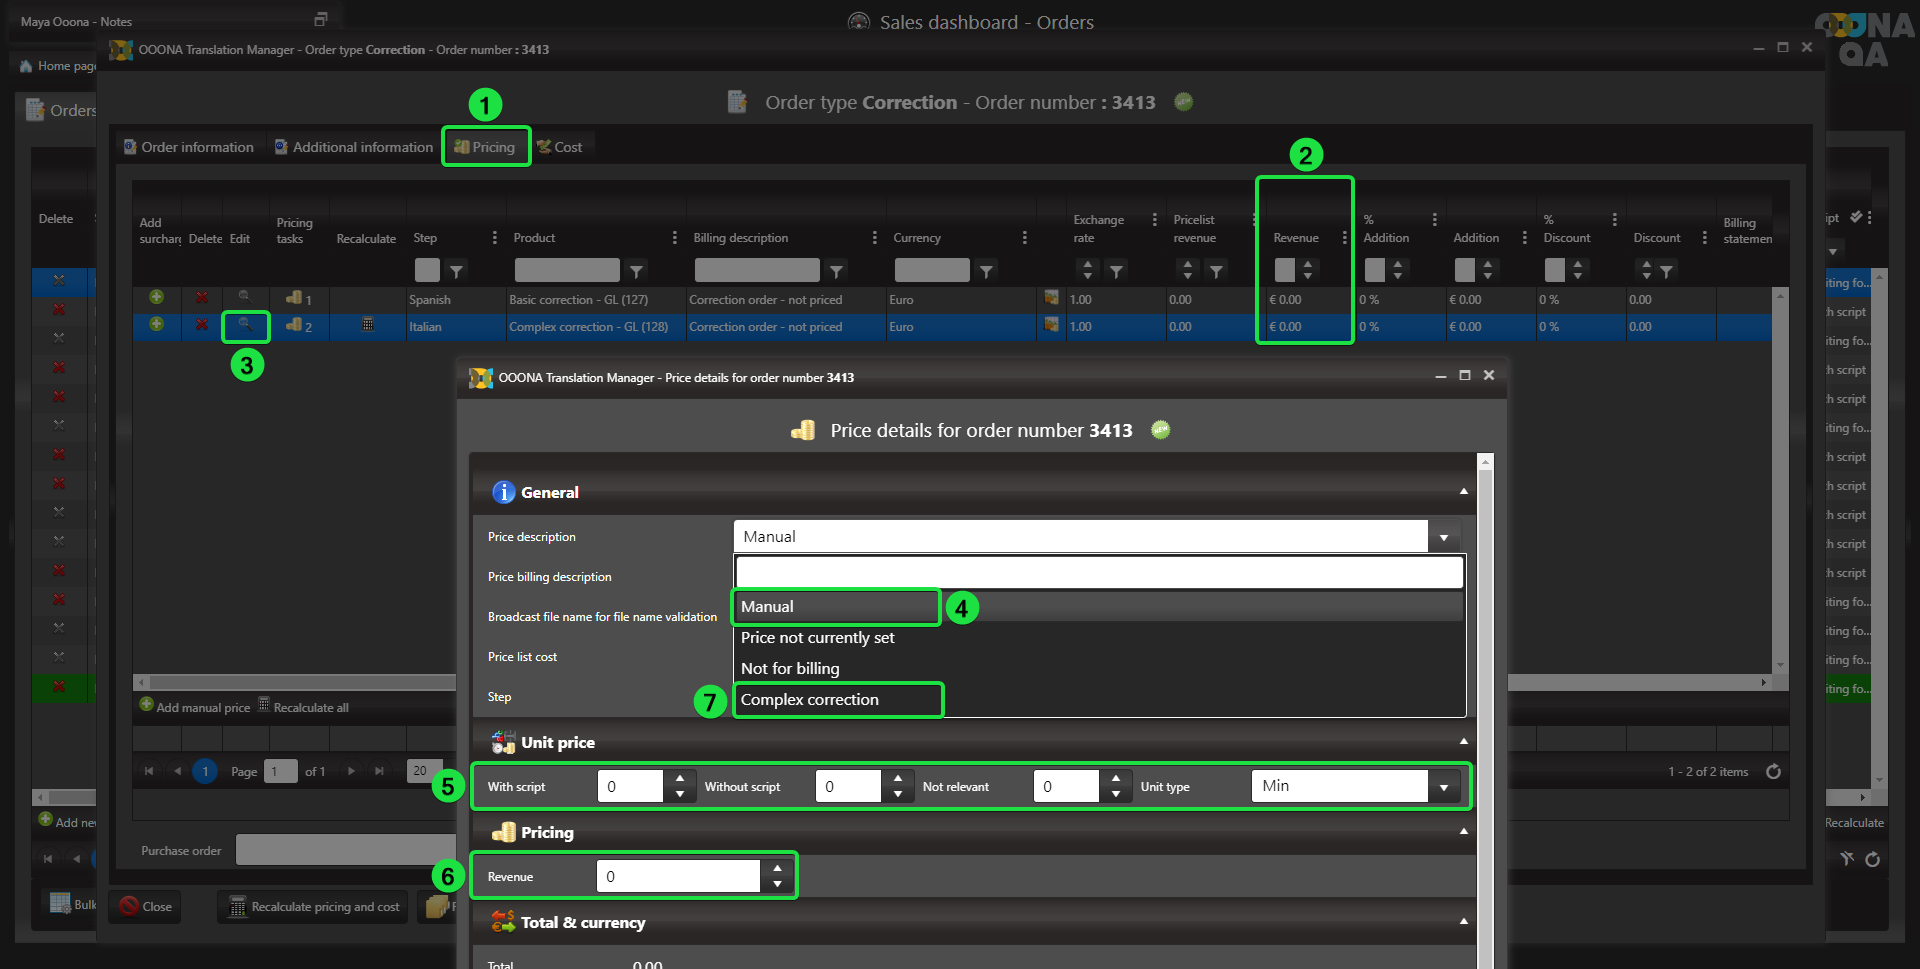
Correction orders are created not priced by default (fig 2) but Manual and Preset customer prices can be applied, if necessary.
To apply a Manual or Preset customer price, click the magnifying glass of the required product (fig 3).
To add a Manual price, Select “Manual” (fig 4) and enter the per minute (fig 5) or fixed price (fig 6).
To add a Preset price, if available, select it from the list (fig 7):
Once clicked, the Correction order’s order info page will open to provide easy access to the correction order:

