Sections in this article:
Setting up resources skills to be able to assign them to tasks
Overview
Resources can be assigned to tasks according to their skills:
-
Task
-
Source and target languages
-
Order type
Setting up resources skills to be able to assign them to tasks
To be able to assign a resource to tasks, make sure all the following attributes are correctly set:
-
Set the resources skills for task assignment. This will determine to which tasks this resource can be assigned.
From: Manager > Rolodex tables > Resources > Magnifying glass > Skills for task assignment:
-
Languages or Language pairs (source and target) the resource can be assigned to (Fig 1)
-
Task types the resource can be assigned to (Fig 2)
-
Order types the resource can be assigned to (Fig 3)
Once the resources skills are set, only relevant resources will be displayed in the resource pull-down menu when assigning resources to tasks.
Without setting these skills, the resource cannot be assigned to any task
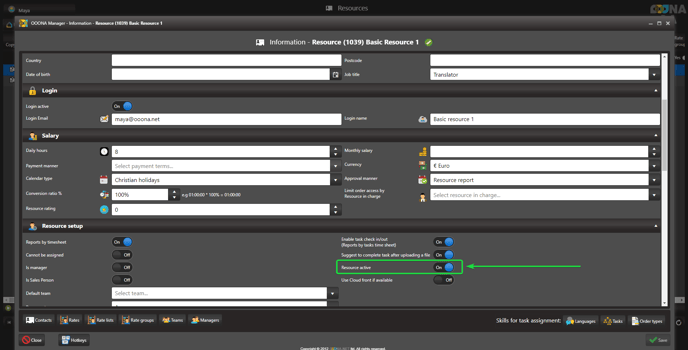
When this switch is on, the resource cannot be assigned to tasks, even if his resource skills are correctly set.
When this toggle is off, the resource cannot be assigned to tasks, even if his resource skills are correctly set.

Single order assignment
Quick in-line assigning
To assign a single order:
-
Navigate to the “Order tasks” page by clicking the blue exclamation icon on any page (fig 4).
-
Click the “Resource” field to open the pull-down menu and select the resource you want to assign.
The pull-down menu will only show resources that have the required skills.
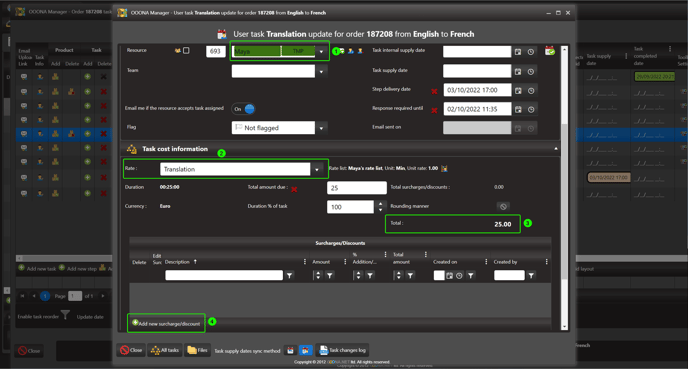
Assigning from the “Task Edit” page has some advantages over the quick in-line assigning. You can see and change the resource rate that was applied for the task, add surcharges and perform additional actions.
To assign a single order:
-
Navigate to the “Order tasks” page by clicking the blue exclamation icon on any page (fig 4).
- Click the “Task Edit” button (fig 5).
3. Click the “Resource” field to open the pull-down menu and select the resource you want to assign.
The pull-down menu will only show resources that have the required skills.

Multiple order assignment
Multiple orders are assigned form: Sales > Sales dashboard > Tasks page
Note: if you don’t have the “Sales” menu, you can also assign from: Supervisor > Resource allocation to task (this page contains slightly fewer options).
The “Tasks” page displays all the tasks within the orders range. Each line is one task (as opposed to the “Orders” page in which each line is one order).
In the “Tasks” page, click the “Change range” button (fig 4) and create a range to display the orders you want to assign. You can filter the range by any value you find suitable: order number, title, series, etc. (fig 5).
Reminder: the range is kept while navigating between the Sales dashboard pages: Orders, Languages, Tasks, Pricing, and Cost.
The red square (fig 1) will show the number of unassigned tasks in the order range. You can click it to only display unassigned tasks on your screen. Click it again to revert to the normal view.
If not all tasks from the order range are displayed in the “Tasks” tab, try clicking “All tasks” (fig 2) to show the missing tasks.
The advantage of assigning multiple orders from the “Tasks” page is that each line is one task from the range which makes it easy to quickly assign resources, one by one, to the different tasks.
You can use the 2 assigning methods mentioned above: Quick in-line assigning (fig 1) or Assigning from the “Task Edit” page (fig 2), in addition, there are three bulk assigning tools.
Bulk assigning tools
Assign all
This tool will assign the same resource to all the same tasks in the range, on the current page.
Same task meaning the same task type (i.e Translation, QC, etc..) and the same source and target language combination (i.e English to Spanish).
-
Use the In-line assign method to assign the resource to the required task (fig 1) (i.e English into Spanish Translation task).
-
Click “Assign all” (fig 2).
All same tasks on the current page will be assigned to the same resource. If you have more than one page, click “Assign all” once for every page, or expand the number of items per page. Make sure to revert to the default items per page to optimize the page’s performance.
Assign to same task
This tool will assign the same resource to all the same tasks in the order range (meaning all pages), and not only on the current page as the “Assign all” tool that was introduced in the previous example.
-
Set the range so only the required tasks are displayed on the screen.
-
Click the “Task Edit” (fig 1) button of the task you want to assign.
- Select the resource from the Resource pull-down menu (fig 2).
4. At the bottom of the “Task Edit” page, click “Assign to all same tasks in the range”
6. To replace the resource in assigned tasks with the new selected resource, set the “Also Replace the assignment of assigned same tasks” switch to on (fig 1).
7. Click “Assign” (fig 2).
8. Close the “Task Edit” page (fig 3.
9. Click “Refresh” on the tasks page to show the new assignments (fig 4).
Assign a resource to only some of the same tasks in the range
This tool enables you to assign all same tasks in the range to different resources.
Same task meaning the same task type (i.e Translation, QC, etc..) and the same source and target language combination (i.e English to Spanish).
-
To better understand the functionality, filter the “Task” column to only display the required task (fig 1).
-
In-line assign the first resource to the task (fig 2).
-
Once assigned, the “Assign same resource” column will be populated with buttons next to each same task (fig 3).
-
Click the “Assign same resource” buttons of the tasks you want to assign to this resource (fig 4-5)

-
Next, in-line assign the next task to the second resource and repeat the action as mentioned above.

-
Repeat the actions until all tasks are assigned.
Assign same resource to different types of tasks
-
Start by setting up a range to only see the tasks you want to assign on the Tasks tab of Sales dashboard. Set additional fields, if necessary.
2. Then, click “Task info”, of any of the tasks.
3. Select the resource and click “Assign all tasks in the range”.
4. Click “Assign” again.


